Over the years, I’ve developed a “sling box” that shares space with my “holster box”. Much like the holster box, it’s full of slings I’ve tried, and discarded, over the years. When the 1994 Assault Weapons Ban sunset in 2004, I obtained my first AR-15 and set out on the adventure of outfitting my first defensive rifle. As I purchased gear, I found slings were not as simple as a piece of nylon connected to the rifle.
I purchased what I assumed was the go-to at the time – a three-point sling. The design of a three-point sling, while stable, presented issues for me as a left-handed shooter. Effectively, the sling strap covered the ejection port and I risked, and experienced, malfunctions as a result. I transitioned to a single-point sling to alleviate this issue and ran with it for years – often to my discomfort. I found the rifle, due to only having a single point of contact with the sling, flopped around violently if not held onto by one hand. This led to uncomfortable results as the rifle was prone to smacking me in the groin occasionally if I was on the move with my hands full. Ultimately, I arrived at the solution that has served me well for nearly a decade – the two-point sling.
Two-point slings and their variants have become the dominant sling option for those who’ve developed an intimate relationship with their fighting rifle. Over the years, I was introduced to and integrated many tips and tricks for using a two-point sling that have served well in the role of providing a secure attachment of the rifle to the user.
Attachment Points
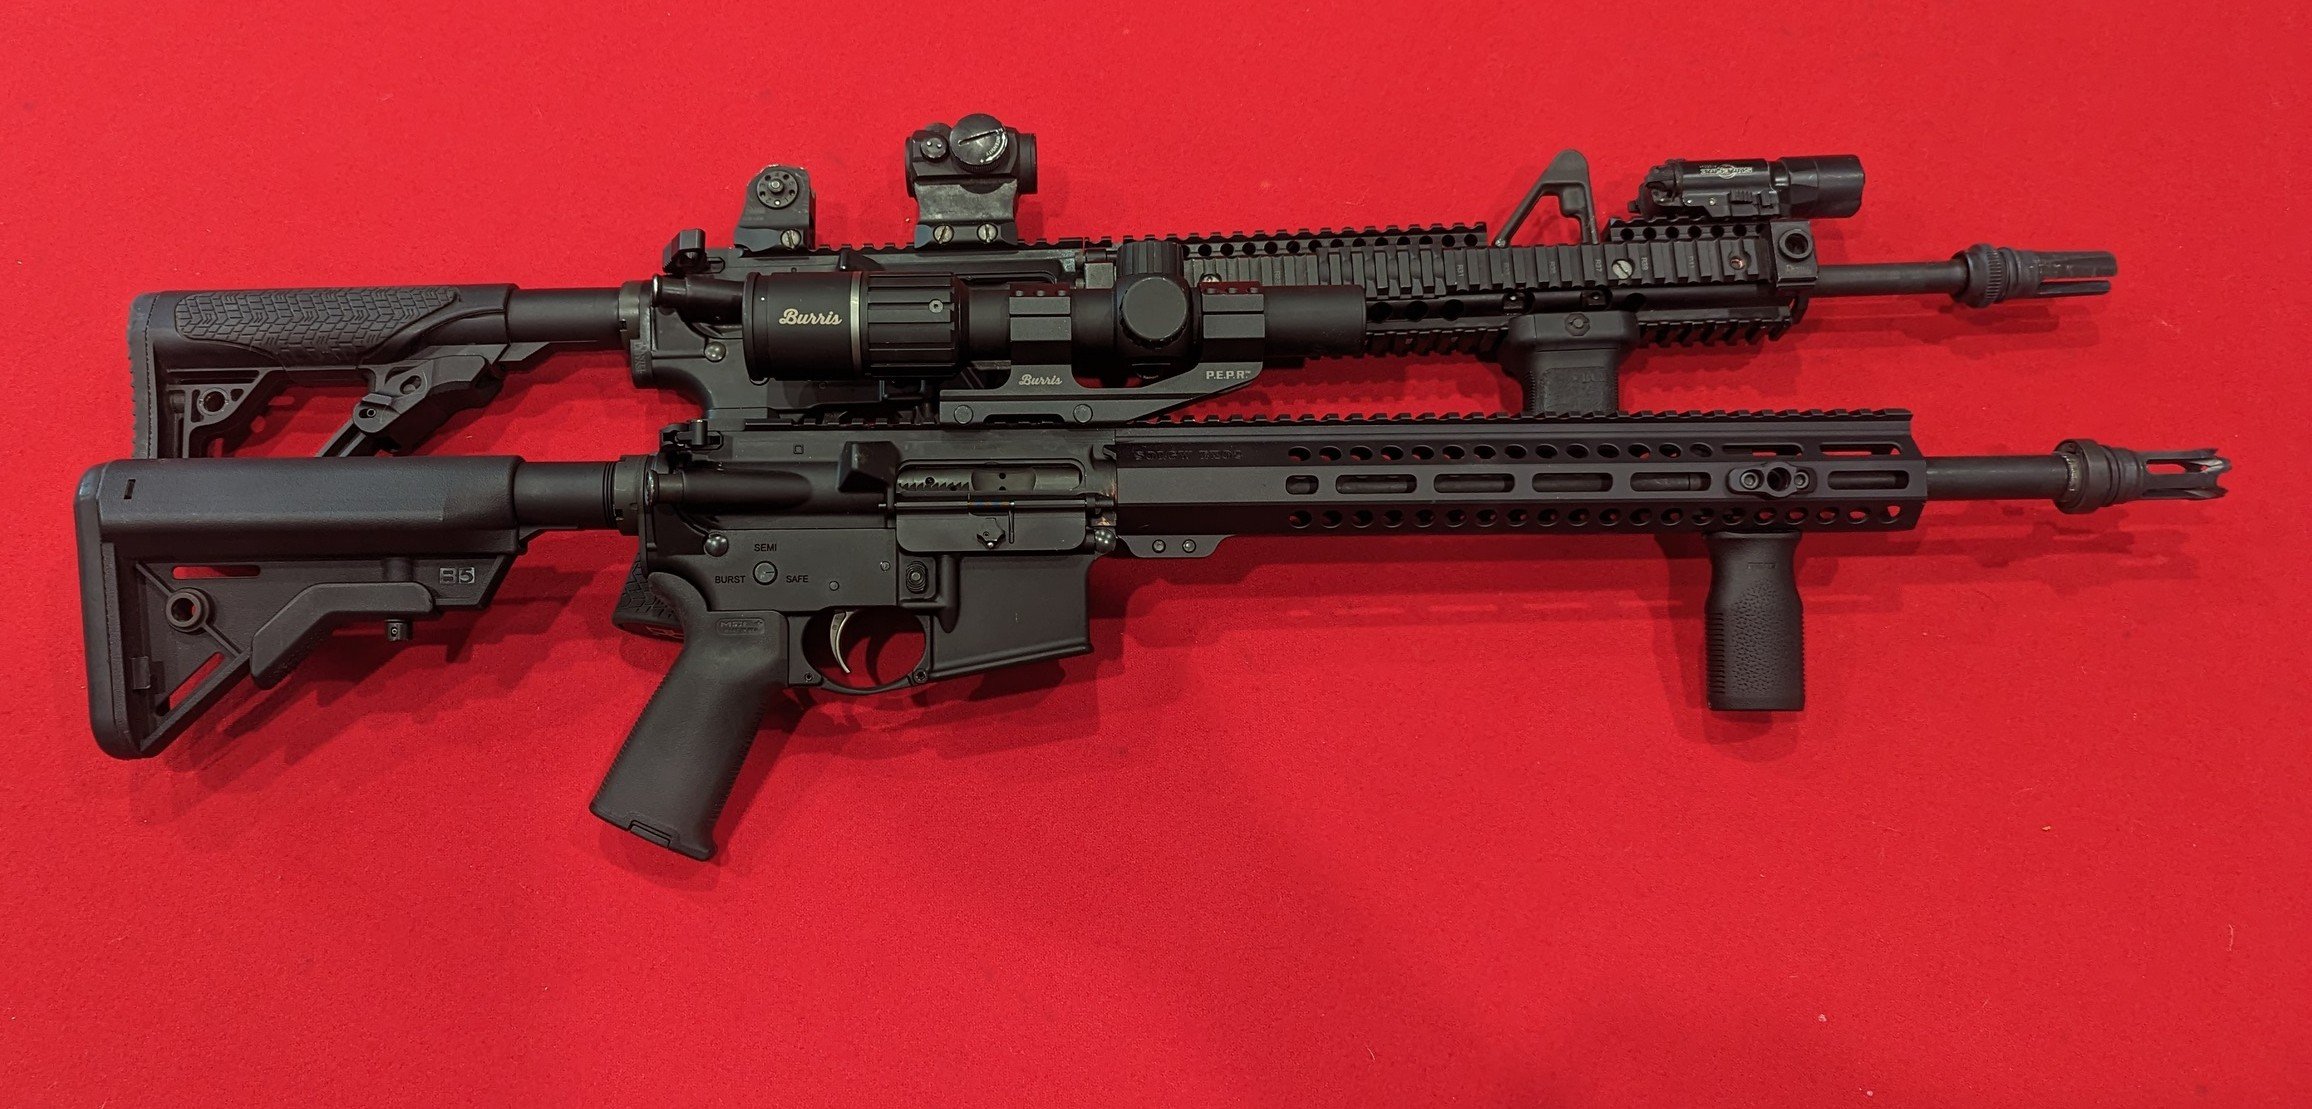
I prefer to use QD swivel mounts for sling mounting. Most modern collapsible AR-15 stocks include a QD stud in the stock whereas many modern rail systems include a QD mount on the rail. I prefer to use QD studs on all of my AR-pattern rifles and configure them in similar locations (see image below). This minimizes the need for additional slings and I can quickly and easily move slings from one rifle to the next.

There are some QD mounts that limit the rotation of the QD attachment. What this means is the QD sling swivel can’t spin unrestricted when the sling is mounted to the rifle. The benefit is the user doesn’t have to deal with the annoying sling that is twisted twenty times over like a braided rope. M-Lok, KeyMod, and M1913 or Pic Rail QD attachments are readily available and easy to install.
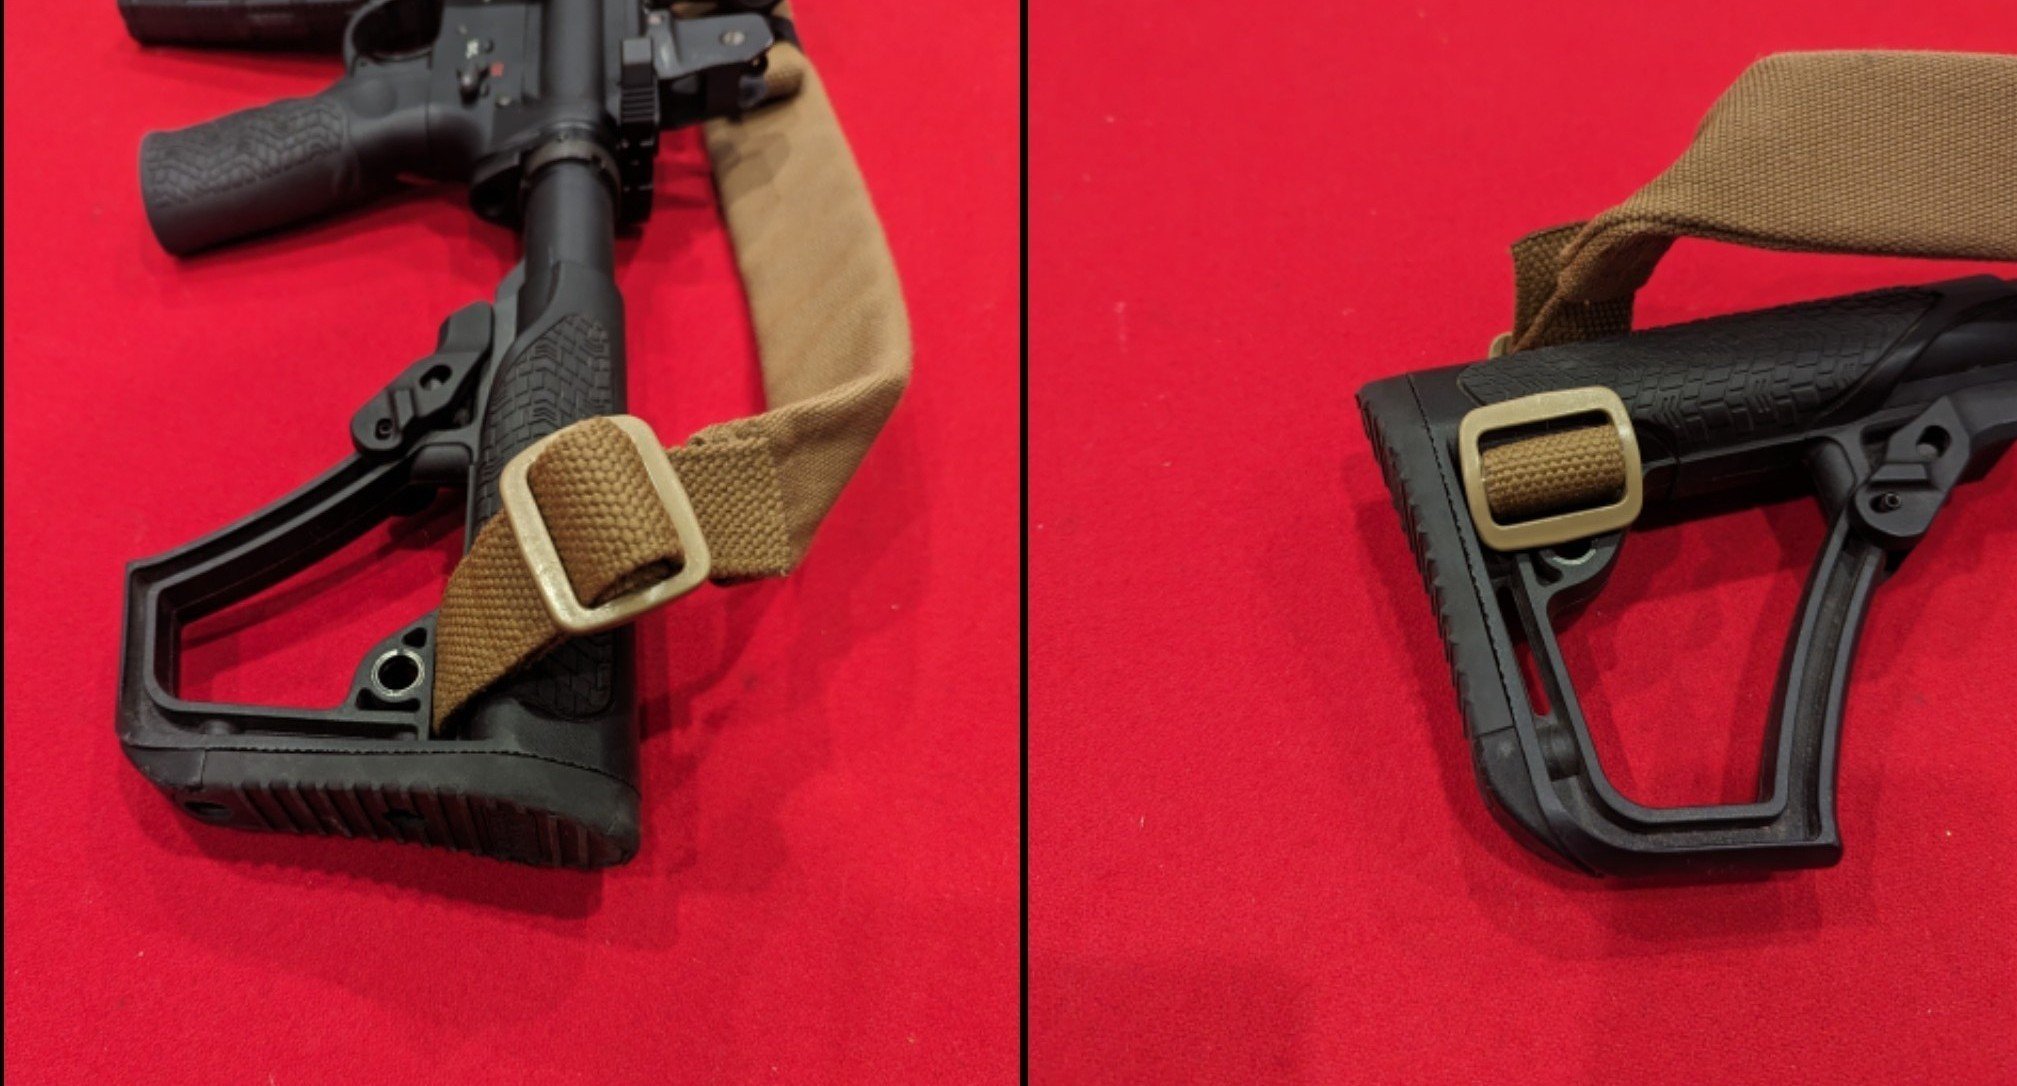
Occasionally, a stock may not be outfitted with a QD stud to attach the rear point of the sling to the rifle. If the stock is not equipped with a QD stud, it will often have a slot below the axis of the buffer tube. This slot, as demonstrated in the image below, allows the user to thread the sling through the stock, place a buckle onto the sling, and then feed it back where it’s secured with an additional buckle. I’ve used this option for many years without issues and found it to be very secure. The greatest inconvenience though is the inability to swap the sling from rifle to rifle quickly as can be done with a QD swivel. Nevertheless, it’s easier and cheaper than modifying or replacing the end plate on the buffer tube for an attachment point.

The Modern Two-Point Sling
There is a plethora of slings available on the market today. While some may offer a discounted cost, there is a word of caution about getting what you pay for. Viking Tactics, MagPul, and Blue Force Gear make quality slings in the $60-$90 range. I’m admittedly preferential to the Blue Force Gear VCAS (Vicker’s Combat Application Sling), specifically, the padded one seen below. It may seem absurd to want a padded sling, but the benefit of the wider surface area and padding pays off when carrying, running, or moving with a rifle for hours on end.

Most two-point slings feature a tab or similar attachment that allows the user to extend or retract the sling to tighten or loosen its fit on the user. On the VCAS, a woven extension on the sling allows me to loosen or tighten the sling using my forward hand without removing my dominant hand from the fire control group. This is especially beneficial when needing to transition the rifle from my dominant side to non-dominant due to available cover or concealment considerations.
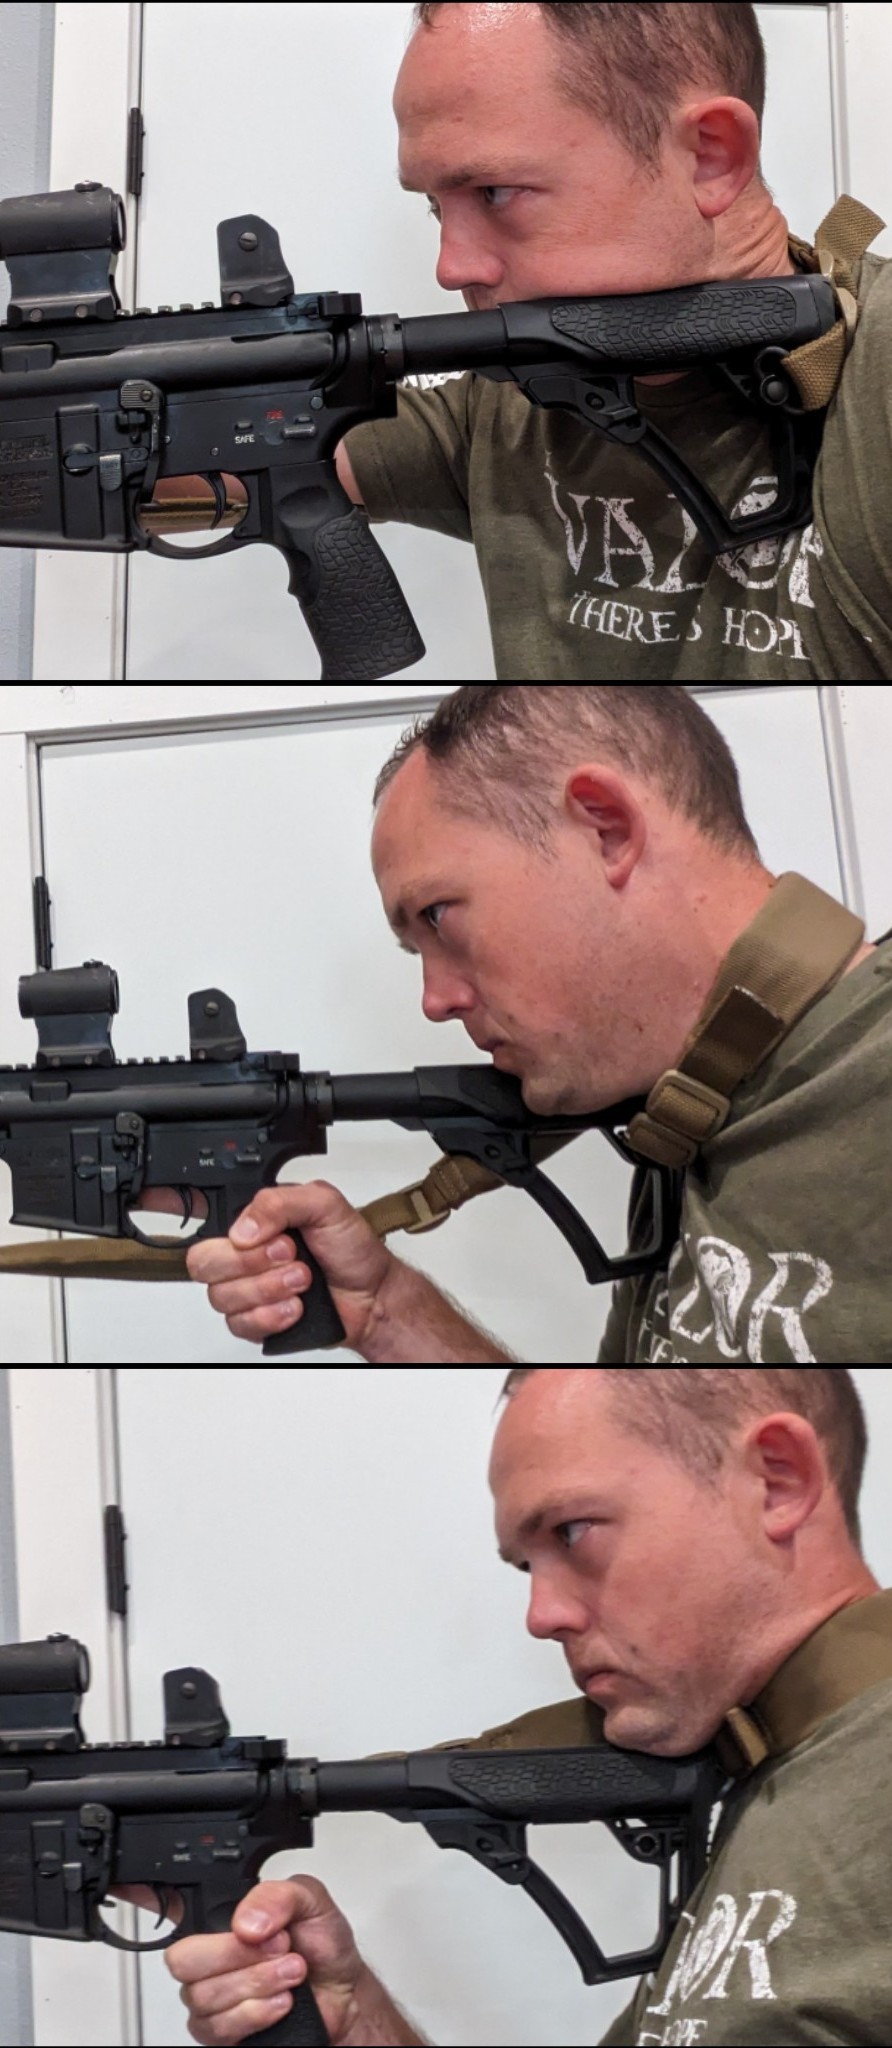
Not all shooting positions are ideal and it’s upon us to learn how to shoot from both sides of cover. While it may be uncomfortable at first, learning to shoot from dominant and support sides is an important skill to add to your list of competencies. The same goes for equipment. I prefer the front attachment be as far towards the end of the rail as possible to control the furthest two points of the weapon. Whether held or slung, it bounces around less than if the two attachment points were closer together. Furthermore, the rear stock sling mount should be on the opposite side of the shooter. I’m a left-handed shooter and mount the rear QD stud on the left-hand side of the stock (non-ejection port side). As seen below, mounting the stud to the outside of the dominant shooting side allows more flexibility when transitioning to the non-dominant side. If the stud is mounted on the inside, the sling, even when fully extended, tends to choke the shooter as they transition to the support side and limits their range of movement.

Stowing
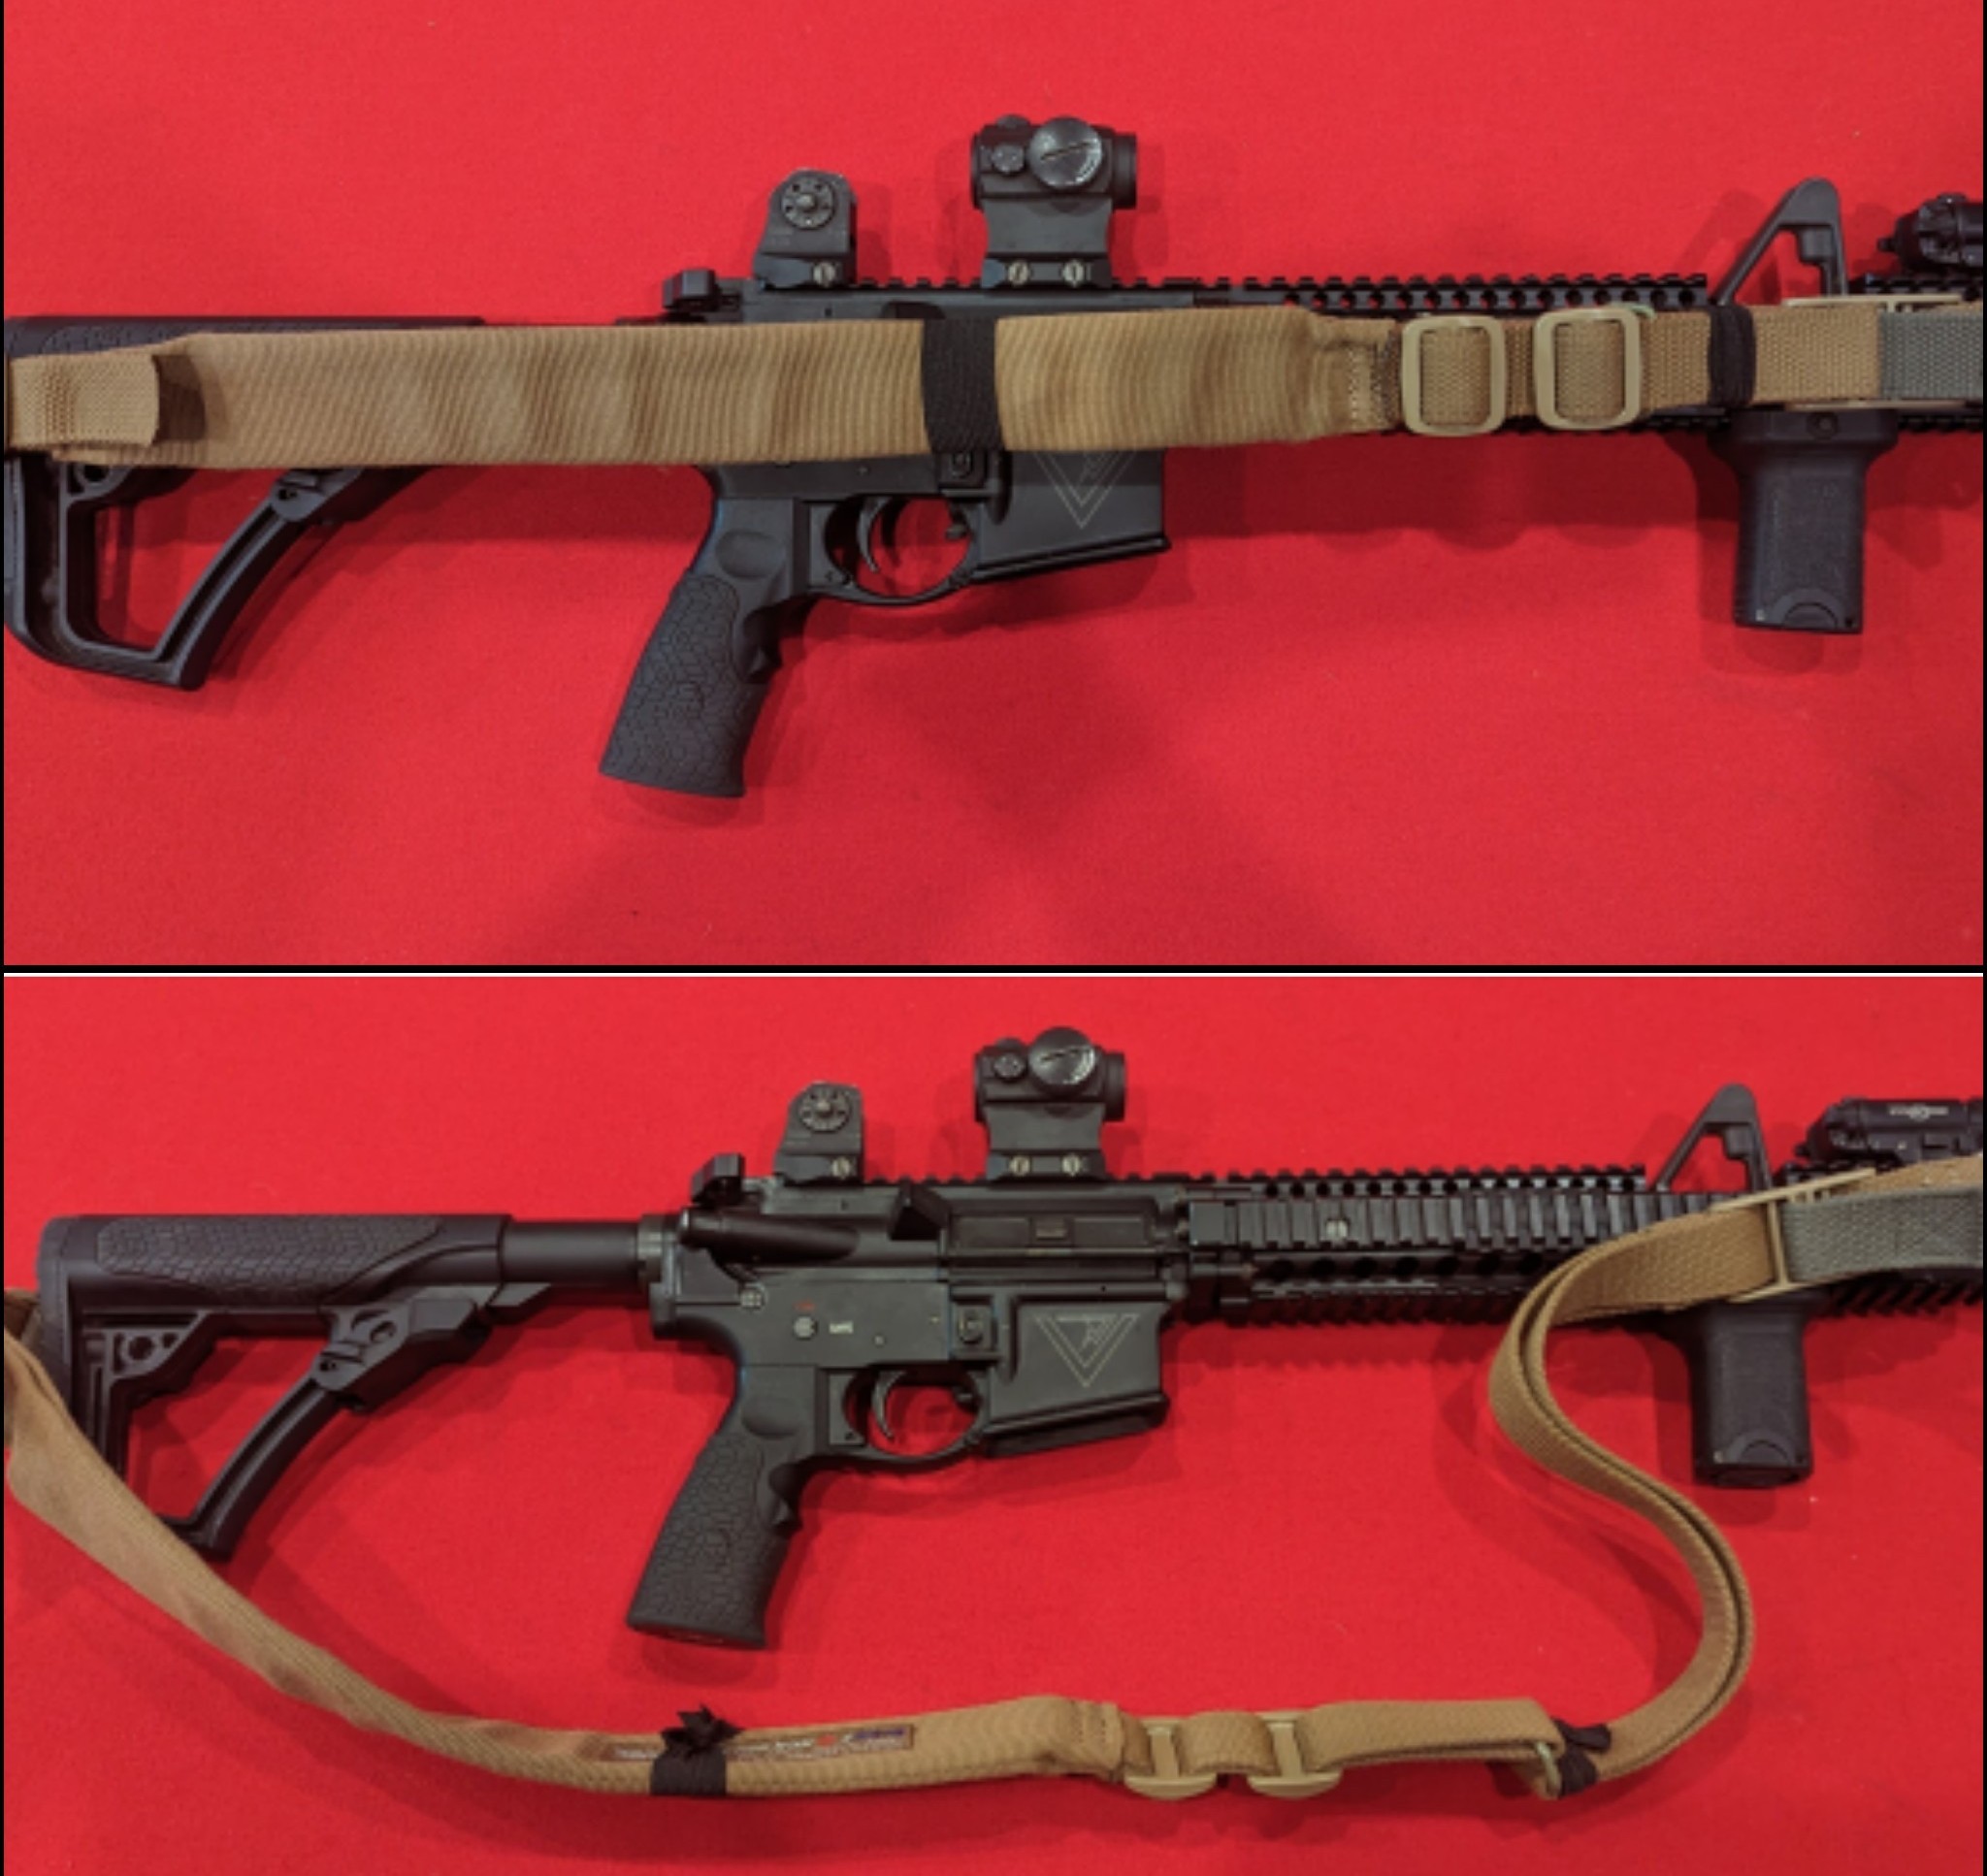
A two-point sling has a lot of slack when not on the body. Even when deployed from a bag, it’s inconvenient to untwist or orient the sling for on-body placement. While there are professionally manufactured solutions available, I use leftover elastic bands for stowing the sling when the rifle isn’t deployed. In the image below, the rifle is set up with two pieces of elastic to properly stow the sling. A quick pull on the rear of the sling and it’s loose, oriented properly, and ready for placement on-body.

Properly stowing and rapidly deploying a two-point sling is not something many consider. For law enforcement, it’s a common problem to access a stowed rifle as the primary weapon is a handgun. Rapid, convenient, and simple deployment is the name of the game when transitioning to a rifle. If deployed from a rifle rack, many in law enforcement can also attest to the issues of not having the two-point sling properly stowed. This is where some professionally made options for sling stowing come into play. For the budget-conscious like myself, elastic banding works well with one word of caution- be careful where the banding is positioned. If the banding is positioned next to a sling buckle, the banding can catch and prevent deployment of the sling. Note how the elastic is placed away from the buckles in the image above, which allows for rapid and easy deployment of the rifle.
Final Points on the Two-Point
A sling is only as good as its user and will only perform to the point it has been tested. I’ve bought slings based on price or user recommendation – only to be disappointed by their performance. Over the years, I’ve fallen in love with the performance and reliability of the two-point sling. It works for what I’ve done, need to do, and practiced for. My opinion may change just as your opinion and use for a sling can change over time. If you’re in the market for a sling though, keep the two-point in mind. Test, toy, and practice with it. It has its quirks but is a tried-and-true option for secure on-body rifle carry.


