Should you find yourself stuck in a remote area, keeping a few items in your vehicle can greatly enhance your chances of survival and making it back home. The subject of a Get Home Bag may not be very tactical or sexy, but it’s reassuring to have some items on hand. Today we’re going to take a look at some items that might be helpful, and how to pack them.
My personal Get Home Bag is not high-tech or elaborate. I have acquired these items over the years. Thinking they might be helpful if I’m ever stranded, I’ve thrown them into a pack as they became available to me. There are still items that I’d like to add as I’m able, so I consider this project to be an ongoing and evolving one.
Bug Out?
These days, I hear so much about “Bugging Out”, and having a Bug Out Bag seems to be all the rage. I can see this if you live in a big city. It may not be a place you want to remain if disaster strikes, and I’d likely have a Bug Out Bag if I lived in such a place.
I count myself fortunate, though, in that I live in a rural area. We have farms, many owned by Mennonites, all around us. If a huge disaster were to strike, or society collapsed (that would never happen though, right?), I’m pretty close to where I’d want to be. No, it’s not a remote mountain retreat, but it’s not a terrible place to be.
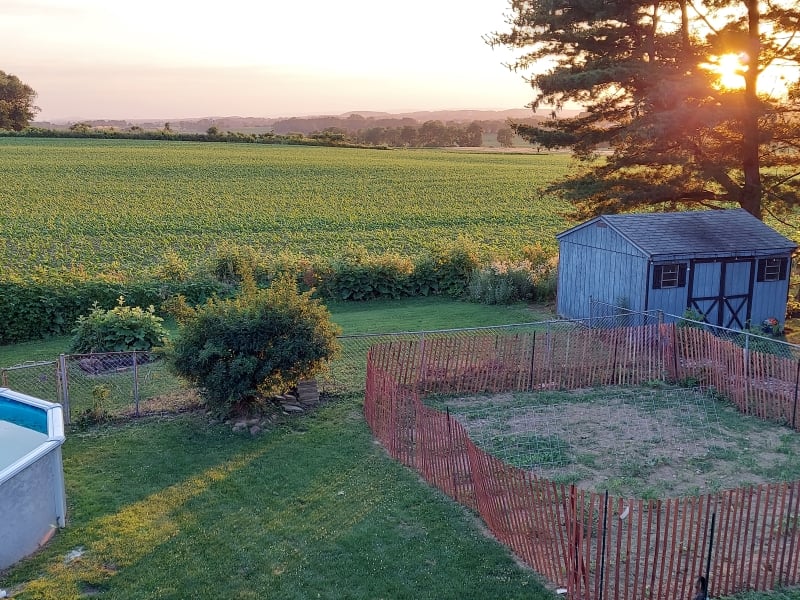
For my family, bugging out really isn’t in our plans. All the things I need are at my house, and we have access to food and supplies via the many farms in the area.
These are some of the things that differentiate between the Get Home Bag and the Bug Out Bag. However, they’re going to contain many of the same or similar items, all aimed at survival and getting from one place to another. Mainly, it’s the philosophy behind the gear that is the main difference.
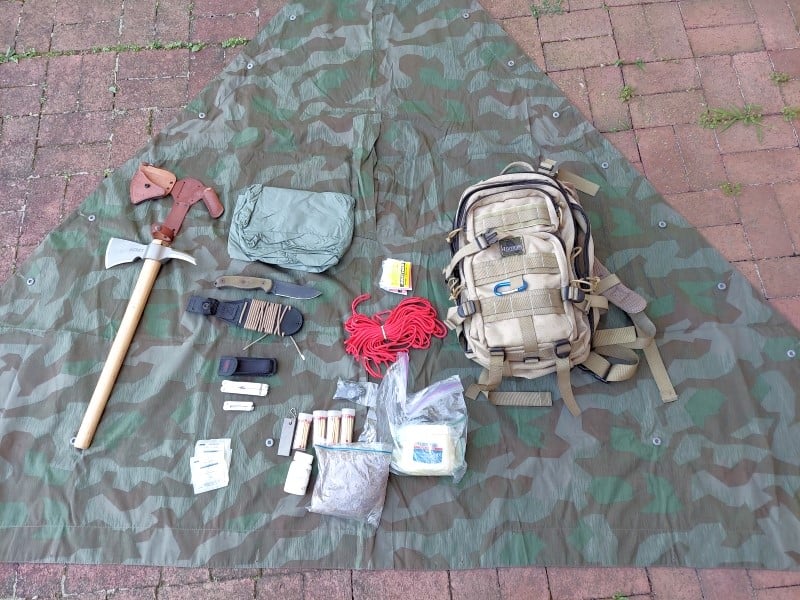
All of that said, here is my Get Home Bag in its current form.
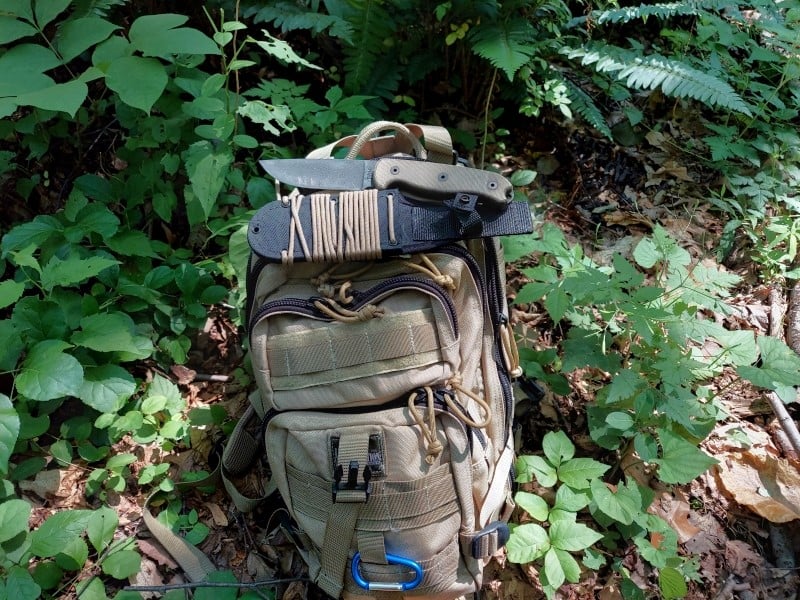
The Pack
The Get Home Bag backpack itself is one from Maxpedition. I forgot the name of the model, as I’ve had it for a number of years and it’s given good service.
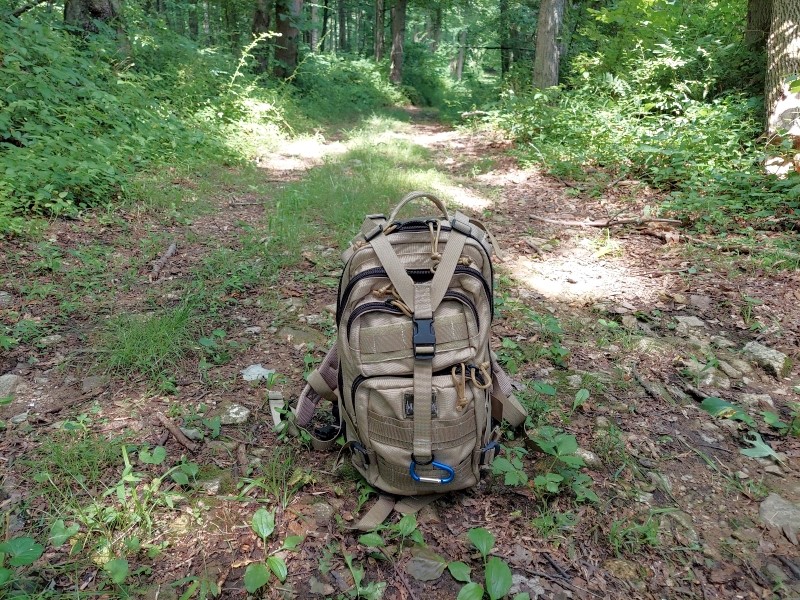
What I really like about it is the fact that, aside from two large main compartments, there are a lot of smaller compartments and little pouches for loads of smaller items. And there are tons of zippers, too, for securing all manner of stuff. All told, this pack will carry a lot of both large and small items very well. And there are PALS loops on the outside for attaching any sort of MOLLE gear.
The Blades
We’ll start at the heart of what most survival systems and Get Home Bags should include: the blades. In the wilderness, and pretty much anywhere we’ll ever find ourselves, a good knife is worth its weight in gold. I have three “knives” in my Get Home Bag. With a knife, you can provide shelter. It also helps build fire and can provide defense. Really, the uses for a good knife are almost endless.
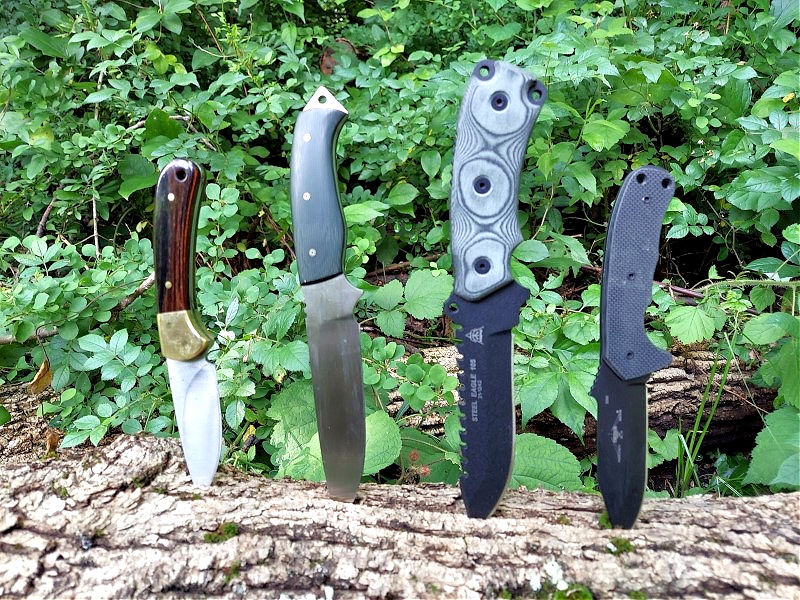
Ontario TAK
The main knife I chose is the Ontario TAK (It appears, under current production, that it’s now named the TAK 1). Made from 1095 carbon steel, the blade holds its edge well and is easy enough to sharpen in the field. It’s not stainless steel, so a little care needs to be taken so it doesn’t rust, but it’s a strong steel that can take a lot of abuse and it performs very well.
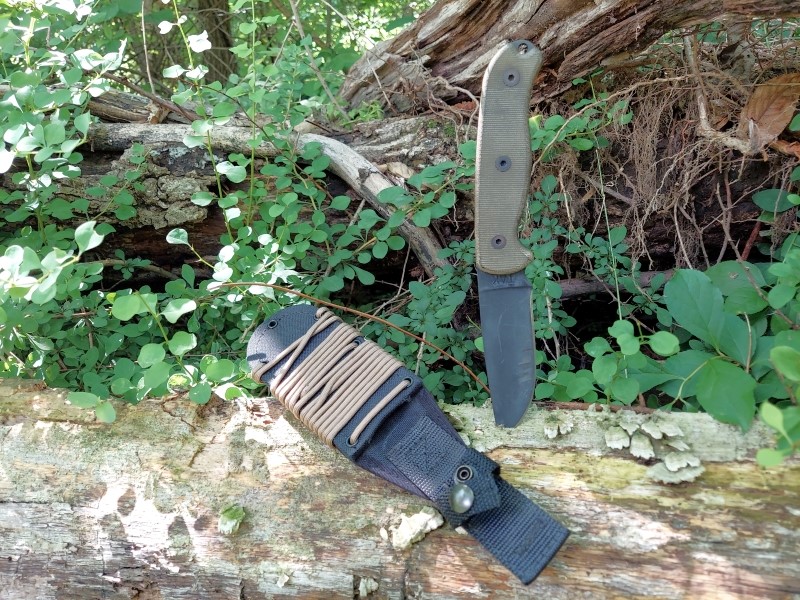
The blade of the TAK is 4.6 inches, so it’s not a huge knife, but it is .188 inches thick and weighs 1.05 pounds, so it has some heft to it in the event you need to do some chopping. Overall length is ten inches, so it’s not a huge knife, but it’s large enough to perform most tasks you’d ever reasonably call upon a knife to do. The blade is black-powder coated, so rust is not a usual issue, and this finish is very durable.
The handle material is green canvas micarta, which is my favorite hard-use handle material for knives. The handle is not slim and small but offers a full grip. Again, this is great in case you have to chop with the knife—hot spots don’t crop up with this handle, and you can use it for a long time with no blisters. Naturally, it is a full tang design for added strength and has a pommel that extends just beyond the handle, which has a lanyard hole should you wish to attach one.
The sheath is black nylon and also durable, serving its purpose well. The TAK is held in by friction but also has a nylon strap that secures with a snap over the handle for extra retention. There are grommet holes around the perimeter of the sheath for attaching to packs, etc. I actually wrapped a paracord around the sheath and threaded it through the grommets because having extra cord is indispensable in certain situations. Finally, there is a nylon strap on the back that secures with a heavy-duty snap that attaches to belts and packs and is MOLLE compatible.
And now for the really great part—this knife is available, at the time of writing, for around $82.50, which represents a major bargain. It’s one of the reasons that I leave it in the pack in my car—if it’s stolen, I’m not out a ton of money. And yet it offers me a lot of utility should it ever be needed in a pinch.
Leatherman PST II Multi-Tool
My next choice is one that everyone needs to have a few of—a multi-tool. I have accumulated a couple over the years, and they can be so darn useful! The one in my bag is the Leatherman PST II.
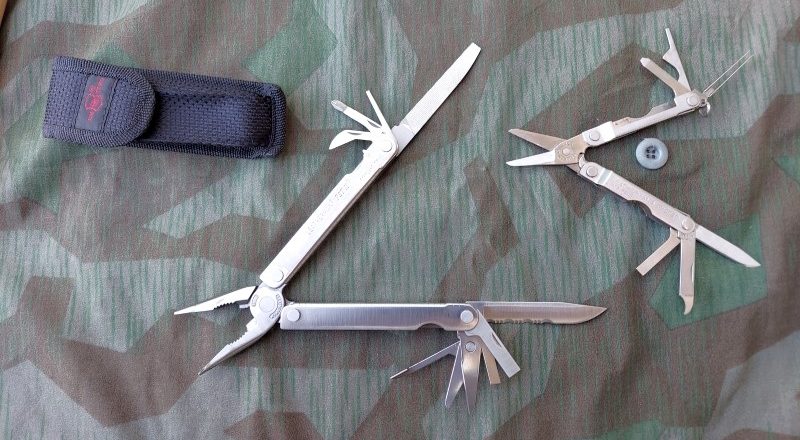
Why did I choose that one? No special reason, I think I either got it in a trade or someone gifted it to me, I can’t remember. It’s pretty standard, nothing extravagant. The main tool is a pliers, but it also has a file, an awl, Phillips screwdriver, bottle opener/can opener, knife blade complete with serrations, two straight edge screwdrivers, scissors, and a partridge in a pear tree. Literally, it’s a small toolbox that fits in your pocket (or, in this case, a little nylon pouch).
Leatherman Micra
Another multi-tool I keep in my Get Home Bag is a tiny Leatherman Micra, which has scissors as the main tool. There’s also a can opener, straight edge screwdriver, tweezers (great for removing splinters and ticks), nail file, and plain edge knife blade—all good stuff to have. I had it lying around, so I figured, why not throw it into the bag. And honestly, that’s how a lot of this stuff was chosen to go into this bag; it was lying around and I thought it might be useful to have in a situation that was dire, so in it went. The bag grew from there.
Fixed Blade and Folding Knives
Aside from the blades I’ve already mentioned, I normally have two or three knives with me in the course of my daily travels. If I were actually planning an adventure, I’d bring some specialized cutlery with me to fit the excursion. But the items in the bag should handle 99% of the situations I’d run into.
Naturally, there are dozens of other blades out there to choose from for this given task, ranging from inexpensive to ridiculously extravagant. Variety is the spice of life, so knock yourself out in choosing.
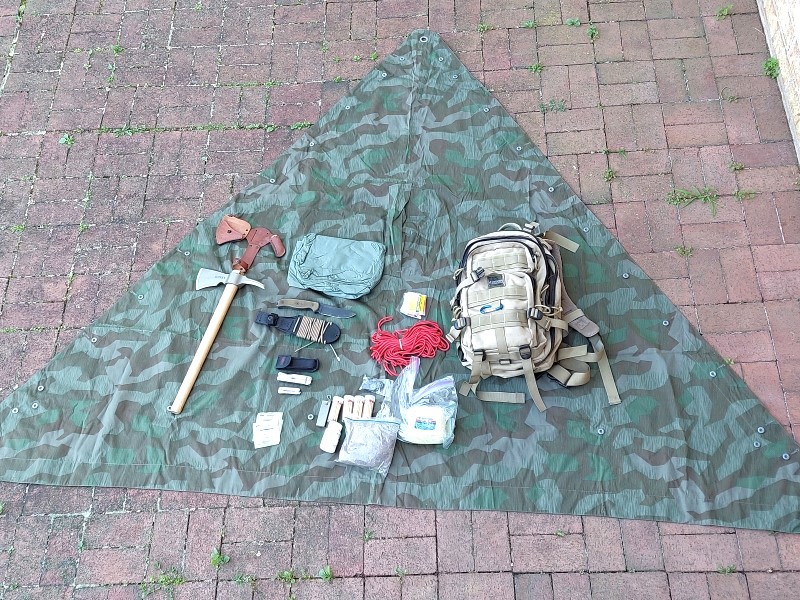
Shelter
Again, nothing elaborate here in my Get Home Bag. In fact, it’s extremely minimalist for now, until something better comes along that I scoop up for the bag. Currently, the main piece is a reproduction WWII German Shelter Half (called a “Zeltbahn”), which can serve as a shelter or poncho. It’s made from a canvas type of material and could serve as a very small tent to keep the rain or snow off.
I also have a regular nylon poncho that could serve its obvious purpose or be used as a ground cloth to stay off the wet ground. A dedicated ground cloth, or even a plastic drop cloth that is intended for house painting could be another useful addition for shelter.

I’ve also thrown in a length of military paracord to help with shelter building should the need arise. I’d likely also augment the above shelter materials with what I’d find in nature.
Here in the Great Northeast, our winters can get extremely cold—sometimes below zero with high winds, snow, freezing rain—the whole works. Now that I think about it, a thermal emergency blanket would be a great addition to the Get Home Bag.
Fire Building
Any good Get Home Bag or Bug Out Bag needs to have a provision for building a fire. Fire means you can stay warm, prepare food, provide light, and generally keep up morale. I included a few different methods of fire starting in my Get Home Bag.
I have a ferrocerium rod with magnesium as one option. There are also all-weather matches in water-resistant, plastic containers. I’ve also included a pill bottle filled with cotton. Cotton is a great material for igniting fires and the bottle will keep it basically waterproof. I also have a plastic sandwich bag filled with dryer lint, which happens to be extremely flammable. A standard lighter rounds out the package. Having different options for fire starting in your Get Home Bag is always preferable. That way, you don’t have to rely solely on one method.
Beyond that, I have a plastic tub of Vaseline petroleum jelly. It’s flammable, and when the cotton is saturated with it, it will burn like crazy, which can be useful if you’re trying to start a fire with damp or wet wood.
Firearms
As long as I’m in my own state or a state that allows me to carry a firearm, I’ll have a handgun along with me wherever I go, in general. Depending on the laws where you live, you might elect to include a firearm in your Get Home Bag.
One that comes to mind that would be perfect for the purpose is the Henry Survival Rifle, also referred to as the AR-7. It breaks down into its own buttstock and stores unobtrusively in a very compact manner. It could be lashed to the outside of the pack, where many people won’t be alarmed because they won’t recognize that it’s a firearm. Or it could be stowed inside, depending on how large your pack is. As an added bonus, the AR-7 will float in water.

Having a semi-auto .22 along for the ride would offer more versatility and peace of mind.
Food
I confess that my Get Home Bag doesn’t contain much in the way of food, and maybe I should remedy that (see, this article is forcing me to take a close look at what I’ve packed). I have a couple of granola and breakfast bars in there, but that’s about it. Part of the problem is that the bag sits in my car through all the elements—Summer, Fall, Winter, and Spring. So there are major temperature variables, depending upon where you live and travel. Most foods will not fare very well under those conditions for very long.
Freeze Dried items might be a good addition. Some bottled water might be okay for the short term as long as it’s not freezing and if you rotate it regularly. Some canned items could also work. Just use your head as to what the elements will do to the food you choose.
Other Items
There are some other items that I threw into the Get Home Bag because…why not? A few ZipLok-type bags couldn’t hurt and are useful for storing all sorts of items.

I have a few packets of water purification powder. One item I’d like to add at some point is a water purification filter. Around where I live, we have many streams, so finding water is no problem. However, purifying it could be an issue and a filter would solve that problem.
I also have band-aids and small bandages, along with antibiotic ointment. A few packets of small Cyalume sticks are in there too for emergency light. I always carry a flashlight with me, along with a small one on my keyring. A few small, button compasses round out the Get Home Bag.
Additional Uses for the Get Home Bag
Aside from using it as a Get Home Bag, if I’m going hiking, I’ll take the pack along, typically adding a few items, such as drinks and food, and maybe a CRKT Kangee Hawk (my tomahawk). That covers me in the event I run into trouble and the stay in the woods is unexpectedly extended. Having those additional items along for the ride helps give peace of mind, “just in case.”

In Conclusion
Don’t worry if you can’t fully equip an entire pack right off the bat for a Get Home Bag. A cheap backpack or day pack with a couple of items thrown in is a start. You can add to the mix over the years until you have things just the way you want them. I still add an item every now and then. Whatever you happen to have with you at the time of an emergency will be that much more than you had before you began preparing.
Garage or yard sales can be a good source for some of the items that you might want to load up your Get Home Bag with and are an inexpensive source. Basic medical supplies can be had at your local food store or pharmacy. Army/Navy stores or online sources can supply much of the other needs.
Being prepared doesn’t have to mean spending a lot of money. You can equip your Get Home Bag fairly inexpensively.