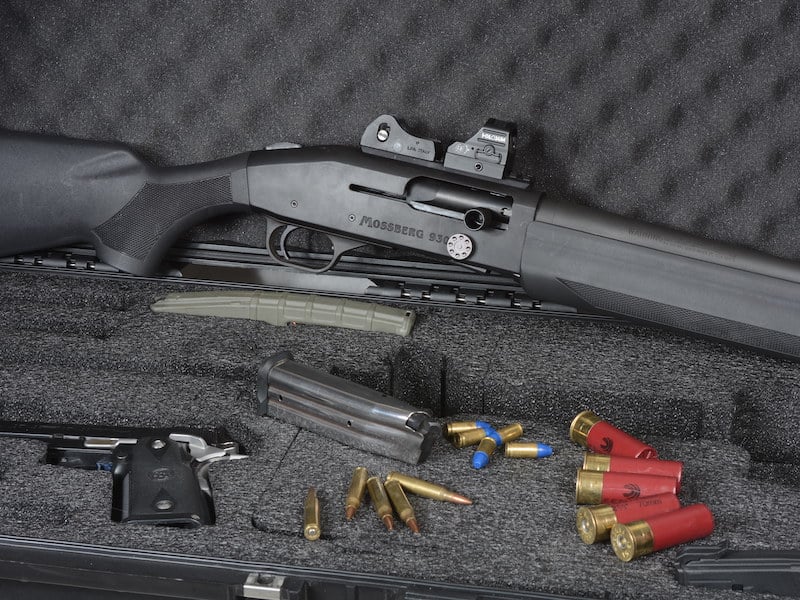
I first became acquainted with the Mossberg 930 SPX at Gunsite about 15 years ago. It had a lot going for it: 7+1 rounds of 12 gauge, a stubby 18.5-inch cylinder bore barrel, ghost ring sights, and a factory-installed Picatinny rail, all cloaked in a purposeful matte black. And, since it was semi-auto, I noticed just how fast it could be while doing a Rolling Thunder drill on the line. It was no fun running a pump and trying to keep up with the guy next to me shooting a 930. I was impressed enough to buy one when I got home and shot it enough to get my split times down to .18 seconds between shots; almost as fast as I can run a 1911 on a good day.
I wasn’t the only one impressed: the 930 quickly became popular in three-gun competitions, which, while not in its infancy, was still very much developing in both hardware and technique. When guns get pushed in unusual ways, you find (or create) new weaknesses, and the aftermarket quickly provided upgrades for the 930 to make it even better than it already was. Having befouled mine in the same corrosive powder incident that required a full rebuild of my beloved Mossberg 500 Cruiser, some remedial work was in order before I could install any upgrades.
Takedown and Disassembly
For those unfamiliar with the takedown process, you start by unscrewing the Choate magazine extension. Two words of wisdom: if it’s too tight to back out by hand, use a strap wrench, and second, that long magazine spring is going to lunge out like an angry metal snake.
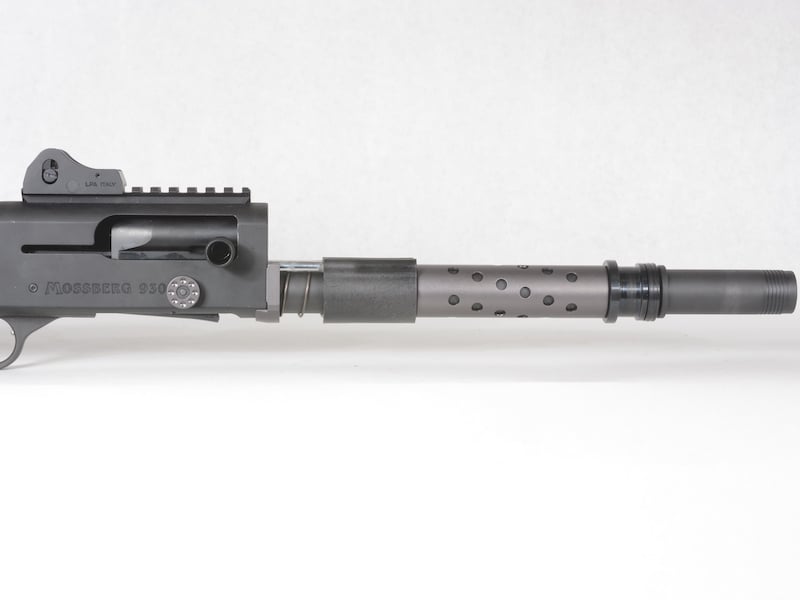
Draping a towel over the joint ain’t a bad idea. With the extension off, the plastic forend can be pulled forward and off, exposing the gas system. Gas is vented downwards through two ports in the barrel into a gas chamber surrounding the magazine tube. It then pushes back against the piston, which also slides on the mag tube, and bears on an aluminum spacer tube that fills the space between the piston and the pusher assembly.
This assembly features twin rods that protrude into the receiver and push back the slide that unlocks the bolt from the portion of the barrel extending into the aluminum receiver (mechanically the same as the action bars/pump on a Mossberg 500). A spring between the pusher and the plastic forend retainer returns the gas system components forward after firing. Unscrewing the magazine tube from the receiver will free these parts, after which the bolt and slide can be removed from the front of the receiver.
Remedial Work and Repairs
The first step in repairing my shotgun was to hone the barrel to remove the rust and as much pitting as possible. Next, I had to clean out the gas chamber using solvent and a variety of stiff brushes, including a small wire wheel on a Dremel and sandpaper as a mandrel, which proved to be the correct diameter for the gas chamber.
On the other end of the chamber is a strong, captured spring which was also badly pitted. Like all the other rusted parts of the gun, I bead-blasted it and had it reblued. Unfortunately, it’s very difficult to both compress it and align the fine threads of its retaining ring at the same time. Wanting to find a way to provide pressure straight down onto the ring, I took a dial caliper to the local O’Reilly Autoparts and measured the outside diameter of sockets until I found one barely larger, which I then ground shorter on a belt grinder using a 10-inch extension to keep from burning my fingers.
Once I had removed almost all but the solid part of the socket, I clamped it in my mill and decked the surface with a .5-inch end mill, which I then used to machine a pair of tabs to interface with retaining ring slots. Time-consuming to make, but I’ll never dread reassembling the gun again; it probably took less than 30 seconds to screw it in.

Since the gas piston uses rings similar to an AR bolt or an automotive piston, I chose to replace it rather than refurbish it. Mossberg makes an upgraded Nickel Boron version that also appears on the 935, and there is an aftermarket stainless version that dispenses entirely with the rings, but the popularity of this upgrade may be judged by the fact that I could not locate either one in stock and for sale. Anywhere.
Functional Upgrades
OR3Gun, having run 930s hard in competition, developed several significant gas system improvements and offers packages that tune the gun for its intended use: light competition loads, heavy field/defensive ammo (which the gun prefers from the factory), or a combination. Good luck getting in touch with them: I couldn’t find a phone number and never got a response to an email, but the parts I ordered did arrive in great time and are beautifully made.
Most packages include the vented spacer tube (MST) that replaces the factory solid one in a variety of weights for the intended load. I chose a multi-use package, which also contains a paired set of spring plunger (CSP) and spring retainer (ASR). The plunger has a tail that fits inside the return spring instead of on top of it like the factory plunger and is intended to improve the geometry of the system and avoid scoring the inside of the recoil tube. When I removed my factory plunger, the base had been well eaten by the end of the factory spring, which may explain some issues I experienced with the recoil system. In any event, before installing a new return spring I ordered from Mossberg, I carefully ground the end of the spring flat so it would fit squarely against the base of the new plunger.

The spring retainer goes on the back end of the spring and is accessed by removing the buttstock. It’s held in place by a cross pin that drifts easily out once pressure is removed from the retainer by pushing a wooden dowel or some such down the recoil tube and against its base. The OR3Gun retainer comes in two flavors: a four-hole version, which either compresses or relaxes the spring based on which hole you select, or a field-adjustable version with two settings that can be rotated with a punch once the recoil pad is removed from the buttstock.
Also included in the package I ordered are a forend retainer (CFR) and extended bolt release (EBR). The forend retainer also comes in two flavors, one intended for field guns and another for competition guns. Be prepared, though, that it requires some modifications to truly be an upgrade.
Furniture Mods
The greatest weakness of the shotgun is capacity, and the greatest advance three gun has given us is reloading technique. My 930 is intended for defensive use, not competition, but it’s foolish not to use the best technique possible, and there’s no reason not to incorporate reasonable modifications that help good technique as long as they don’t compromise some other part of the gun’s utility. Common twin load/quad loading techniques let you stack two cartridges end-to-end in your palm and then slide your hand down the underside of the gun, feeding both into the magtube in a single stroke. The bottom corner of the 930’s forend usually creates a large shelf that keeps your hand from making that sweeping motion (note the 940 forend is completely smooth). The machined aluminum OR3Gun forend retainer extends further backwards over the receiver than the factory one, creating a ramp that you can then shape your factory forend to match. After installing the retainer, I carefully cut back my forend on a belt grinder until I had the right shape, dressed down the cut surface with 220 sandpaper backed by a file to get a good, continuous surface, and finished it with a trip-through the bead blaster.
I also modified the loading port by beveling the sides with a 60-degree mill cutter and rounding the front with a .5-inch ball end mill, then cleaned up my cuts using sandpaper backed by a round oak dowel. You can do the same work without a milling machine, either with a file or a Dremel, of which I suggest files. Aluminum is soft, and that Dremel will dig a hole in a second if your attention wanders, which it probably will.

Just having made this modification, I’ll shoot it for awhile before I decide if I want to go more radical, or whether or not I need an extended elevator, such as the Miculek extended one that avoids pinched fingers during reloads. Once I make up my mind that I’m done, I’ll swab on some aluminum black to finish it.
Control Upgrades
The OR3Gun extended bolt release is a clever bit that serves as an overtravel stop for the factory button and does not require drilling and tapping to install. It’s held in place by a set screw installed from the side, and the wise shooter will put a drop of thread locker on the threads before installation. That’s not the only control I swapped out: while there’s nothing per se wrong with the factory curved charging handle, it’s pretty small to run in a hurry, so I upgraded to a factory Mossberg extended charging handle, which is the same one you’ll see on the 940. Like the factory one, it’s held in place with a spring detent in the bolt slide, which means you simply push it straight inwards until it clicks, and pull it straight out to remove for disassembly.
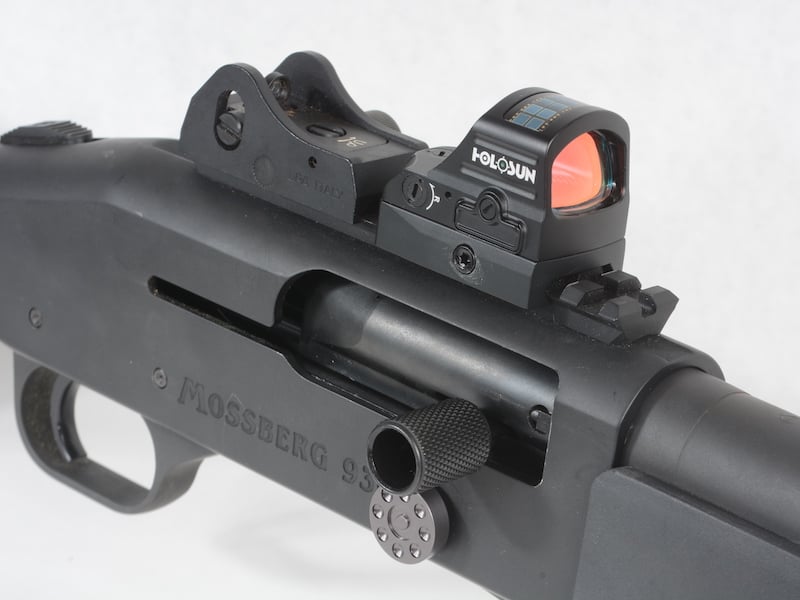
Not a devotee of dots on everything, Jeremy is still dot curious, and installed the Holoson 507 he’s been running on a pistol. We’ll see how it works for him. Also, note the extended charging handle and bolt release for faster manipulations.
As a last touch, I replaced the extractor and gas system return springs with new ones from Mossberg, and the mag spring with an extra power Wolff one supplied by Brownell’s, which requires some fitting. Every spring becomes solid when it’s compressed far enough, so I clipped coils until the spring would allow a full load of seven shotshells in place, and for an eighth to start. It seems a bit weak to me, though, so after shooting it a bit I may put an unmodified spring in and give up one extra round for the certainty of operation. I also used the OR3gun extended follower, which protrudes more than the factory follower to provide a tactile means of determining whether or not the tube is loaded.
I also took the opportunity to install Holosun’s 507 red dot on the pic rail where it co-witnesses with the factory ghost ring rear. While I’m not exactly an early adopter of dots on everything, I’ve been using the 507 on a pistol for quite some time now and have been very impressed.
Shop This Article
-
Hornady American Gunner Reduced Recoil 2.75" 12 Gauge Ammo 00 Buckshot 10 Shells
 $18.99$12.99Save $6.00