Optics are everywhere these days. They’ve gotten smaller, more capable, and more powerful. In the modern era, optics like LPVOs have taken over the market, and the modern AR is often outfitted with one. We also have rifles in dedicated marksmen rifle (DMR) formats using 2.5X and 3.5X as their minimum magnification and fixed power prism users. These optics work quite well but tend to be slower for extremely close range. What’s a shooter to do? Well, why don’t we add another optic? Specifically an offset red dot.
Remember, optics have gotten smaller, considerably so. This includes the ultra-small red dots we often see on handguns. In reality, the first micro-optics were designed to be used on rifles and even machine guns. These micro-sized dots have become a popular backup sight option on rifles with magnified optics. To master this offset technique, you need the right mount. Today we have a mount from Warne that does it just right!
The Warne Offset Red Dot Mount
This Warne offset mount is a simple design. It allows you to mount a microsized red dot to the left or right-hand side of your gun. Typically an offset dot will be mounted on your dominant hand side. The Warne offset side mount places the optic at a 45° offset, and it is a low-profile mount.
Warne always delivers quality optics accessories. This little company makes some outstanding mounts, rails, and rings, and of course, they make awesome offset mounts. The Warne offset design comes in black and FDE, and I went with FDE.
The Warne Offset Red Dot Mount provides just a hair of rail that’s just long enough to mount a micro-sized red dot. While it’s mostly used for red dots, the Warne Offset Red Dot mount can be used for various items. It is just a rail, so it can fit lights and lasers, as well as iron sights if you buy two of them.
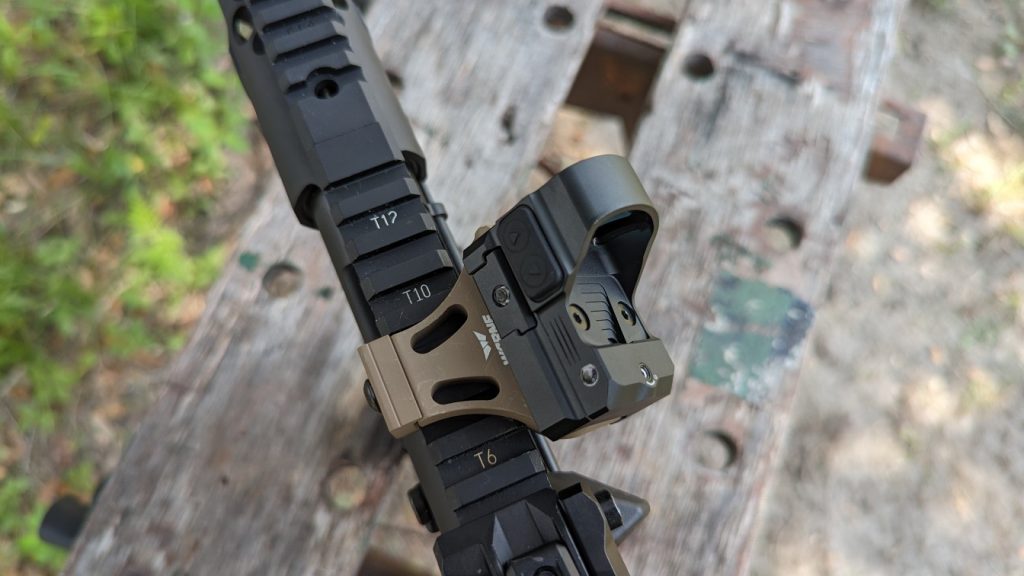
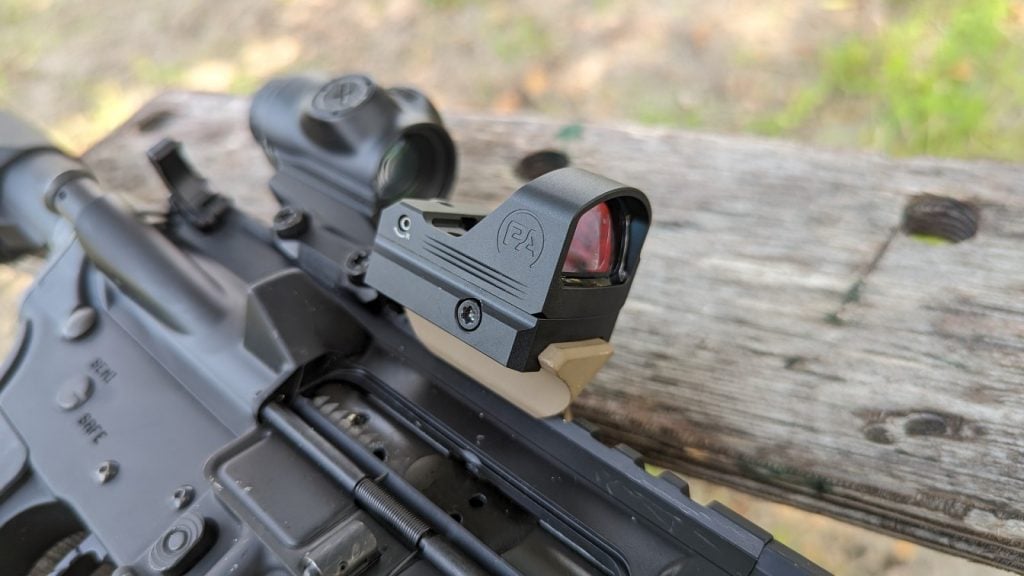
The Warne Offset red dot mount locks up super tight on the rail. The mounting system is low profile, and it doesn’t expand beyond its space. Mounting is simple enough. I dropped the rail on the gun and the red dot on the rail without any issues.
With everything locked in place, it wasn’t tough to get the dot zeroed. The dot remained zeroed, not just because it’s a good dot, but because the mount locked down onto the gun and remained locked down. It worked extremely well and provided a solid base for the red dot.
It’s likely not a surprise that the Warne mount works, but let’s dive a little deeper into the world of offset red dot mounts.
Why Mount an Offset Red Dot
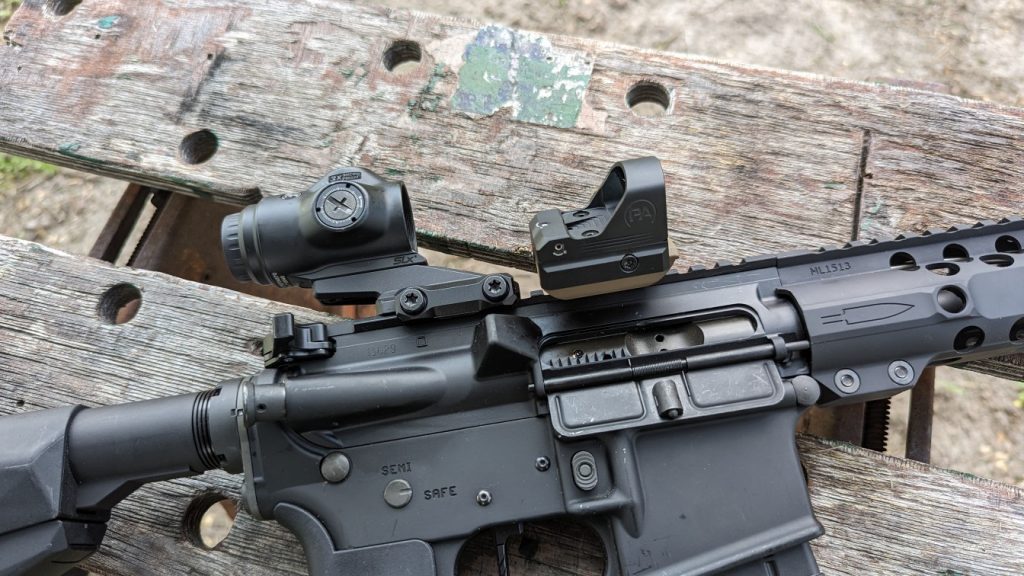
In the world of magnified optics, an offset red dot makes it easy to switch to a world of close-range firepower in a near instant. While techniques like occluded shooting work well, the switch to a red dot is more precise and much faster. An offset red dot allows for an instant switch.

One of the best features of an LPVO is your ability to jump between a higher-powered magnification to a 1X setting. That’s great, but as 3-Gun champs have shown, we can rotate to a red dot a bit faster than we can slide the rotation ring. With medium power optics and fixed power prisms, the offset red dot is a very useful tool for quick transitions.
Dual red dots have also been mounted to the competition pistol caliber carbines. These dual-mounted red dots make it easier to shoot around obstacles while staying in the box, and it’s interesting to see these PCC champs use them.

Finally, for shooters with night vision, an offset red dot can be used fairly easily with night vision, although there are better options for a spare red dot. Another way to mount a secondary red dot is via piggybacking, which leads us to the offset vs. piggyback argument.
Offset Versus Piggyback
A piggybacked optic is mounted right above the primary optic. This can be done directly to the optic like the Trijicon RMR and ACOG combos, or you can use a specific ring setup to mount an optic above your optic. There are some benefits and downsides to both piggyback and offset red dot mounts.
For example, piggybacked optics work better with night vision. They sit nice and high and are easy to see through your NODs.
Offset red dots have less height over the bore, and this allows for a better cheek weld. Plus, since the optic is lower, your close-range mechanical offset isn’t as extreme. Zeroing with an offset dot does require a slightly different offset and has its own complications, which we’ll discuss later.
A piggybacked optic allows for ambidextrous use. It’s on the top, so there is no rotation required. With an offset red dot, it only works with the specific side you’ve mounted the red dot on.
A lower offset dot does tend to work better around side barriers as well as low barriers. Shooting in awkward positions can be a bit easier with the slight offset dot, although that same offset can catch on all sorts of stuff in the real world. Catching an offset dot is a great way to make extra noise, risk your dot, and ruin your presentation.
If it comes down to short-stocking the rifle, then the piggyback design does work significantly better in that role. It’s easy to maintain a view on the dot with the stock stuck over your shoulder.
Zeroing an Offset Red Dot
There seems to be a bit of an argument over the right range to zero an offset red dot. I’ve seen many suggest 50 yards. That way it’s zeroed out to 200 yards. The offset zero doesn’t align perfectly like a standard red dot sitting on top of the rail. I don’t think the 50/200 zero applies as accurately in this position, but that doesn’t mean a 50-yard zero isn’t a good option.

Plus, I’m using this optic for extremely close quarters. With that in mind, I went with a simple 25-yard zero. At 25 yards, I can shoot with good precision at ranges as close as 10 yards without a huge offset problem, and as far as 50 yards fairly easily.
To zero, you have to cant your rifle and try to get it as square as possible. I don’t think you need to whip out a level but try to make sure it’s canted just right. Bags will make your life so much easier in your attempts to zero an offset red dot. Ensure you remain consistent with your cant as you zero.
Offsetted
An offset dot in the right mount can be an extremely handy tool for close-range shooting. Instantly swapping between an offset dot to a magnified view makes your life a lot easier. It takes some time and training to work out perfectly. Like most things, it’s constantly evolving, and better tactics and techniques continue to present themselves.
