The only thing I know about Kansas is from the band Kansas, and it’s the songs “Dust in the Wind and “Carry on Wayward Son.” If I had to guess, I bet people from Kansas are fine, upstanding Americans who likely live in peace in a rather nice state. Seriously, look at some of the natural beauty in that state and tell me it’s not gorgeous. Well, today, we are talking about Kansas, and learning something beyond a few 1970s rock songs. Today we’re learning the handgun standards the Kansas police employ with the Kansas CPOST annual firearms qualification.
What We’ll Need
The Kansas CPOST Handgun qual is fairly simple and won’t cause you to go broke on ammo. All you’ll need is 50 rounds, which isn’t bad. In terms of magazines, that’s up to you. You could stop the qual to reload your mags or just bring four average 9mm magazines. I suggest at least two mags, but the qual doesn’t require a particular number.

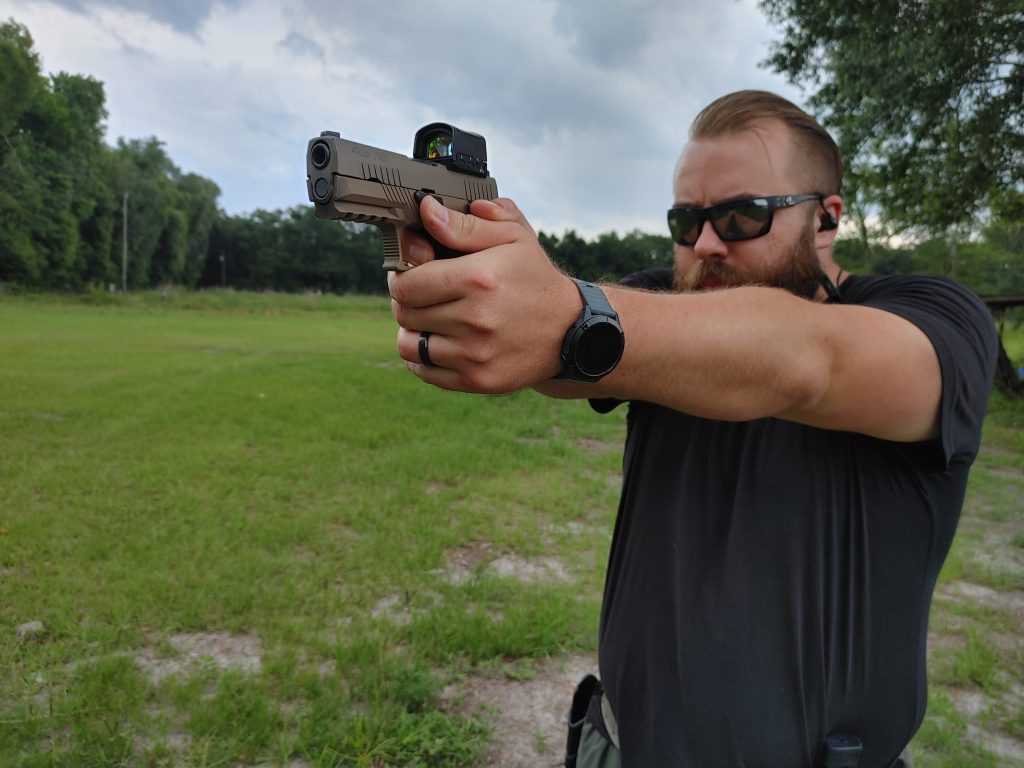
Obviously, we’ll need our handgun. It’s a police qual, so I went with a duty-sized handgun with the P320C that’s optically equipped with a ROMEO2. You’ll also need a holster. I used an L2C fit to a battle belt. While it’s not a police belt, it’s a close replication. The CPOST also requires a single target, and the target is either a standard FBI Q or an IALEFIQ. We aren’t Kansas police, so we can make it up as we go. I used a simple Sage Dynamics target, which is admittedly smaller and more challenging to hit.
We will also need a barricade of some form to train behind. You can improvise your own or employ something like the PTSB Lite. I’ve been using an old blue barrel, and it seems to work pretty well for what I need.
Scoring
Scoring is very simple. Shots have to hit the bowling pin of the Q target. There is no call for headshots or specific body portion shots. To pass, shooters have to score a 70% or higher, which means 35 shots have to hit a fairly big target. Any shots fired outside the time limits are misses.
Hitting the Range With the Kansas CPOST Qual
What you should know about this course is that there are no required or timed reloads. Ammo management and reloads are entirely on the shooter. If you are shooting a string and run empty, you have to reload and keep shooting. This can make things interesting and force you to either reload quickly or plan ahead.
Stage One: 1.5 Yards
Yep, we start up close and personal with your target. This likely simulates an interview position and situation that goes bad. At the beep, you have to step to the rear and then laterally. At the same time, you have to draw and fire three rounds into the target. You have a total of three seconds to get it done.

Do this drill twice for a total of six rounds fired.
Stage Two: Five-Yard line
This time we are far enough to draw and engage from a safe distance. At the beep, you’ll draw, assume a two-handed grip, and fire three rounds into the threat. You get five seconds to get this drill done. Not bad, fairly generous, and it’s close range, so you should have no problems.
You’ll commit this drill twice and for a total of six rounds fired.

Stage Three: Seven-Yard Line
Stage Three sees us enter that golden seven-yard line everyone loves to talk about. From here, we will assume a low ready hold. At the beep, fire the gun twice into the target. Then you’ll transition to the weak hand but support it with the strong hand and fire two more rounds. You have four seconds for this drill. This is only shot once.
Phase Two
Remaining at seven yards, you will have the gun in a low ready with only your strong hand. At the beep, raise and fire three rounds from the gun with your strong hand only, and you have four seconds total.

Phase Three
Start in the low ready. At the beep, you will step laterally and fire three rounds into the target with a two-handed grip. You have four seconds. Reholster your firearm.
The second part of this drill has you repeat the drill, but this time drawing and firing three rounds in four seconds.
Stage Four: 10 Yard Line
At 10 yards, we start with a holstered gun. At the beep, draw and fire four rounds into the threat. You have five seconds to finish this drill.
Repeat this drill twice for a total of eight rounds fired.
Stage Five: 15 Yard Line
We are backing up to a range some people might not find comfortable. This drill has you drawing and shooting the target four times. You have six seconds total. Don’t rush your shots; it’s better to stretch the time out and make those hits.

Phase 2
Phase 2 has us draw and fire three rounds in five seconds. Again take your time and see your sights; five seconds is an eternity.
Stage Six: 25-Yard Line
We are moving behind barricades now. At the 25-yard line, you might feel under-gunned to the extreme, but we have time, and you should take it. You’ll start behind the cover, and at the beep, you’ll draw your firearm, lean around the cover, and fire five rounds. You have 15 seconds.

Phase 2
We are still using cover, but this time it’s in a kneeling position. At the beep, you’ll draw and use the barricade as a support and fire five rounds around a barricade in a kneeling position. You have 15 seconds. Don’t rush those shots!
My Thoughts
I’ve become a bit of a broken record here. The times are fairly generous for most of these strings of fire. The target is also massive. New shooters will have a great time and get to work on some skills under objective standards of time and accuracy. It does bring you out to some distance and likely will break some shooters out of their comfort zone.
I do like the use of cover and the movement. Additionally, there is a ton of drawing, and that’s always a valuable skill to have. It’s great for newer shooters looking to stretch, but I would really like armed professionals to have some tougher standards.
Regardless, I got to shoot a good bit, and I always enjoy that. What are your thoughts? Let us know below, and also, I’mma go listen to some Kansas.
