The Carrier Key within the AR platform is a key component to proper gassing of the system. It creates a seal between the key and the tube which then pushes the bolt to allow the gun to cycle. A key can be damaged or come loose which will need replacing to keep that proper seal. Proper quality of parts and tools are vital to not damaging more than just your key during removal.
Why Replace It?
The carrier key on an AR-15 bolt carrier group (bcg) acts as a sealant between the gas tube and the carrier key. As the gas comes through the gas tube it pushes out into the gas key which then pushes the entire bcg back thus cycling the gun. One, that is a lot of force getting pushed into a part that is only being held on by two screws, and two, if any gas leaks out from the key you lose pressure that is needed to push the bolt back.
Inspection of the Carrier Key
1. Inspect the lip inside the key, is it worn down?
If you look closely there is a small ridge on the inside of the carrier key. This is meant to act as a sealant around the tube. That can wear down over time, thus allowing gas to leak out.
2. Is the carrier key dented?
A dented carrier key can cause damage to the gun, specifically your gas tube. The carrier key is constantly hugging the gas tube as it goes back and forth, a dented key can put added stress onto what is supposed to be a smooth relation.

3. Is the carrier key loose?
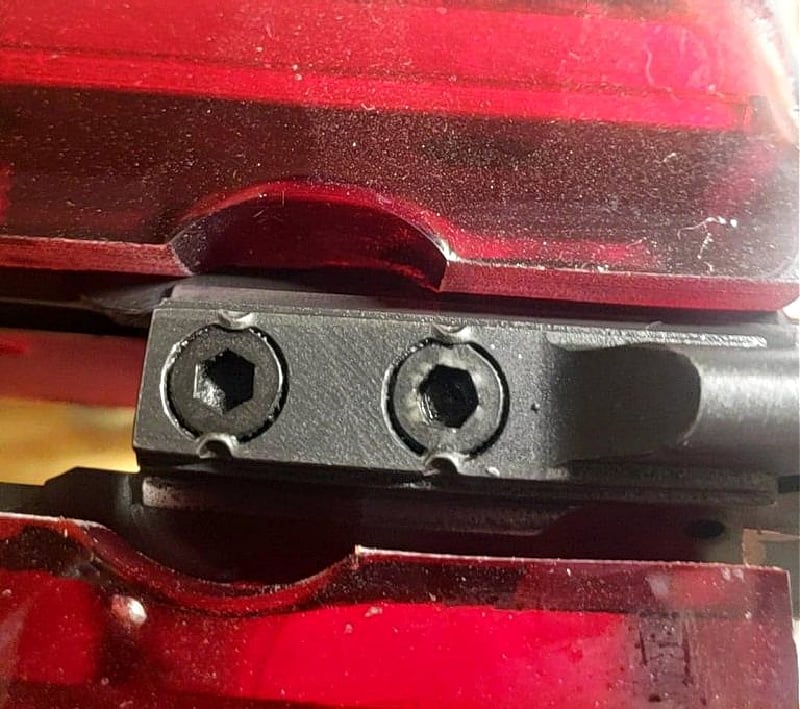
This is probably the most common reason you’ll see for a key needing replacement. The key is held onto the carrier by two screws. These screws, if not properly installed, can come loose over time thus allowing the key to be loose. A quick tug on the carrier key should show if there is movement or not. There should be zero movement.
4. Is the carrier key bent?
A simple carrier key alignment test will show if your key or gas tube are bent or misaligned. To do this, strip the carrier of everything except the carrier itself. So no bolt, firing pin, cam pin, etc. Remove the charging handle from the upper receiver and hold the upper receiver at a 45-degree angle. Slide the carrier into the receiver and let it fall on its own weight onto the gas tube. If it hangs up when reaching the tube that means either the tube or key is bent.
Often, the tube is the issue. Some light tweaking of the tube should fix it, though if the tube was installed poorly and it is resting on the barrel nut it may take reinstallation of the barrel and tube to adjust it.
Why not just replace the whole carrier? Well, that can be over a $100 dollar difference in parts. Add in the tools you need for your first replacement and maybe that evens out. However if you will be doing more than one within your life span, a 40-dollar carrier key and screws is a lot more worthwhile than a 170-dollar carrier.
Quality of Parts
Just as armorers or gunsmiths need quality tools when doing a job they also need quality parts to work with. When it comes to a carrier key, the screws are the main part that you need to focus on brand for. Taught from a man named Will Larson, or others may know him as IraqGunz on M4Carbine.net, one of the things Will harped on during his Semper Paratus Arms Armorer Courses is using the correct screws when it comes to carrier key installation.
Note: Both screws should be replaced anytime a carrier key is uninstalled or installed. They are not to be used twice.
The screw quality is important not only for proper staking and holding but also for stress applied during removal. When removing the carrier key the operator will often try to turn the screws hard enough to break through the metal staking. This applies a lot of torque and stress to the screws and often can strip out even the strongest of screws if not done correctly. The torque value for these screws during installation is 50-58 in-lbs so the screw needs to be able to hold up to that value as well.
First, say NO to YFS screws. You’ll see these a lot. They are Chinese branded screws and are very cheaply made. They will have the letters YFS on them. Brownells has been known to sell YFS screws with their carrier keys, it is unknown if they still do it today though.
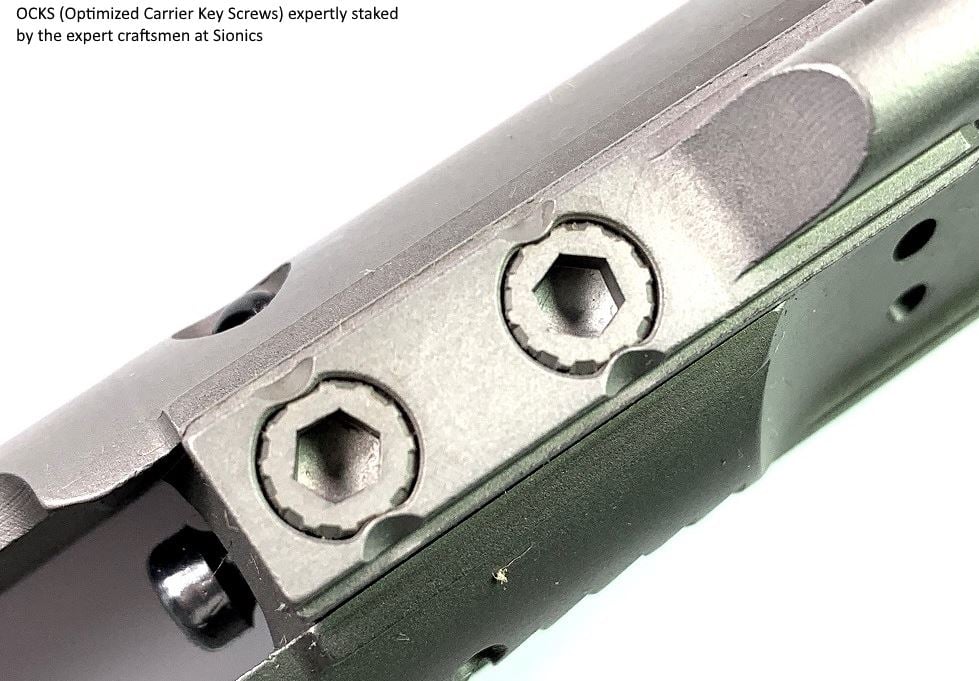
Instead of not made in the USA YFS screws, you have two options. The standard cap screw by Colt is the standard when it comes to mil guns. Or, the Optimized Carrier Key Screw (O.C.K.S), made by Ned Christiansen from Michigan. These screws are made with 12 splines that act as a pocket for the metal being staked onto it.

In all reality, with the OCKS you are getting a higher quality of screw for the same price as the standard cap screw.
Remember, when ordering a new carrier key the key often doesn’t come with the screws and will need to be ordered separately. Ensure that you are ordering two screws and not just one. Some websites offer it as two in a package or one separately.
Tools Needed
Now for the quality tools. Carrier Key removal and installation can be super easy or very tricky depending on the company that it came from. Some companies will put red Loctite on their screws which only reacts to heat to loosen. Others will stake their screws very well which means you’ll need to push the metal back because turning the screws won’t be enough to break through the metal. Due to all of these variables for removal you may need a Dremel and a sharp pointed punch. You will also need a proper staking tool due to the key being very strong heat-treated metal.
Note: True mil-spec gas key installation involves no gas sealant under the key or Loctite on the screws.
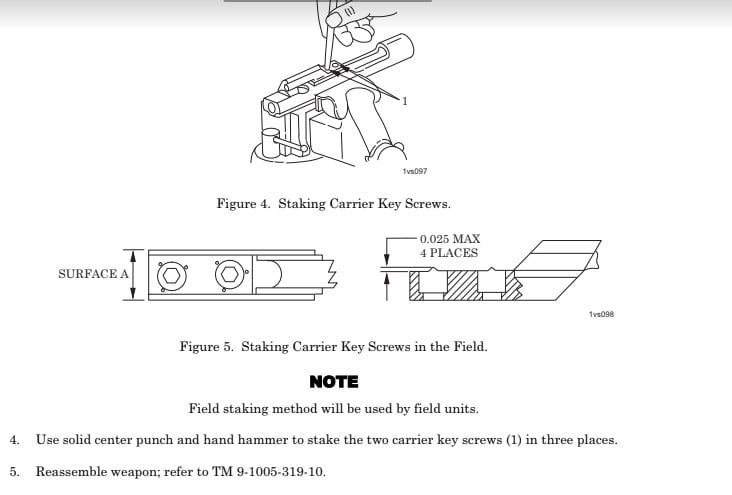
Field Staking
There are actually two types of staking methods. One is the field staking method which is meant to be a field expedient method to fix a loose key. Not the most reliable but a quick and easy fix that just needs a punch and hammer. (Usually a strong punch and big hammer due to the metal being so hard.)
Staking Tools
The proper and most reliable method of staking involves a tool/jig.
Brownells
In most government small arms repair shops (due to being easy to order off of Brownells) you will see the Brownells Staking Tool. This is an easy-to-use tool that involves only the tool and an Allen wrench to use. On the top, you’ll see one screw that acts as a locking screw to keep the carrier in place. The other screws on the side have a sharpened point on the side that contacts the carrier key. As you tighten the screws the metal will be pushed in by the sharpened edges which leads to a nice stake.
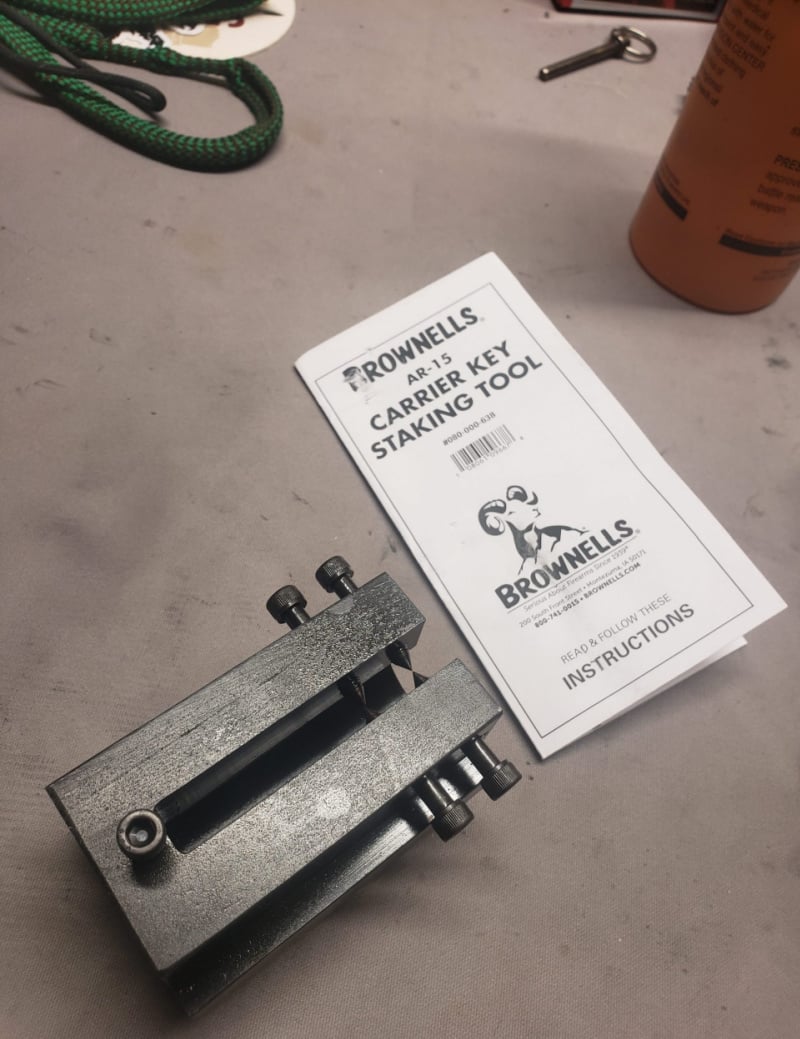
The only issue that has been seen with this tool is that due to the screws being so sharp sometimes it’ll push the metal up as it is staking which then may need to be filed off. A positive though, Brownells offers extra staking screws for the tool so you can play around with filing the sharpness down if you want and order more if need be.
MOACKS
The MOACKS is a smaller and lighter staking tool over the Brownells. Instead of screws that are parallel to the floor, the MOACKS screws come in at an angle and have a more rounded tip. The tool is lined up by an Allen wrench going through the tool and being placed into the carrier key screw. From there it’s the same concept, tighten the screws on the tool until a stake is made.

Both tools are entirely adequate in making a strong enough stake to keep the screws from moving.
Below is a video of how to properly install a Gas Key by following the Army 23&P technical manual. NSZ-85 is using YFS screws due to them coming with the carrier key off of Brownells.