Do you want to build your first AR-15? The market is flooded with AR-15 rifles, so they are selling for dirt cheap right now. Smaller companies are popping up all over the country offering great deals of surprising quality. But buying an AR-15 and building one are two different things. Regardless of the money you put into building your own rifle, it means more to you because you put every pin and spring in that thing.
Another benefit is you can build it exactly how you want. People build their own rifles for different purposes. Some want specific parts of the highest quality for competitive shooting or hunting. Some want a flashy trophy gun to show off to their buddies at the BBQ, and for others, it’s about the experience. I fall into that last category. I admit, I like shopping. Looking for the right product or part is exciting to me.
What parts are needed?
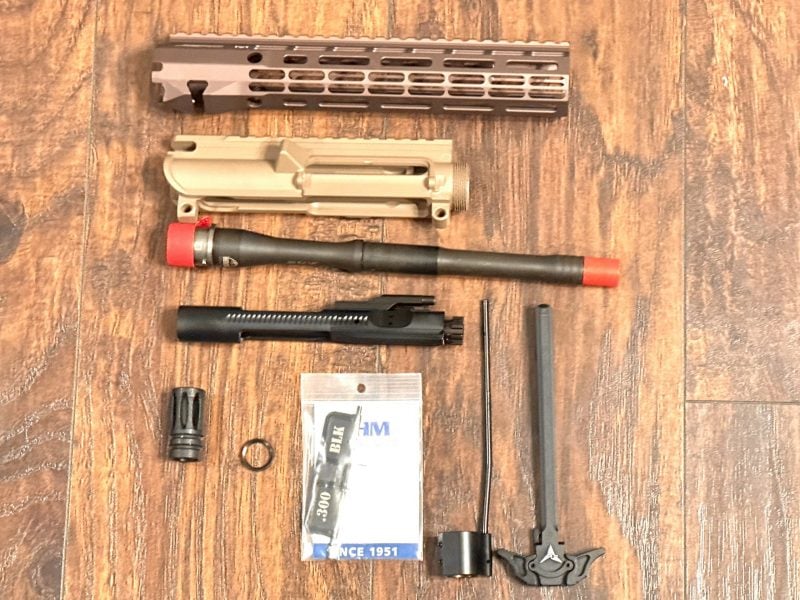
Here is a quick guide to the parts you will need when building an AR-15. I am going to base this list on a typical Mil-Spec AR-15 with a 16-inch barrel, chambered for 5.56 NATO. We will go over each part more below before getting into what tools are needed for the build.
- AR-15 upper and lower receiver (stripped)
- AR-15 lower parts kit (select a kit with the trigger assembly included)
- AR-15 upper parts kit (this has the forward assist and dust cover)
- Carbine-length buffer tube with buffer spring and weight (these can be purchased together)
- BCG (bolt carrier group)
- Charging handle
- Adjustable stock for carbine length buffer tube
- Barrel
- Free-float Handguard (barrel nut comes with most handguards)
- Muzzle device (flash hider or brake)
- Gas tube and gas block (the tube length will depend on the barrel selected)
Selecting the upper and lower receiver
Buying the parts for your rifle build is fun, but it can also be frustrating if you don’t know what you want. There are a lot of options available, and you will be looking for the next 10 years if you try to look at them all. If you have never built an AR-15 before, I would recommend building a cheap one first. You can build a high-end rifle the first time if that is what you want, but a cheaper one gives you some practice. And trust me, mistakes will be made on the first go-round.

Everything part you buy for an AR-15 will determine quality and price. Some people like to buy different brands of upper and lower to get the gun they want. I have done this before and haven’t had too many issues, but it may be a good idea to stick with a matching set for your first build. If you want to experiment with different colors, several manufacturers (like Aero Precision) have lots of options. If you order the upper and lower from different places, there is a small chance they will not fit together very well. The finish of the two may also be different. So just keep that in mind as you start your shopping.
Upper/lower kits and buffer tube assembly
Most of the parts that need assembling are on the lower receiver. If you are planning to use a custom trigger and not a mil-spec trigger, then purchase a lower parts kit that doesn’t include the trigger assembly. If not, you can find lower parts kits that have everything for the lower except the buffer tube, spring, and weight.
The upper parts kit will have the forward assist assembly and dust cover assembly. If you start getting into custom/high-end parts, you may have to purchase parts separately for the upper and lower. But, if this is your first AR-15 build, I would recommend using standard Mil-Spec kits.
If you are installing a rifle-length fixed stock, you will need a carbine buffer tube. This is what most adjustable (six-position) stocks are compatible with. You can easily find kits that have the buffer tube, spring, and weight sold together. If not, buy the buffer tube separately and then purchase a spring and buffer weight package. There are a lot of choices for adjustable stocks so take your time selecting the one you want.
You won’t need it until the gun is built. It only takes a few seconds to install after the build. Magpul makes awesome stocks and has the most options of any company. When selecting a stock, keep in mind what type of sling you want to use. I like the QD (quick detach) slings, so I use stocks with QD attachments on them.
Barrel, Handguard and Muzzle Device
The barrel needs to be 16-inches or longer for it to be a rifle in the eyes of the government. Anything shorter makes the gun a pistol or an SBR (short barrel rifle), which is subject to NFA regulations and need to be registered and approved by the ATF before you build them. Pistols need a pistol buffer tube which is made so that stocks will not fit on them. Arm braces used to be a good option for AR pistols, but their legality is questionable and still being challenged in court at the time of this writing. Do your due diligence before making a purchase.
When you select your barrel, the first major choice you will have is the type of material. Stainless steel is the best for accuracy, but it’s heavier. Unless you specifically want a stainless barrel, I would recommend one that is 4150 CMV (chrome molly vanadium) that is compatible with a carbine length gas tube and .750 gas block.
Unless you choose to use an FSB (front sight base) which is a fixed triangle-shaped front sight, you can use a free-float handguard. The length of the handguard is up to you and just about any length you want is available. Some people like to use a full-length handguard that stops just before the end of the barrel. Others prefer a shorter handguard (like 12 inches) to keep the gun lighter. Some of this will depend on what you plan to attach to your handguard.
What tools do you need?
Building an AR-15 is not hard once you learn the basics of how they work. Each pin and spring have its own place and a simple diagram can help you keep track of which part goes where on the gun. We have previous articles covering the building process as well. Having the right tools will make your rifle-building process fun.
Without them it can be frustrating, so I recommend spending a little money on some armorer’s tools along with your gun parts. If you are only planning to build one rifle, ask a friend or someone who has the tools to help. Here is a list of tools that are needed for building your AR-15.
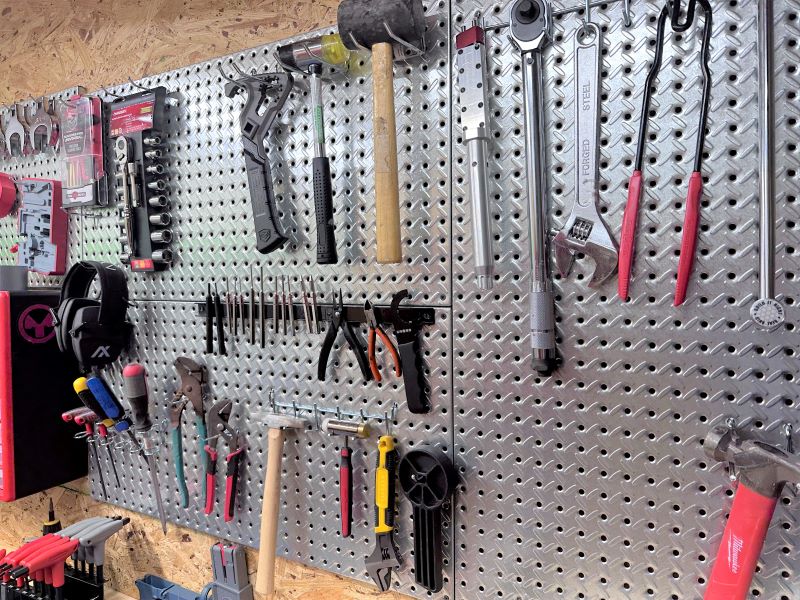
- Work Bench (any place to setup a vice and work on the gun)
- AR-15 Hammer, Pin, and Punch set (I recommend the Real Avid Accu-Punch AR-15 Pin & Punch Set)
- Armorers Wrench (The Master Armorers Wrench by Real Avid is a multi-use tool that works great)
- AR-15 lower vice block (this is a tool that is shaped like a magazine and clamps into a vice to hold your gun while working on it)
- Armorer’s Non-Slip Parts Tray (this holds all the little pins and springs, so they don’t get lost)
- Torque Wrench (for tightening the barrel nut)
- AR-15 Upper Vice Block (this holds the upper receiver when working on it)
- Hex/Allen Wrench Set
- Master Armorer’s Kit (optional)
What brand of tools should you buy?
There are several options for companies that make armorer tools. The most common are Wheeler and Real Avid. A few of the other tools are things you may already have around the home. It is possible to build an AR-15 without a vice, but it’s much better to have one along with the lower and upper vice blocks.

Ready to start your build?
For first-time builders, I would recommend a few things. First, be patient and don’t get frustrated if something goes wrong. Losing a spring or pin is okay. They make spring and pin replacement kits just for this. Read some how-to articles and/or watch some videos before you start the process.
And finally, if you know someone who has built an AR-15 before, ask them to help while you put it together. Other than that, it’s a fun process and you get to say “I built that” when you take it to the range. Just remember to perform some safety/function checks on the gun before firing it.
Shop This Article
-
Ballistic Advantage Classic AR-15 10.3" Carbine-Length Gas 5.56 1:7 CMV CL Barrel
 $157.99$152.99Save $5.00