When you’re working to hone your shooting skills, extra tools can come in handy. This extends to shot timers, which tend to be most useful as stand-alone devices but also exist as apps for smartphones. Shot timers are great for fine-tuning your drawstroke, finding out how long it takes you to get shots on target, and a wide variety of drills. We’ve rounded up the top five shot timers that are worth adding to your range day.
Top 5 Shot Timers
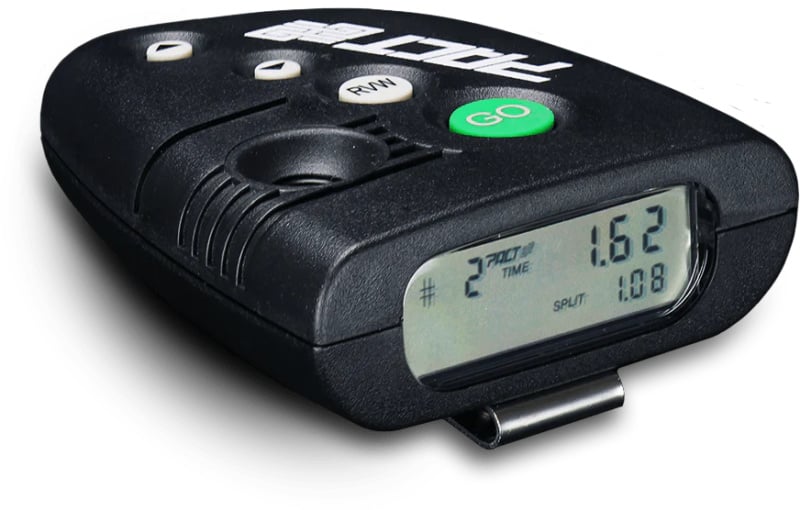
Pact Shot Club Timer III
Of the many brands on the market, Pact is among the best known. The Pact Shot Club Timer III is a well-made shot timer that’s user-friendly and also offers a slightly lower price point than some models. This shot timer has an ergonomic design for the ideal fit in your hand, and it has buttons that are easy to operate by touch, so you can run your timer without looking (with a little practice). It features a single metal clip so it can be hooked onto the user’s belt or waistband.
The Pact Shot Club Timer III measures 5.5 inches by 4.75 inches by 2.5 inches and weighs 0.58 pounds. It’s light enough not to add excessive weight to your belt and streamlined to reduce the risk of snagging. This model has a black housing and runs off a single 9-volt battery. Features include the capability to record multiple shots in a single string of fire, an extra loud buzzer, and the ability to choose between instant and delayed start.
Users can review split times and shot times in each string, and par time can be set as well. The digital screen is easy to read and view even while the timer remains on your belt. This is a good, all-around shot timer for shooters looking to improve their times who prefer a straightforward device.
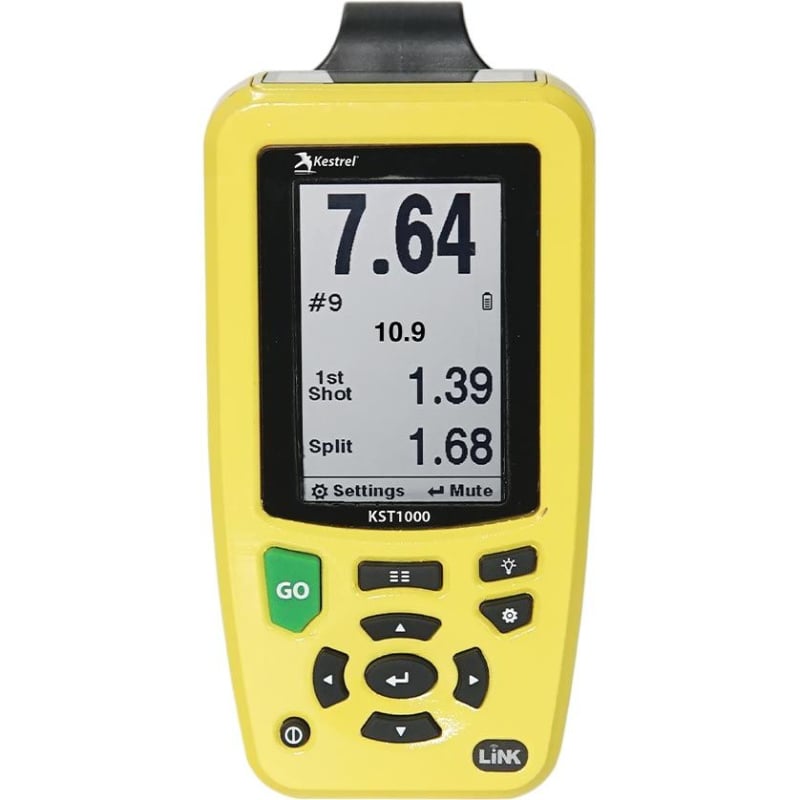
Kestrel KST1000 Shot Timer
For shooters needing a truly rugged, versatile shot timer with numerous features, the Kestrel KST1000 Shot Timer is a great choice. Not only is it backed by a five-year warranty, but there are also many informational videos on its use on the company’s website. The Kestrel KST1000 Shot Timer is larger than others but that’s due to the massive number of features it has to offer. This timer was designed collaboratively with Doug Koenig, so you can be confident it offers useful and precise settings and results.
The Kestrel KST1000 Shot Timer has a bright yellow housing made of rigid material designed to withstand hard use. It’s designed and made in the USA and is waterproof and dustproof. Also, it’s been durable drop tested according to MIL-STD-810G standards. There are five nameable presets on this shot timer as well as two easy-to-operate screens, meaning it can be read from the hip or hand. The buzzer is loud and easy to hear. Perhaps best of all, this model is Bluetooth-compatible. This shot timer has an interface with raised, clearly shaped buttons, making it easier to operate by touch.
If you’re in the market for a high-end shot timer that’s known to be reasonably bomb-proof, check out the Kestrel KST1000.
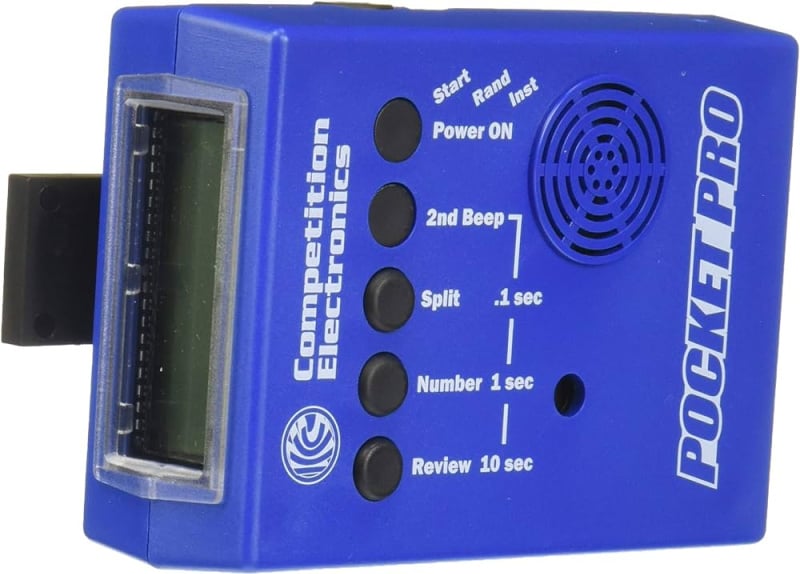
Competition Electronics Pocket Pro Shot Timer
If you’re looking for a good, basic shot timer that’s well-made and proven in the field, the Competition Electronics Pocket Pro Shot Timer might be perfect for you. This shot timer is designed to deliver super precision and displays times to 199.99 seconds. It’s meant to help shooters improve shot times and offers a classic layout that’s easily recognizable for many gun owners. It has a bright blue, square housing and a neat row of buttons for simple operation.
The Competition Electronics Pocket Pro Shot Timer measures 3.125 inches by 4.25 inches by 1.5 inches and weighs 6.5 ounces. It’s powered by a single 9-volt battery and has an automatic shut-off after ten minutes of inactivity to preserve battery life. This shot timer is made to be operated by right- or left-handed shooters with no concern about the shooter’s hand covering the buzzer or sensor. The 0.5-inch display is easy to read. Features include the ability to review up to 50 shots—forward or in reverse—adjustable sensitivity, and a separate sensor and buzzer. It has a clothespin-style clip to attach it to your belt or waistband.
SG Shot Timer with U-Grip
The Shooter’s Global brand offers the SG Shot Timer with U-Grip, a timer that’s designed with an eye for detail. This shot timer has a U-shape, as its name suggests, allowing it to fit more securely in the user’s hand. It has a black housing and a screen with an innovative design that utilizes the sun’s rays to illuminate the screen from the inside for excellent contrast and clarity. If the sensor detects low light, it will activate a backlight to keep the screen bright.
The SG Shot Timer with U-Grip is made for one-handed use and has an interface that’s user-friendly. Navigating the settings takes a minimal number of clicks using the buttons located on the side of the device, and there’s even a Dedicated Range Officer mode that is straightforward to use during matches. Features include echo filtering, built-in memory, par times, a 5-100 adjustable volume level, and spy mode that allows synching with compatible devices. This is one of the shot timers that is truly compatible with suppressors. And thanks to advanced firmware, you can even record dry fire sessions and review your performance for dry fire and live fire as it relates to set goals.
IPSC Shot Timer
There are quite a few shot timer apps on the market for Androids and iPhones, and the IPSC Shot Timer is a good example. The IPSC Shot Timer is for competitive IPSC, USPSA, and IDPA shooters. It can be used with live fire or dry fire depending on sensitivity settings, and although it was updated in 2019 and has been around since 2011, it’s still listed as being the BETA program.
The IPSC Shot Timer can be used on lengthy strings of fire or set to time only a specific number of shots fired. It works well for par time and offers a variety of relatively user-friendly settings. The fact that it doesn’t automatically run ads is a nice bonus as well. It’s possible to set the beep to randomization and also to adjust sensitivity on your phone, which does mean it might depend on your specific phone when it comes to how well that works.
It’s worth noting that there are quite a few options for shot timer apps and you might just need to try a few to find one that fulfills your needs and also works well with your phone.
