If you’re reading this, you’re probably already aware that your handgun grip matters. And by “grip” we aren’t referring to whatever material or sleeve is on the gun itself, we’re talking about how you hold that gun (the thumbs forward grip is one example). How a handgun is held can make or break accuracy, and there’s more than one way to do it (and no, the other ways aren’t all wrong). Interested in learning more? Check out this handy guide on grip and thumb positions.

Why does handgun grip matter?
Not only does how you grip your handgun matter, it’s essential to your shooting success that you master that grip. Your grip and shooting stance are tied together as well. For example, if you prefer the Weaver Stance, you’re probably using a thumbs forward grip exerting a balance of push-pull—dynamic—tension. Sound challenging? It can be.
How you hold the gun directly translates to accuracy. Uneven pressure can pull shots to one side or the other and a low, weak grasp contributes to a lack of control and can even create an unsafe situation. How you position your thumbs is a factor in the even application of pressure as well as your ability to maintain control during live fire.
Instead of relating grips to specific shooting stances—which only really applies to Weaver, anyway—let’s consider the possible grips and how to properly execute them. For the sake of simplicity, let’s approach these all as strong-sided grips. If you’d like to shoot mirror, simply reverse the instructions so the strong side hand becomes the support side hand.

What is the thumbs forward grip?
The thumbs forward grip has been the most commonly used handgun grip for years now. It’s understandable considering this grip does a good job of facilitating an even, firm grip while keeping thumbs comfortably aligned with the gun’s slide.
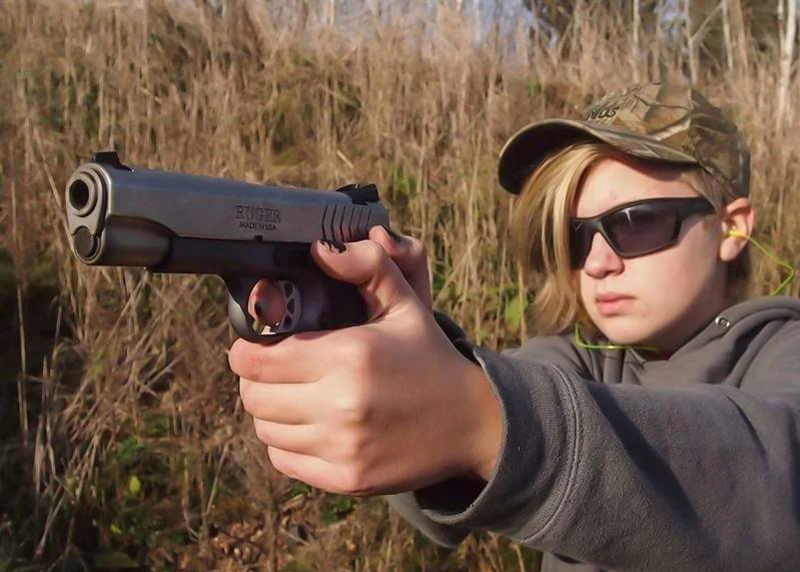
Start by taking hold of the handgun with your strong side hand. If you’re right-handed, this would be your right hand. It’s important to take a high grip, meaning the webbing between your thumb and pointer finger needs to be pushed firmly into the beavertail of the handgun’s grip. Your pointer finger is then indexed along the slide—meaning it’s rested straight out on the slide and raised up so you can see air through the trigger guard, but no finger—and the remaining three fingers wrap around the grip. There are instances with smaller guns where those three fingers might not all fit on the grip’s surface. If that’s the case, simply allow your pinkie to curl back the same way the other fingers are doing. It’s also possible to get a magazine extension for many magazines so you have a pinkie rest.

With the gun held snugly in your strong side hand, extend it in front of your body. Raise your support side hand to the gun and wrap it around the grip on top of your strong side hand. The specifics of finger placement at this point are affected by how long your fingers are, but basically the fingertips of the strong hand should be held tightly around the top of the palm of your support hand. Grip size of the handgun being held also affects exactly how much fingers overlap. A good way to figure out if your grip is good is to check to see whether the middle finger of your support hand is resting snugly atop the middle finger of your strong hand.
There should not be a gap between the heels of your hands at the back of the gun. Furthermore, when you’re doing this grip correctly, it should feel fairly natural and simple to place both thumbs along the off side of your pistol. The thumb of your strong hand will rest on top of the thumb of your support hand, with the support hand thumb reaching further forward than the strong side thumb. Both thumbs reach for the target.
You might notice some shooters use thumbs forward more aggressively than others. Sometimes the thumbs are fully extended, actively, along the slide of the gun. Other shooters might allow the upper—strong side—thumb to bend over slightly and “hold onto” the back of the support side thumb. Finger length matters; shooters with larger hands have an easier time executing an active, aggressive thumbs forward grip while those with shorter fingers won’t have a precise-looking grip.
The key to a good thumbs forward grip is to apply even pressure. Unless you’re doing Weaver Stance, which shifts how your arms are held, you’ll probably be in Isosceles Stance. That means your arms will be held out in front of you to form a triangle and the pressure exerted on the handgun should be equal. A solid crush grip and strong thumbs forward go a long way to improving overall accuracy and control.
What’s thumbs down/thumb over thumb?

The thumbs down—or thumb over thumb—grip applies the same equal pressure as the thumbs forward grip, only with different thumb positioning. To successfully execute thumbs down, rather than aiming both thumbs forward, point them down. Do this by placing the thumbprint of your support hand on the thumbnail of your strong hand, with both thumbs tucked tightly downward. This grip can feel awkward when you first do it but it’s favored by many shooters.
What’s the thumbs up grip?
It isn’t common to see a thumbs-up shooting grip anymore but ever so often you might see a shooter gripping their handgun with both thumbs raised as though they’re giving a thumbs up. This does work for some shooters and might be especially useful with arthritis or injuries that interfere with your thumbs. It isn’t preferred to the point that thumbs forward and thumbs down grips are, but it’s still used occasionally.
What grips should I not do?

There are a few grips or thumb positions you should always avoid, including:
- Teacup grip (using your support hand to cup the base of the grip of the handgun)
- Thumbs crossed (crossing thumbs behind the slide of a semi-automatic in an X)
- Wrist support (gripping the wrist of your strong hand with your support hand—no, it does not provide any support or help control recoil)
- Thumb on both sides (one thumb aimed down either side of the slide.
Also, take care to avoid gadgets that involve strange thumb placement. And remember, although wrapping the pointer finger of your support hand over the trigger guard is typically frowned upon, there are rare instances where it works well for people.
What about riding the safety?

Some instructors and shooters will suggest riding the thumb safety with one thumb while others will baldly state that’s a great way to snap the safety off. Here’s the thing: if your hands fit the gun in such a way that you’re bumping the safety with your thumbs and accidentally putting the gun on safe while shooting, you really want to consider going ahead and riding that safety. Is it possible to snap off an external thumb safety? Of course, it is, but it isn’t guaranteed to happen. In fact, it’s more likely it won’t.
If you do ride the safety, do so with your strong side hand’s thumb while in the thumbs forward position. With thumbs down, you’ll have your support thumb’s thumbprint over the thumbnail of your strong hand, so it will be the pad of your strong side thumb riding the safety. Personally, I’ve found bumping the safety to be more of an issue while shooting 1911 platform handguns with my thumbs down.
Which handgun grip should I use?
Frankly, it’s a matter of personal preference. There are shooters who will tell you that you can only be successful if you do as they say, whether that’s thumbs forward or thumbs down, but in reality, it depends on your hand size and your gun. Long experience with a wide variety of handguns has taught me it benefits me to run most guns thumbs forward and some guns thumbs down. It depends on the gun. The difference in accuracy can be quite significant, so I do recommend becoming proficient in more than just thumbs forward.
What’s your favorite grip and thumb position? Tell us in the comments below.
