Last week, in Parts 1-4, we ordered parts and assembled the lower receiver of an AR-15 rifle or pistol. In this final installment of our Building an AR-15 series, I will cover the parts that need to be ordered for the upper receiver. Then, we can assemble the upper receiver and complete the AR-15. I want to cover the rest of this process in one article so I will jump right in.
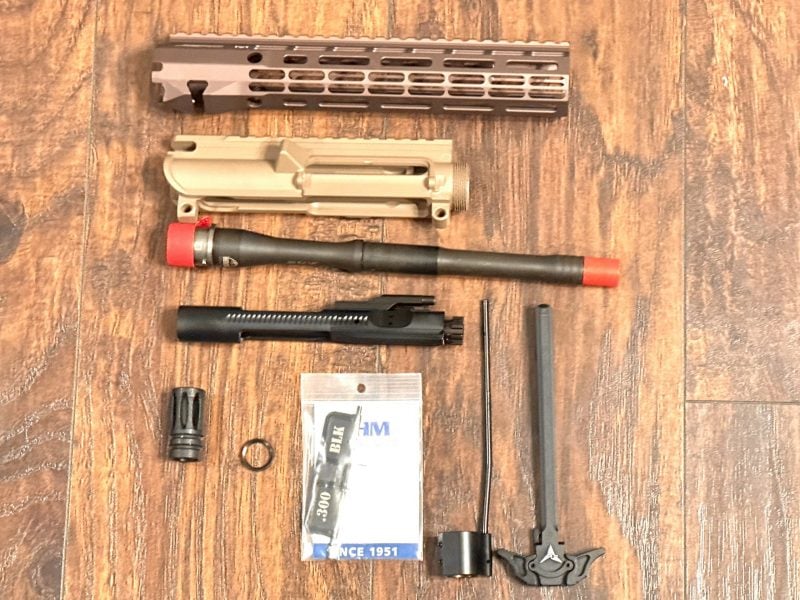
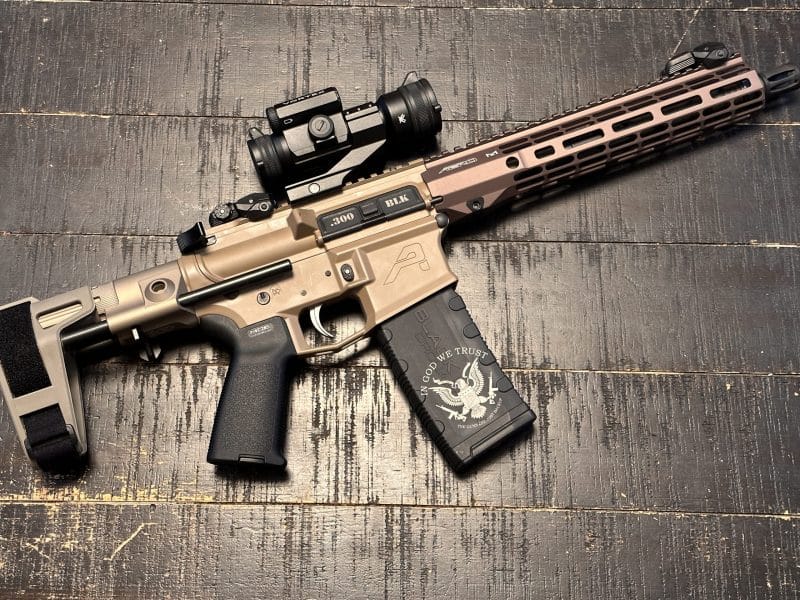
I ordered my upper receiver from Aero Precision at the same time as the lower because I wanted the color on these two parts to match. As long as they are mill-spec parts, they don’t have to come from the same manufacturer, but I would recommend it if this is your first build. The color scheme of the rifle can be whatever you want it to be. I chose to do a light brown upper and lower receiver with a darker brown handguard. Some want to stick to the traditional AR look and go with all-black. I have started to like mixing colors on my guns for fun. Here is a list of the parts that will be needed for this upper assembly:
- Upper receiver
- Dust cover
- Barrel
- Gas block and gas tube
- BCG (bolt carrier group)
- Charging handle
- Muzzle device

Getting Started
They make a tool that will hold the upper assembly in the vice while you work on it. Unless you plan to do this a lot, I would just attach the upper receiver to the lower and then set the lower in the Real Avid Vice Block. The takedown pins can be closed to hold it secure. The first thing we will assemble is the dust cover and forward assist. Most uppers will come with the forward assist already installed. The Aero Precision that I ordered does not have a forward assist, so I did not need to assemble that part.
The forward assist has a large spring and roll pin that comes with it. To install this part, slide the spring over the forward assist. Push it into the receiver with the curved part of the forward assist facing inward (towards the receiver). This should also line the holes up where the roll pin goes. An easy method I like to use for installing the roll pin is to use a small punch and push it through the hole from the bottom side. This will hold the forward assist in place temporarily. Then, insert the roll pin from the top using a 3/32 roll pin punch. You may want to push in on the forward assist as you go to make sure it is working properly. It should have spring tension on it as you push in.
Dust Cover
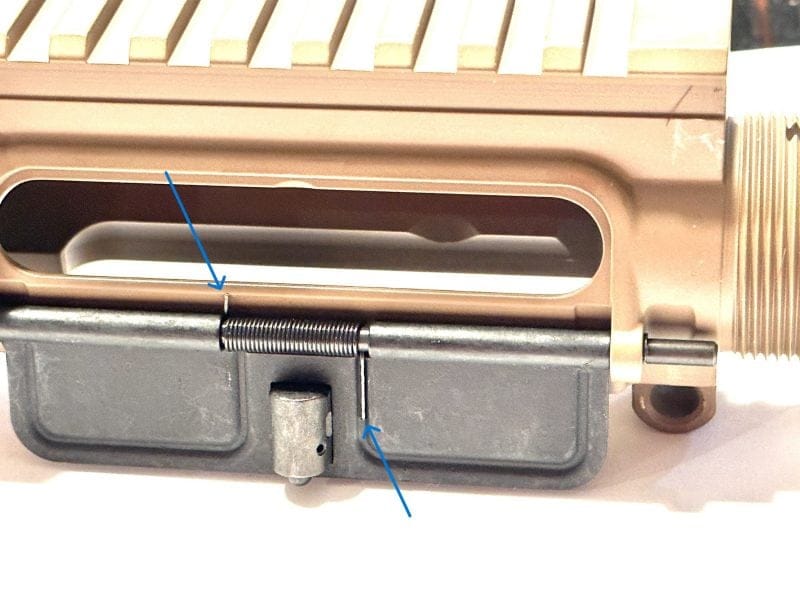
The dust cover can be a little hard if you have big fingers, but don’t worry it can still be done. There are several ways to install the dust cover, but here is the one I use the most. I start by placing the dust cover between the eyelets like it will sit when it’s opened (see photo below). The spring will need to be placed in the cutout of the dust cover with the short stem facing up and the long stem facing down. Next, from the front side of the gun, slide the dust cover part way in so that it goes into the spring about a quarter of the way.

Now, the spring is positioned as it should be, but you will need to grab the end of the spring the rod is not in (the side with the short stem) and give it a full turn. Once it has made a full turn, the spring needs to be pushed against the receiver and held down while you push the dust cover rod the rest of the way through the spring and into the other eyelet. When you are done, the spring should be centered in the dust cover with the short stem against the receiver and the long stem over the dust cover.

Installing the Barrel
Installing the barrel is one of the easiest parts of the upper assembly. I purchased a 10 1/2-inch .300 blackout barrel by Faxon. It is a 416-R stainless steel barrel that is Nitride coated. The barrel will determine how accurate the rifle is. A cheap barrel will work but may not last as long or be as accurate. I chose the Faxon barrel because it is tested and individually checked for headspace with a precision PTG gauge. This barrel requires a pistol-length gas block with a diameter of .750” which is a common diameter. I ordered a gas block that had the tube already installed on it.
There is a small post that sticks up from the back of the barrel. As you push the barrel onto the upper frame, this post will fit into a slot on the receiver (see photo below). If the barrel is tight and will not push in all the way, use a heat gun or small torch to heat the end of the receiver and the barrel will go in the rest of the way.

Apply some synthetic grease to the threads on the upper receiver. Then screw on the barrel nut that came with the handguard. Some barrel nuts will have some very thin washers that can be used to get the barrel nut lined up properly for the gas tube. Many of the new handguards now come with barrel nuts that do not have to be lined up, only tightened. I purchased my handguard from Aero Precision, which does not need to be lined up for the gas tube to fit over the top of it. Tighten the barrel nut down with a torque wrench (between 30 and 50 ft-lbs).
Installing the Gas Block and Tube
The gas block is the next part to install. If you have a block and tube separate, the tube will need to be placed on the gas block with the provided roll pin. Slide the gas block over the barrel with the tube facing the gun. There is a small opening in the receiver above the barrel that allows the gas tube to slide through. The gas block should stop directly over the small hole in the top of the barrel. This allows the gas from the barrel to go through the tube to make it cycle for the next round.

There are two small screws on the bottom of the gas block that can be tightened once the gas block is in the correct place. I like to hand-tighten the screws and wait until I have fired the gun before I go back and add Blue-Loctite to the screws to keep them from coming loose. If you need to take them back out, just heat them up with a heat gun first.
Muzzle Device and Handguard Installation
The muzzle device will come with a crush washer that goes on the end of the barrel. Use an armorer’s wrench to tighten the device until it is snug. The handguard is what really makes the gun come together. Place the handguard over the barrel nut and use the provided screws to secure it. Each handguard has its own barrel nut and system of attaching the handguard. The Aero Precision handguard I purchased uses a clamp system with one locking screw in the bottom.

Completing the Build
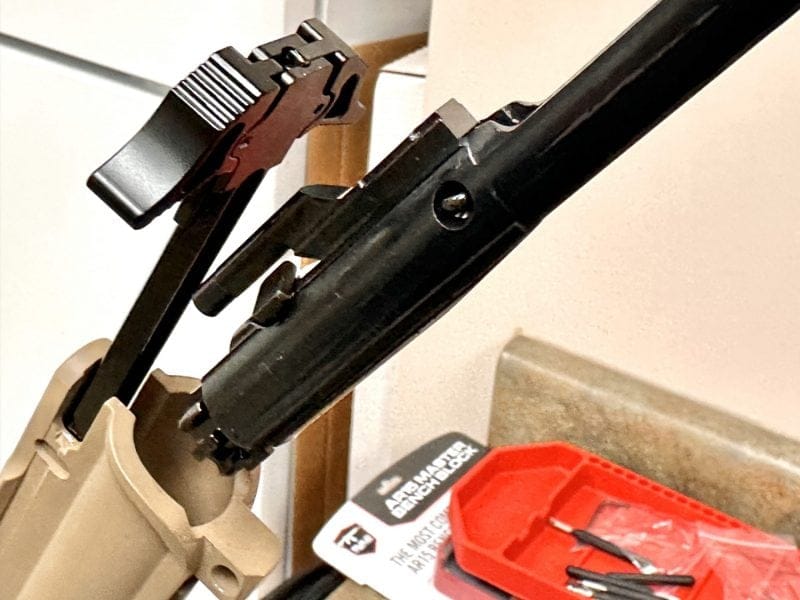
With all the parts installed, we can now insert the charging handle and BCG into the upper. To do this, push the rear takedown pin open and flip open the upper receiver. The charging handle will slide into the groove in the upper receiver and the BCG will slide in after that. The receiver can then be closed, and the build is complete.

I like to perform final functions check of the trigger, selector switch, and cycle the bolt. If all appears to be functioning correctly, I head to the range.
Note: if this is your first time building an AR-15, it is advisable to find someone with experience to check it before shooting. Other than that, enjoy shooting your new rifle for the first time and for many years to come.

*Disclaimer: While building an AR-15 rifle is fun and not complicated, it can be dangerous to fire a weapon that is not assembled correctly. This article is for information only. It is recommended that a weapon be checked by a certified armorer or gunsmith before firing.


