If you have any type of modern firearms, there’s a good chance you have or are planning to do some type of work on it. This could be upgrading parts, adding an accessory, or some other type of customization. Regardless of what you are doing, having a place to work on your guns just makes everything go smoother. I’ve said before, you can set up a workstation just about anywhere.
The first few AR-15s I built were at my kitchen table. But if you tinker with guns a lot, it is handy to have a dedicated area to keep your gun tools. Finding a place to set up a workstation, however, is a different story. If you’re lucky, you might have a workshop with enough room you can easily dedicate a small area to gun tools and a place to do your upgrades and repairs. But the rest of us must work with what we have.
Because of this, I made another place to park my truck which only left my wife’s car in the garage. I now had plenty of room for some other projects with the rest of the space. Today, I will cover building the benches and installing them.
Walls and Benches
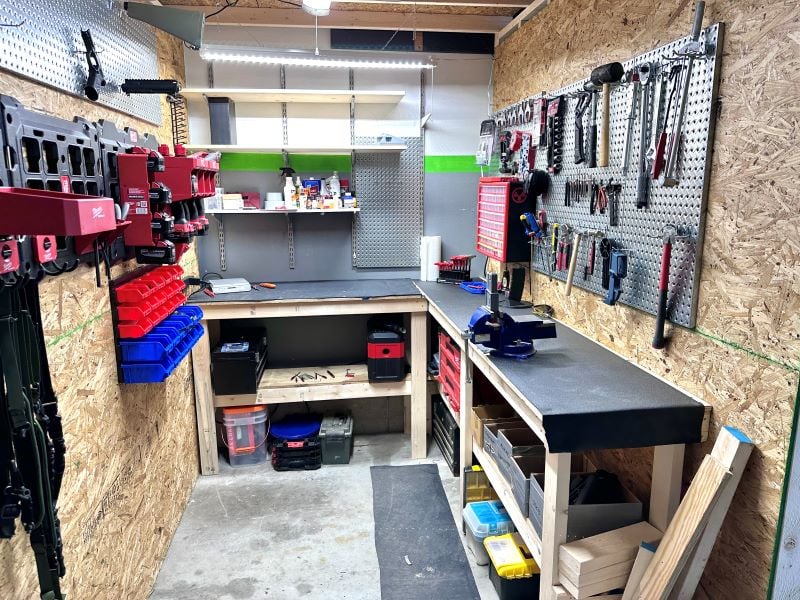
I wanted a dedicated area that was just for guns. To do this, I first set up two divider walls in my garage that were about eight feet long and six feet apart. I didn’t need a lot of floor space, just some benches to work at and a place to hang some tools. The ceiling in my garage was tall so I placed some 2×4’s across the top and covered it with OSB to make a storage area.
This would give me plenty of room for what I needed and still leave a place on top to throw those items you only use once a year. I also lined the walls with OSB (or chipboard as they call it around here) to give me something solid to attach items to. The workbenches were next. If you haven’t don’t much woodworking before, don’t worry it’s not hard. At least not on this level.
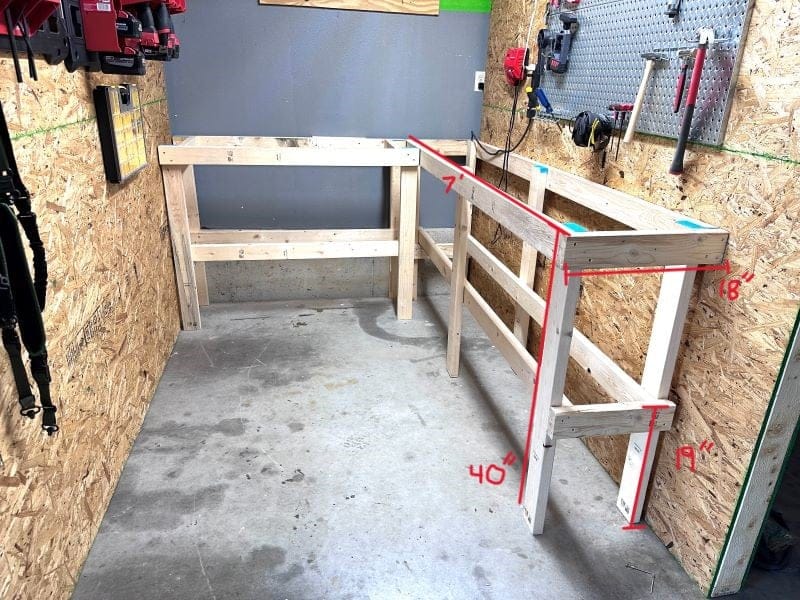
I decided to make the bench 40 inches tall (not including the ¾-inch top) and 18 inches deep. I had three walls to work with, so I put work benches on two of them and left one wall for mounting some other items.
Building the Benches
Again, even if you don’t do a lot of work with power tools, or building anything, it’s not hard. For this project, all you need is a circular saw and a drill. If you have a chop saw and or table saw then great, that’s even better, it’s not hard to do it all with a circular saw.
I am a fan of Milwaukee tools so I used my cordless saw, but Wal-Mart sells a cheap saw that will get this job done. To fit in the space correctly, I needed one of the benches to be seven feet long and the other 54 inches long to fit between the first bench and the wall.

I didn’t want there to be an overhang on the counter, so I put the legs on the inside of the frame. The size of your bench can be customized to any size you want. Think of it as building Legos. You need two frames (top and bottom) and four or six legs depending on how long the bench is. Screw the 2x4s together and if you mess up, just take the screws out.
Installing the Benches and Securing Them to the Wall
Once your bench or benches are done, they need to be secured to the wall to make them more stable. I could have made my corner bench one piece, but I wanted two separate benches just in case I decided to move on someday. I placed the benches together and screwed them to the wall and connected them in the corner where both benches met.
Once they were in place, I cut strips of plywood for the top. With the length of my benches, one sheet wasn’t enough, but I already had part of another sheet in my woodshop out back. I cut the strips at 18 inches so they would not overhang from the bench. If you haven’t cut plywood before, it’s not hard either. I placed a 2×4 under mine and cut it in the yard with my circular saw.
A tape measure and chalk line were all I needed to mark it. I used wood screws to attach the top onto the benches. The strips of plywood for the shelf (which was 15 inches from the bottom) were 12 inches wide. I didn’t want the shelf to be flush with the outside of the bench because I wanted more legroom. My garage floor stays dry, so I also left enough room under the shelf to store additional items. If you’re not doing this, the shelf can be much closer to the ground.
Placing a Soft Cover on the Bench
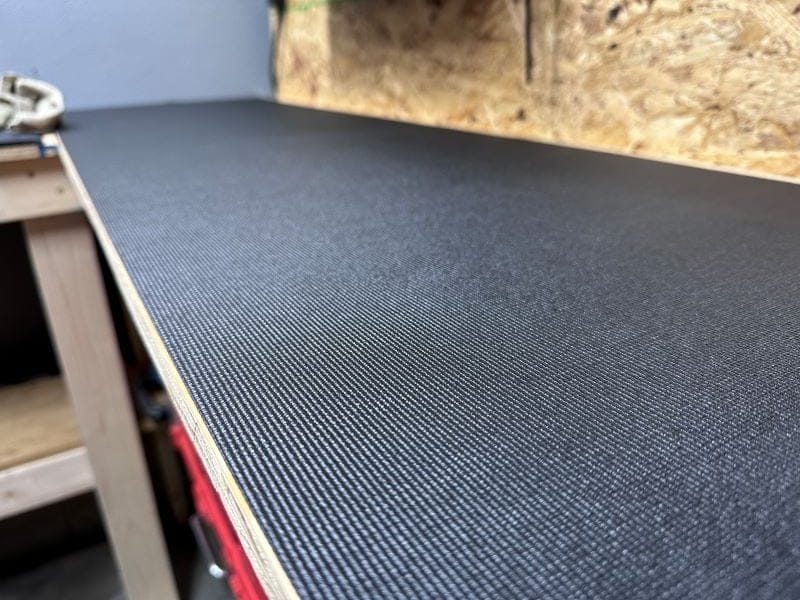
When you make any type of workbench, just about everyone agrees you need to cover it with something. Raw wood will soak up every bit of grease, oil, paint, sweat, and anything else that touches the surface. There are several options for covering the surface, but if your workbench is for guns, I would choose something soft.
Varnish or polyurethane is great for protecting the wood, but not so much when it comes to your guns. The cheapest covering is cardboard. Take some large boxes and cut the cardboard down to fit over the top of the workbench. It’s durable and when it gets dirty or starts to tear up, just replace it.
Another option is carpet, but I have never been a fan of carpet on a workbench. This is preference so if you have an old rug or roll of carpet laying around use it. What I ended up using is a roll of Husky drawer lining from Home Depot. This is the rubbery soft liner that goes inside the drawers of the large toolboxes.
Storage Below the Work Bench
As I mentioned in the first article, building a workbench is somewhat like playing with Legos. You cut the pieces to the size you want and put them together. Make it the height, length, and depth that works for your area. It’s common to have shelving under the bench so decide what type of storage you want when building the bench.
I built mine in the garage where the floors are always dry. I wanted a place to store larger items, so I put one shelf under my bench that was high enough for a five-gallon bucket to slide under it. This allows me to store any type of plastic container directly on the floor under the bench. Smaller items can go on the shelf above.
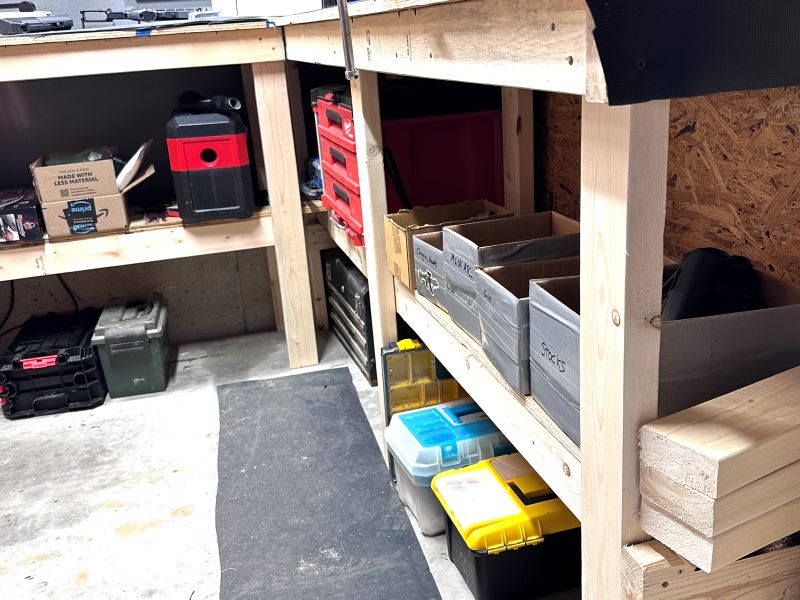
Plastic containers and buckets are great places to store bulk items under the bench as well. I keep a five-gallon bucket full of work rags and a plastic container with extra paper towels and cleaning items. Having these things close while working on a project just makes life easier.
What can go on the wall?
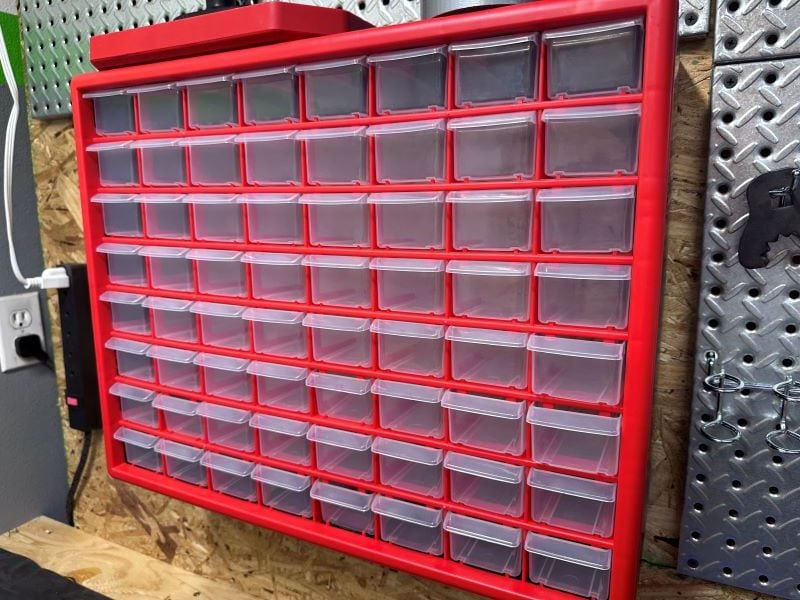
Another valuable storage system I use is a plastic storage wall hardware organizer. If you keep parts for handguns, AR-15s, or any other gun, this thing is the most valuable storage system you can get. A large one with small drawers like the Akro-Mills 64-drawer plastic storage cabinet from Amazon is cheap, compact, and holds every little pin and spring you have. I used a label maker to create labels for each drawer, but a Sharpie also works.
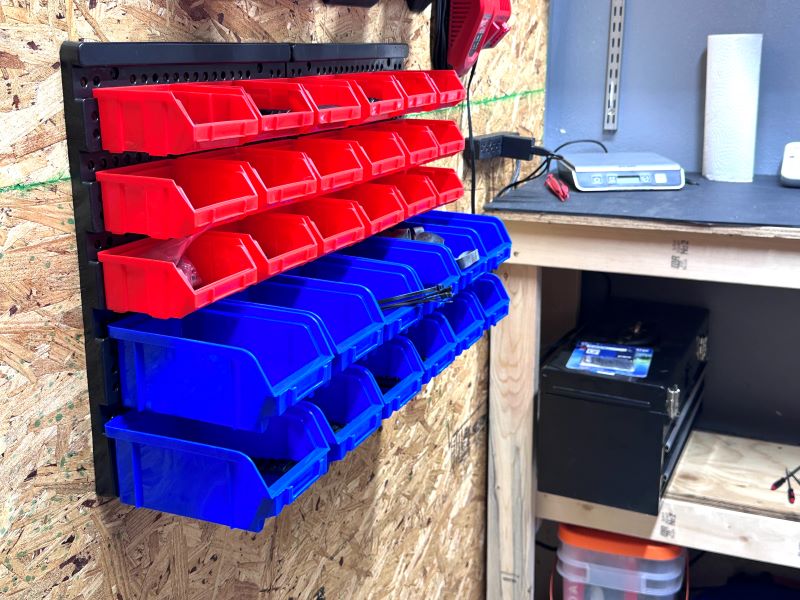
If you don’t want to use a wall organizer or need something mobile, screw/bolt/nut organizers work great for gun parts too. This is what I used before I mounted an organizer on the wall. If you’re a competitive shooter, a small storage container with compartments is handy.
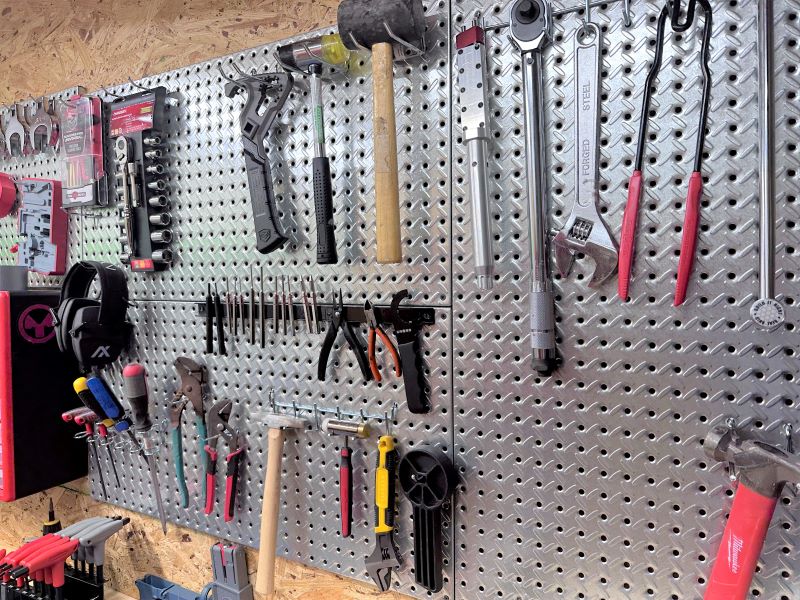
What tools do you need?
All of them! Or at least, we wish we had every tool we wanted, right? The tools you want to start with will depend on the types of guns you will be working on. There are some basic tools that are handy for any type of armorer’s workstation so start out with those. Here are some helpful tools to get started:
- Rubber Mallet
- Screwdriver Set
- Pliers
- Magnetic Wand (for finding those lost pins and springs)
- Torx/Star Driver Bit Set
- Bench Vice
- Large Crescent Wrench
- Small File
- Punch Set
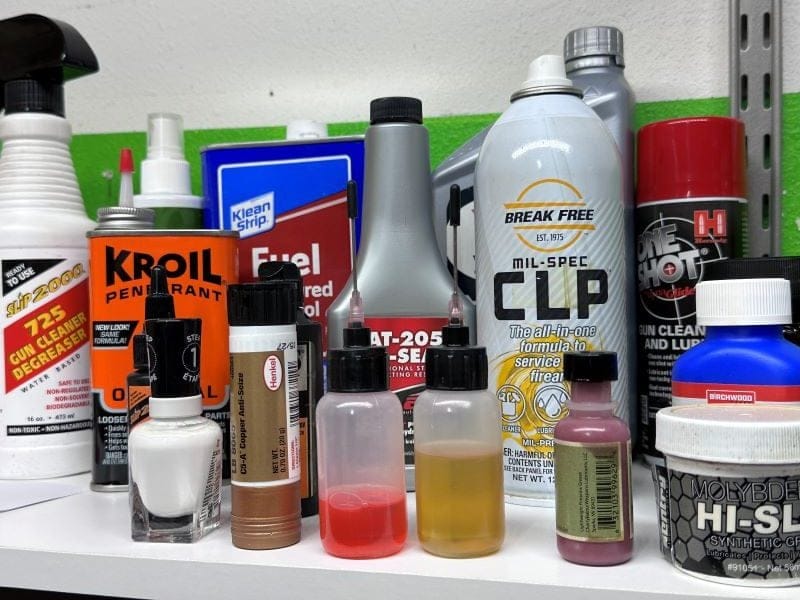
Other tools will be more specific to the type of gun you are working on. For an AR-15 I would recommend the Real Avid Master Armorer’s Set. It has almost everything you need to work on your rifle including a torque wrench. A multi-purpose Glock tool is a handy way to keep just about everything you need for a Glock in one place. You should have some type of bench block on your list and a rubber tray for holding gun parts while making repairs/upgrades. If you are not familiar with Armorer’s tools, I would check out Real Avid or Wheeler products.
Make Gun Repairs Easier
Start with a bench and organize the area to keep your tools and gun parts. Add some basic tools and continue to add more as needed. Building a workbench isn’t hard, and it’s worth the effort when you are done. The more you use it, the more ideas you will have for improvements.
I added a second light once the workstation was set up because I needed more light shining directly on the area of the bench where I would make repairs. A chair or stool is another good addition, and your back will thank you for it later. Get some ideas, set it up, and make it your own space. Building, cleaning, upgrading, and repairing firearms is fun and an armorer’s workstation makes the process even better.