Note: You may notice a change in this article. It originally was an article about tuning the buffer on my AR15 Pistol. I have never claimed to have all the answers and in this case, the answers I thought I had were incorrect. As in many parts of my life, I learn from others and in this case, you, the readers tipped me off to my error. The error is one of legal semantics and it is unfortunate that we all have to deal with these silly rules, but we do. I have amended the post below to reflect accurately that my 12.5″ AR is, in fact, a firearm and not a pistol.
When it comes to defensive or duty firearms the most important attribute is likely reliability. When you choose a gun as a life-saving tool you need to know it will fire when you need it to: in other words, on-demand, not on command. In an AR15, the gas system is one area where reliability can be a make it or break it set of components and the most variable aspect of the gas system may very well be the buffer. It is for this reason that I paid close attention to tuning the AR15 buffer as I completed my AR pistol build.
It turned out to be a far simpler process than I expected. I feel comfortable that anyone who can assemble an AR15 can easily tune their buffer, especially with the right AR15 tools.

AR Firearm: Why I decided to build now
A couple of months back I looked at the prices of AR15 components, especially lower receivers, and decided it was time to make sure I had all the components I needed to build whatever tools I wanted for the next few years. Prices were so low that I couldn’t conceive of them getting much lower and I was able to capitalize on some special deals, including a couple offered through Aero Precision (aeroprecisionusa.com). Among those were four “blem” M4E1 Enhanced lowers,1 for my build and one for my wife and two daughters.
My AR15 build: a quick overview
It wasn’t long before I started to collect the other parts I needed. I already had a complete bolt and bolt carrier and an ALG Defense ACT trigger, but otherwise decided to keep my build relatively “on brand” to avoid issues with tolerance stacking. Aero knows what Aero builds so I expected the parts to work together.
12.5″ AR Build Gas System
I decided on a 12.5 in. barrel and handguard mounted to the Aero M4E1 Enhanced upper receiver. The barrel has a gas port at carbine length. I added a carbine length gas tube and an Aero gas block to my cart.
Carbine length made sense for the gas system because it has about the same dwell time as a 16” mid-length gas system. Dwell time is the length from the gas port to the muzzle and is important because it is when gas is forced back into the bolt to operate the action. I have found the mid-length system to be very reliable in my JP VTac AR15 and I approached my decision from an “if it ain’t broke, don’t fix it view.”
It should also be noted that the gas block I selected is not an adjustable block. An adjustable block would provide more wiggle room, but I was building for reliability and simplicity. In addition, the gas block is easy to swap out in the future if needed.
Other Pieces, Parts, and Paraphernalia
I sourced my lower parts kit, grip, and pistol brace from a distributor taking advantage of wholesale pricing. This is also where I grabbed a Spike’s Tactical H3 buffer.
Why the AR 15 Buffer Matters

The buffer has an important job. Along with the buffer spring, the buffer provides resistance to the action of the AR as it moves rearward after a shot has been fired. The buffer’s job is to help slow the BCG down so that it doesn’t damage the rifle (in this case, firearm) over time and to help the rifle/pistol/firearm feel like a soft shooter.
If the buffer is too light it can travel to quickly and batter the bolt carrier group and the buffer tube. If the buffer is too heavy, it can slow the BCG to the point where it doesn’t move enough to eject the fired round, scoop a new round from the mag, or press the bolt firmly into battery.
After a build is complete tuning the buffer is the easiest way to modify bolt speed.
Other Gas System Factors
Don’t think for a second that the buffer is the only way to tune the gas system of an AR15. It isn’t. It is the easiest way to tune the gas system after a build is complete. There are other options but each is more of a commitment and could still require the buffer to be tuned.
Gas System Length
This is probably one of the biggest factors in how an AR works so it makes sense that changing the length of the gas system would change performance. The problem is changing the length of the gas system requires changing a barrel. The physical act of changing a barrel is easy enough if you have the right tools. The problem is the cost. Good barrels aren’t cheap so this should normally be viewed as the last resort. Choose wisely upfront.
Know that changing a barrel can also result in a larger or smaller gas port or simply a better match between the gas port and gas block. These factors are harder to control.
Gas Block
Changing to a different or an adjustable gas block is an option for tuning. This isn’t too tough, but would require the removal of the hand guard.
Changing the gas block may simply provide better alignment or a larger port in the gas block itself.
BCG Weight
Bolt carrier groups can be made out of different materials or have material removed so that their mass changes. A lighter or heavier BCG can significantly change the speed the carrier is traveling and reliability. Changing the BCG is actually the easiest mod you can make to the system, but bolt carrier groups aren’t cheap. It could get expensive quickly trying to tune the BCG.
Tuning the Buffer

Tuning in your AR15 buffer is pretty darn easy and it can be the most cost-effective way to increase the performance of your AR.
If you can pound in a nail you can disassemble a buffer.
What you are looking for.

You have properly tuned your buffer when you observe the following while shooting the first few rounds of a full magazine:
- Your AR15 cycles completely ejecting the spent casing, loading a fresh cartridge and locking fully into battery.
- The spent brass landing between 3:00 and 5:00 if 12:00 is directly downrange.
- Your BCG locks to the rear on empty.
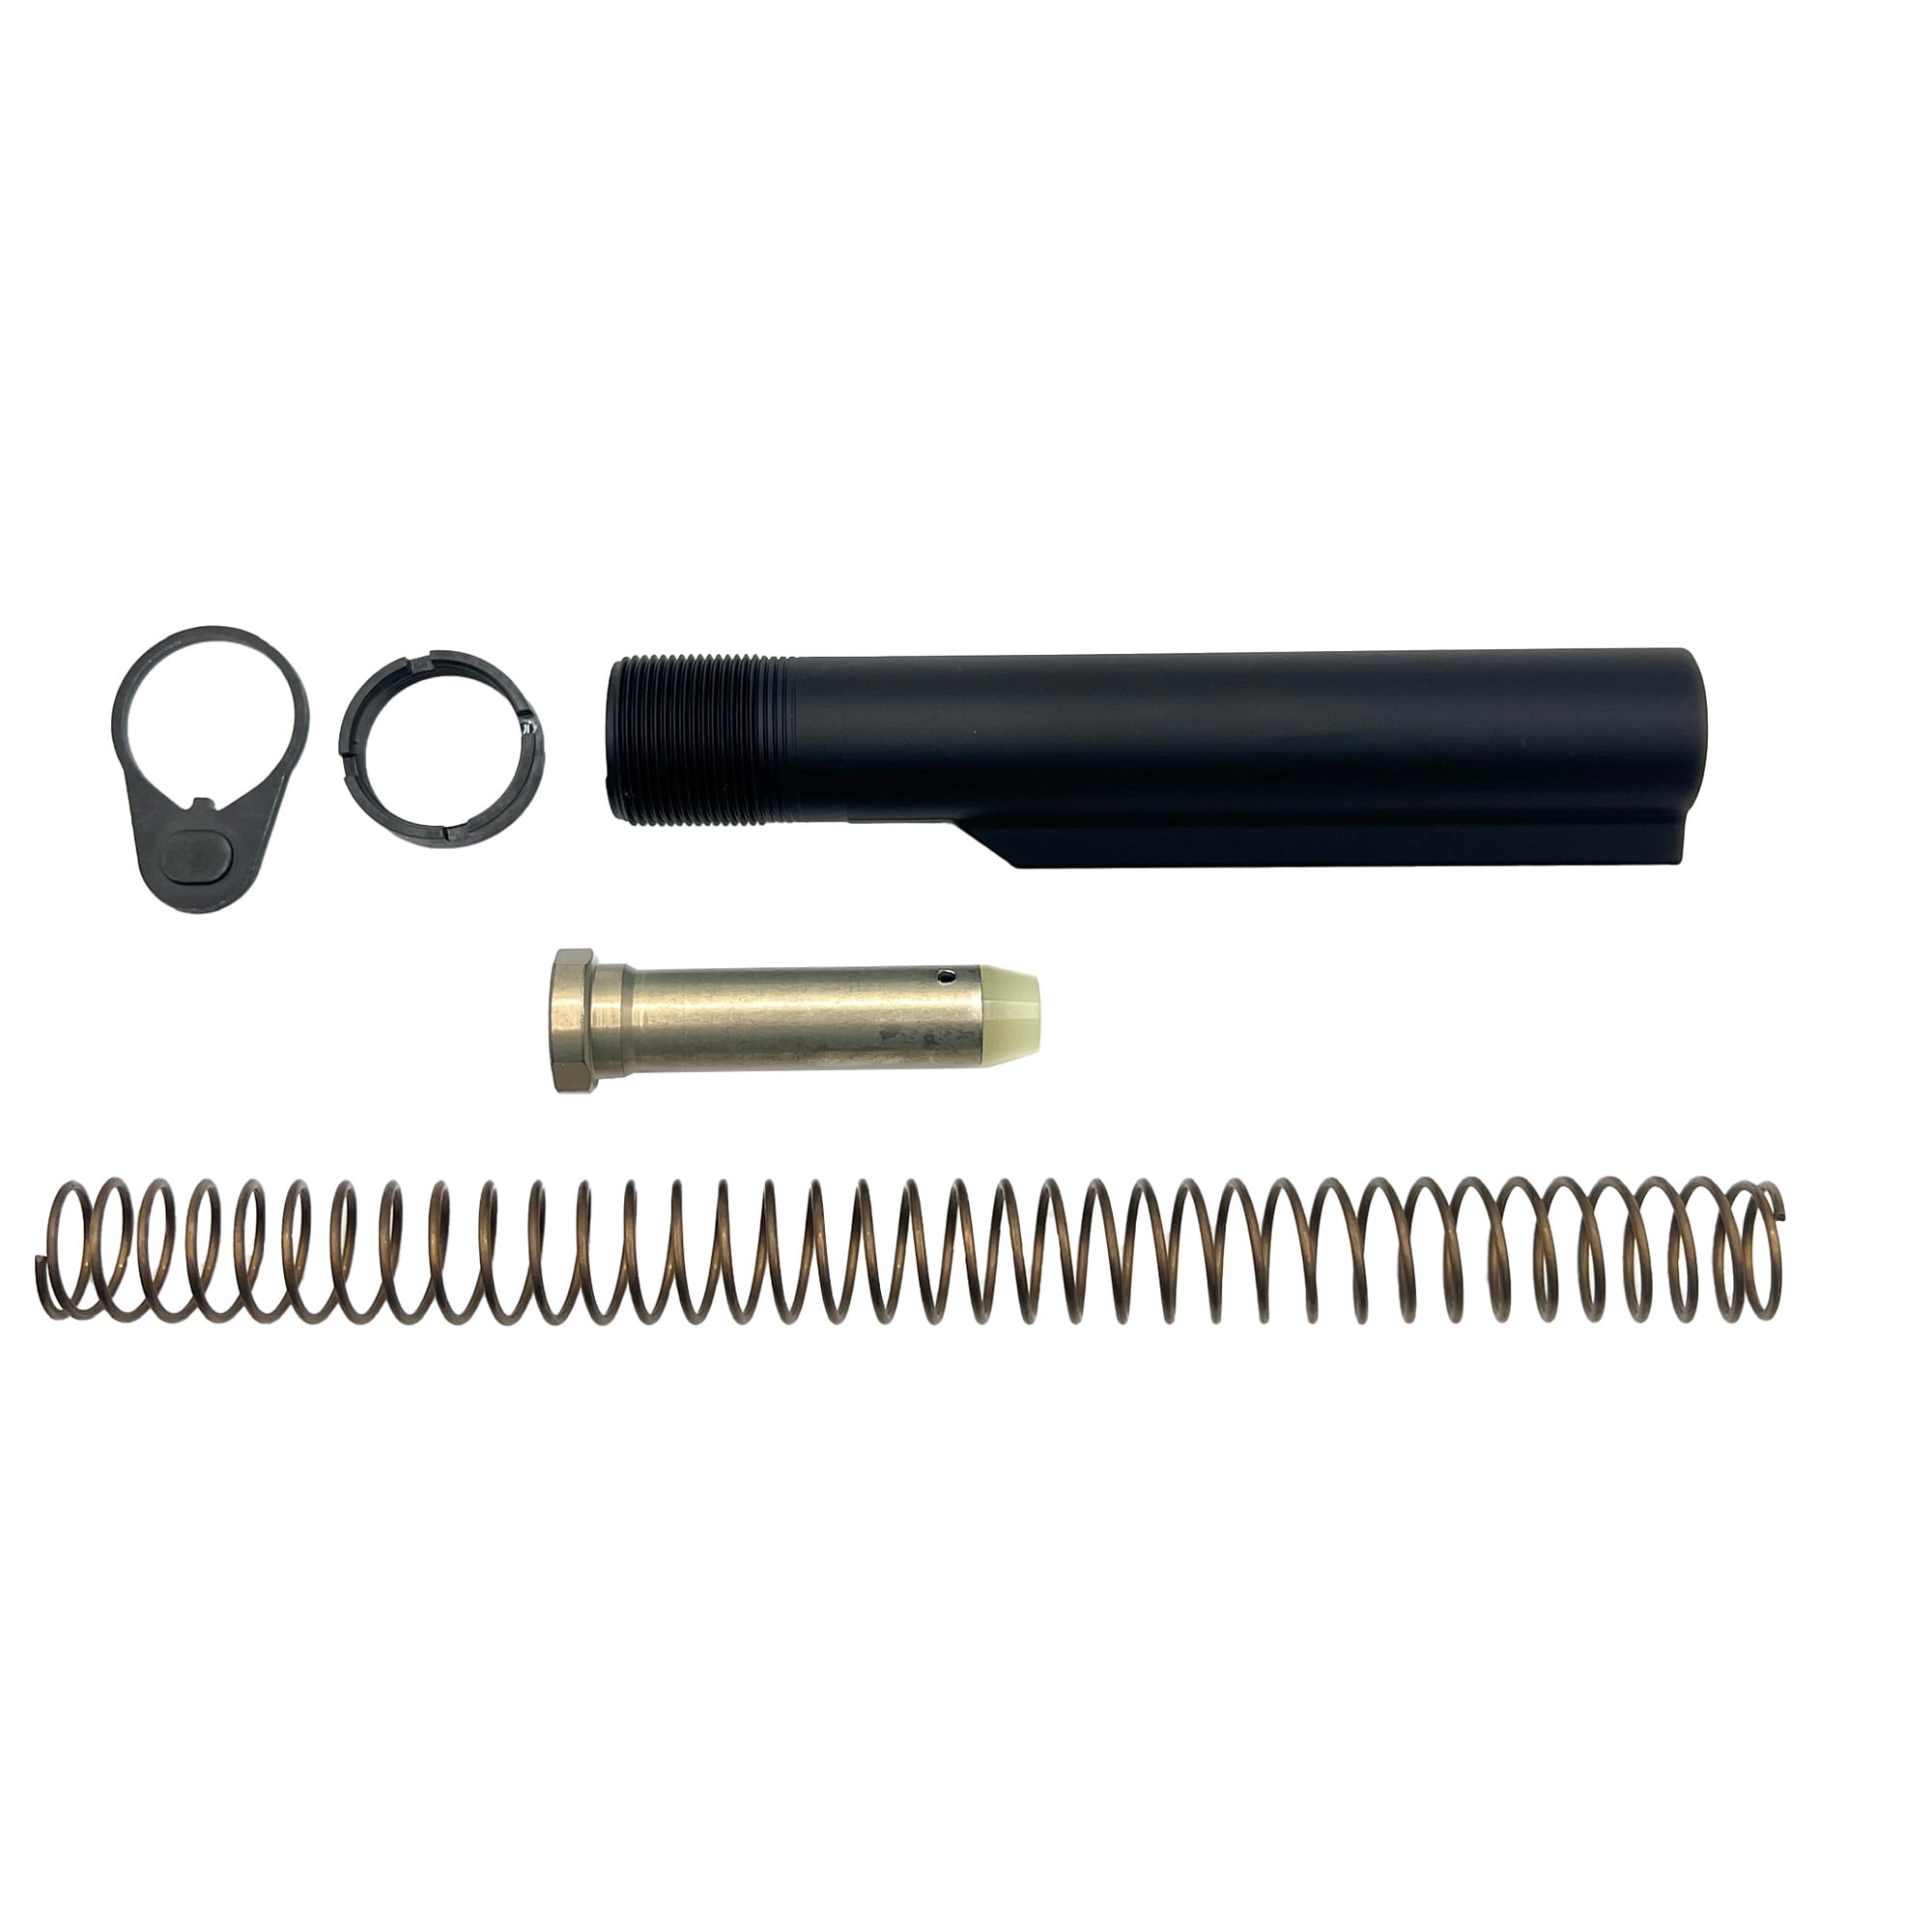
What You Need
- A carbine-length and weight buffer
- A carbine-length H3 buffer
- A roll pin punch
- A hammer
- A roll of electrical tape
- Several magazines loaded to capacity
How to Tune your AR15 Buffer
The steps are simple. Gather the above supplies and head to the range. You’ll need a solid table to work on as there will be a bit of pounding involved.
Keep in mind that you probably want to run the heaviest buffer that works in your gun. This will help to ensure that your gun isn’t over gassed and causing long term damage to your weapon. It will also feel soft and flat compared to a lighter buffer!
1. Start HEAVY.
Break your upper and lower apart at the rear pin and place your H3 buffer in the buffer tube with your buffer spring. While on a live-fire range observing all safety protocols insert a fully loaded magazine and squeeze off a few rounds.
If the gun cycles, your spent brass clears to between 3 and 5:00 and you lock to the rear when you are at the end of the mag your job may be complete.
As a side note, this is where my tuning ended. I repeated the first shots from a full mag 10 or so times, and then a few more with some different brands of ammo and several different brands of AR mags. All worked. The gun worked. The H3 buffer was right for me.
2. Lighten UP!

Let’s assume that your gun did not cycle properly or maybe the brass was just trickling out of the gun. The H3 buffer is too heavy for your system. We are going to use the carbine length carbine weight buffers to build an H2 buffer. Here is how it works.
The carbine weight buffer contains three carbon steel weights and three rubber spacers. The H3 buffer contains three tungsten weights and 3 rubber spacers. Tungsten is denser than carbon steel so the same size weight has more mass.
We can build an H2 buffer by driving the roll pin from both buffers, pulling the rubber plug and dumping the weights.
Use one of the buffer bodies and insert 2 tungsten weights and one carbon steel weight (don’t forget the rubber spacers).
Reassemble your new H2 buffer, reassemble your weapon and test it out.
3. Keep going if you need to.
You can repeat this process each time replacing a tungsten weight with a carbon steel weight. Each time the buffer gets lighter and moves faster. When you get to the combination that operates properly and feels great, load up some more mags and have fun!
Final Thoughts

Building an AR15 can be an extremely rewarding process, and you don’t have to be Jim Hodge to do it. At the same time, you need to make sure that you are doing things correctly. Especially if you are building a duty or defensive tool.
Tuning your buffer won’t solve every problem. You may need to change gas blocks, swap out barrels or take other measures. Even if you have to take big steps to get your weapon running properly your last step is probably going to be tuning your buffer.
Have you ever messed with your buffer weight? Even if you didn’t build your AR pistol (or rifle, the material here obviously addresses both) you can fine-tune it over factory performance. Just be careful. A project like tuning your buffer could be your gateway drug into the world of tinkering with AR15s.
Have fun!