The Sig M17 has been a rock-solid handgun since it was adopted by the US military. It has a good balance; good weight and it shoots like a pro. I have yet to have any issues with my M17 as I run drills at the range. The M17 had to undergo torture and reliability tests before the US Military would consider it. This is a benefit to us because we already know how the gun will hold up.
I used my M17 on the range last summer when it was hot and humid. It rained on us in the morning and then scorched us in the afternoon. We continued to shoot, regardless. By the end of the day, the M17 had all kinds of gunk building up in the slide, around the ejector, and just about everywhere else I could see. A good cleaning was all it needed to put it back in tip-top shape. You may never have this issue but it’s still good to know how to disassemble the main components of any gun. Today, we will take the M17 apart to inspect and deep clean it.
How To Field Strip the M17
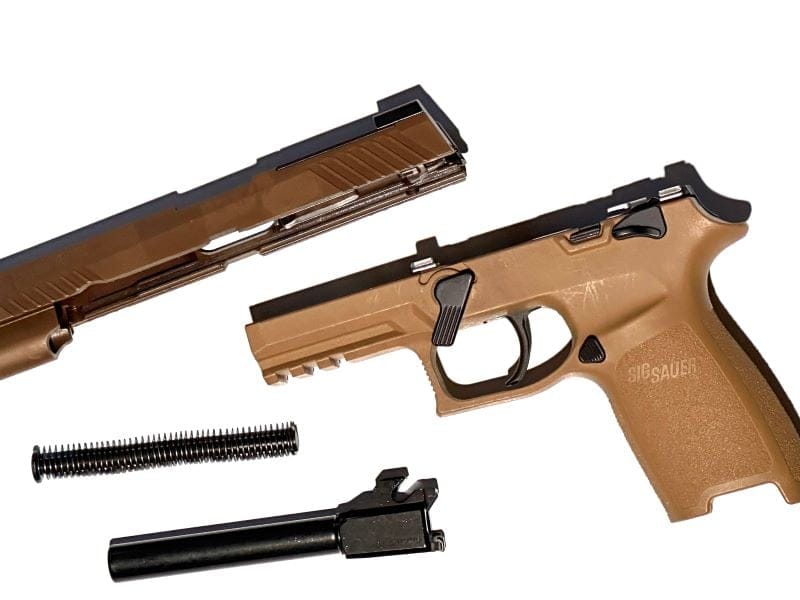
Like I said earlier, most people only need to field strip the M17 for basic cleaning. Sig made this very easy process very easy, and it can be done without any tools. As always, safety first. Make sure the magazine is out of the gun and the chamber is empty. Lock the slide to the rear of the gun and flip the takedown lever down until it stops. Release the slide slowly and pull it forward off the frame of the gun. Now remove the recoil spring by lifting it from the slide and then remove the barrel. You have now field-stripped the M17.
How To Remove the M17 Frame From the Grip Module
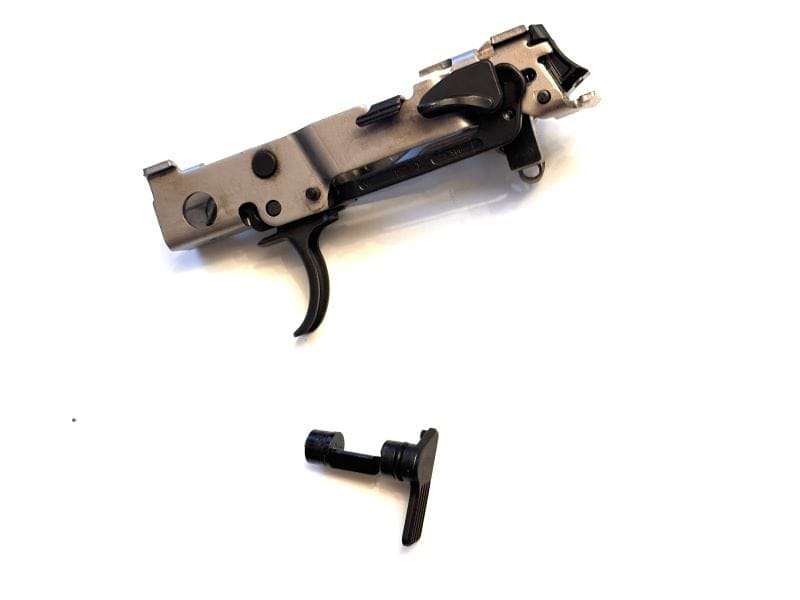
The Sig is a little different than other handguns because the frame of the gun is separate from the grip module. Most handguns contain the frame (lower part of the gun) and the slide (upper part). The M17 has a removable frame that contains the trigger bar, trigger, safety selector, and every other lower part.
To remove the frame, simply pull the takedown lever out of the gun and lift it off the frame. Even when mine gets dirty, I can clean it without taking everything off the frame. We will cover disassembling the frame components in another article. From here, however, you can clean and re-oil everything on the lower part of the gun. The frame is considered the “gun” so this is the part that contains the serial number.
How To Remove M17 Slide Components
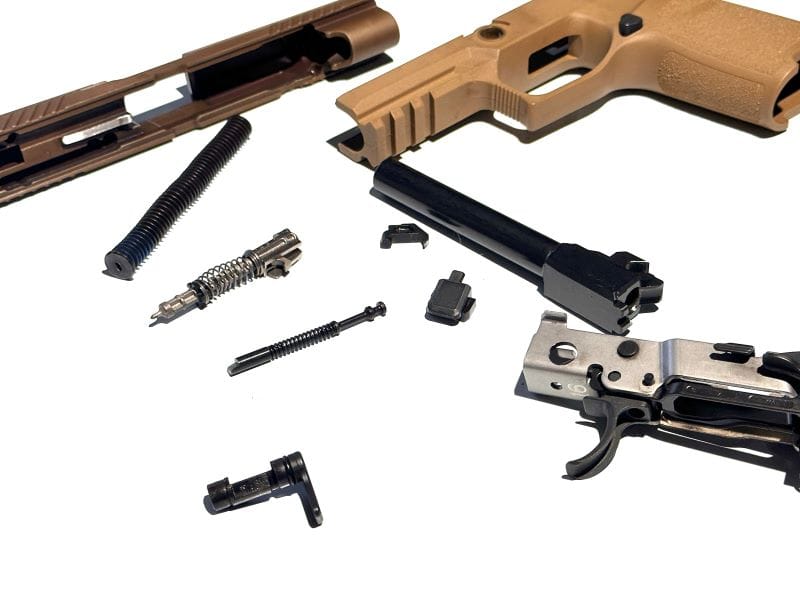
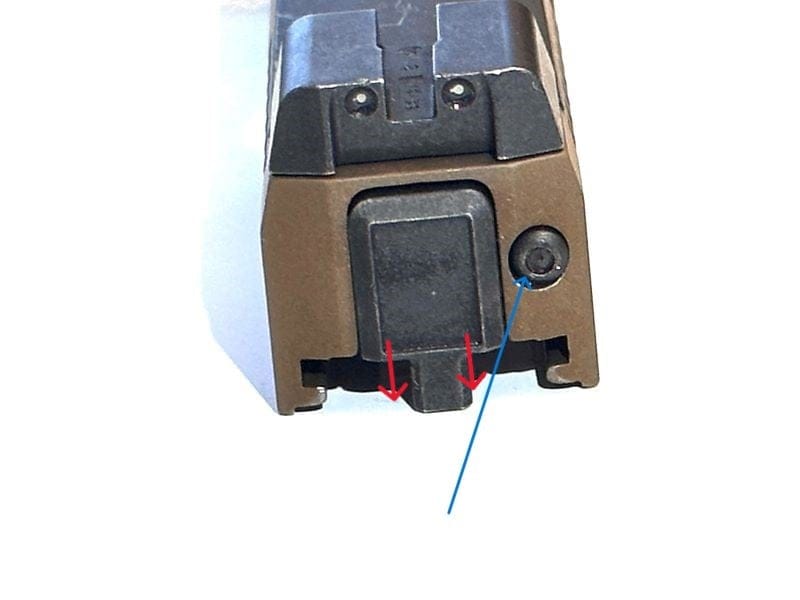
The next part of the gun we will look at is the slide. This is the area I see the most build-up and dirt get into. Besides cleaning, it’s good to inspect these parts on a regular basis. On the back of the slide is the slide rear cap. Next to it is the extractor spring rear guide. It looks like a small back pin or screw.
Push down on this part with an Allen wrench or something the same size as the rear guide. While pushing down, use your thumb to slowly push the end cap off the slide. With the end cap off, you can pull the extractor spring guide out. Pull the striker housing out next.
Final Step — Reassemble the Gun
Once all the parts are cleaned, I place a small amount of oil on each part before re-installing them. While the extractor is off the gun, check it for any signs of wear or damage. If you fire any steel case ammo through your gun, it will eventually wear down the extractor, but that is an easy and cheap fix.
The extractor should have a good, almost sharp-looking edge on it. While these parts are off the slide, give the slide a good cleaning. If you ever want to take the optic plate off the slide, this is how you get to the screws that hold it on. They sit on each side of the striker housing from the bottom side of the gun. Removing these screws allows you to take the plate, rear sight, and loaded chamber indicator off.

Summary
Most parts on the M17 or the Sig P320 are easy to find and can be ordered online. If you need to replace a damaged, broken, or lost part, don’t panic. Just look up the part using a Sig P320 nomenclature (diagram of the gun) and order what you need. If you are not sure about something, contact a gunsmith for advice or repair.
The M17 is a unique gun that will remain one of my favorite handguns. Besides the fact that it’s a great shooting gun, it comes with a military history. Since 1911, the M17 has been only the third standard-issue US Military handgun. I expect it will remain in this position for years to come. Someday we will go over a complete breakdown of parts, but until then, keep your gun clean and running like a champ.