Yesterday in Part 1 of our Building a Glock series, we put the mag catch spring and mag release in the frame. We also put together the trigger assembly which consists of the trigger housing, connector, trigger spring, and trigger bar. These parts are easy to identify and install when you have plenty of light and the right tools. A magnet is great to have around for those little parts that fly off the table and hide in places nearly impossible to see. I keep a flashlight and magnet with my gun tools just for those rescue missions when parts go running from me. Today in Part 2, we will be completing the lower assembly.
Installing the Lower Assembly
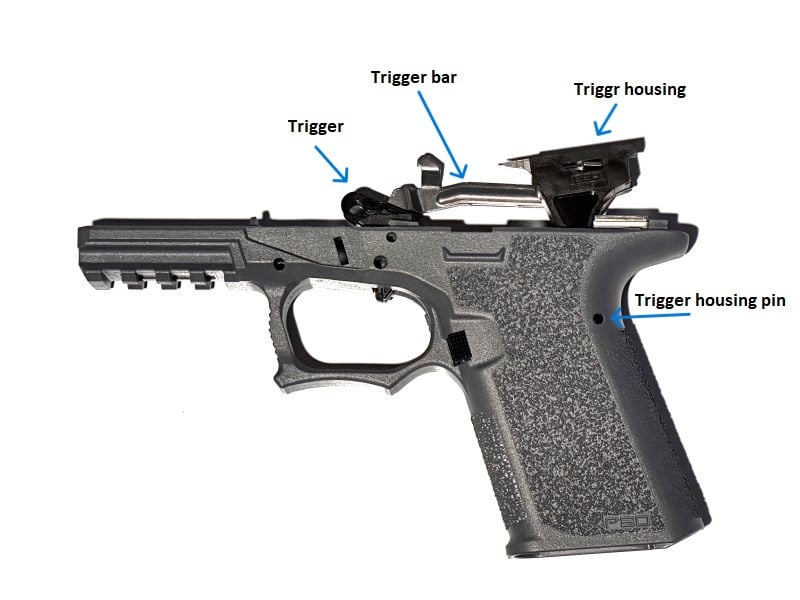
Now that the lower assembly is ready to install, we will be placing it into the Glock frame. But first, we need to make sure the trigger assembly is in the right order. The spring should be attached to the trigger housing, but we need to set the trigger bar in the housing. To do this, rotate the trigger bar over the top of the trigger housing until the cross shape of the trigger bar is on top of the housing. You will have to rotate the bar a little to get the edge of the bar to go into the groove of the housing.

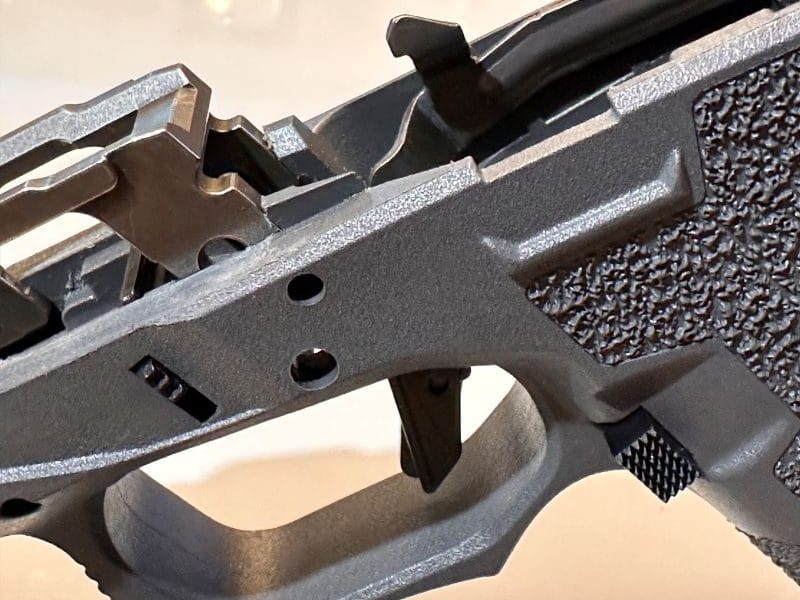
Now we can set the trigger housing into the gun frame. The trigger housing will go towards the rear of the gun and the trigger end will go down through the opening for the trigger (see photo below). As the trigger goes through the trigger slot of the frame, the trigger housing will push down into the opening just behind the mag well. The trigger bar will sit up against the inside of the frame. Once it is seated all the way, install the pin in the upper back portion of the handle. Use a punch if needed for this step. In many cases, the pin may push in without any tools.

Installing the Slide Stop
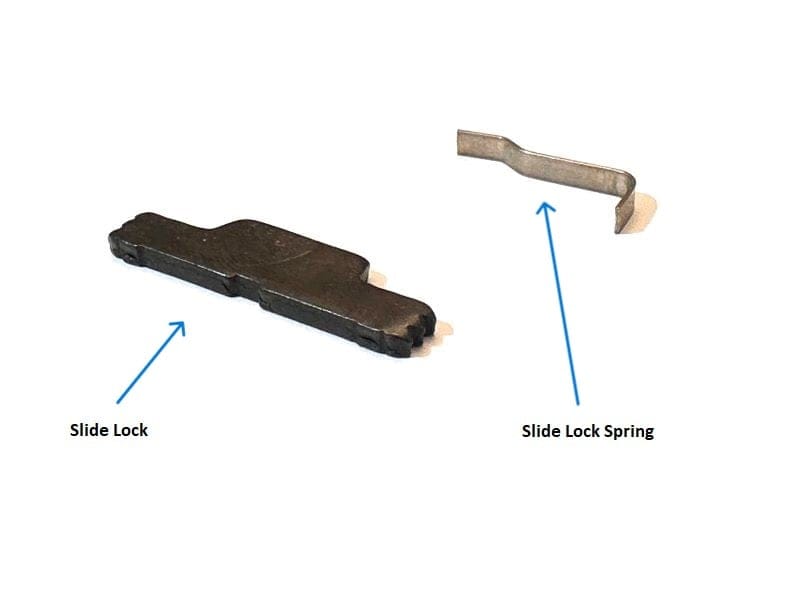
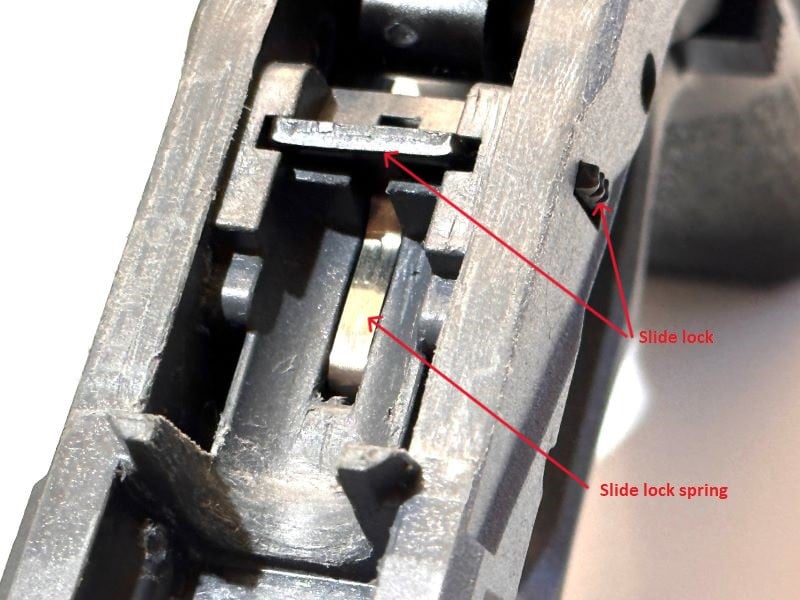
For this part, you will need the slide lock spring, slide lock, and frame. The slide lock spring on a Gen 3 Glock looks more like a thin metal bar that is bent. The end of the slide lock spring looks like it was bent. This bent piece will go down into the groove of the frame in front of the opening for the trigger. The other end of the bar will stick up and put pressure on the slide lock, which we install next. When the slide lock is in the upward position, the slide cannot come off the gun.

Once the slide lock spring is in, we can insert the slide lock into the gun from either side. The rigid side of the slide lock will need to face the rear of the frame. There is a small notch at the bottom of the slide lock. This will face down and go over the slide lock spring. Use a small punch to push down on the slide lock spring as you slide the lock over the spring. If the slide lock is installed correctly, the spring should be pushing the slide lock up. When the gun is assembled, you will pull down on both sides of the slide lock to release the slide and remove it from the frame.

Installing the Locking Block
The locking block is very easy to install and is one of the larger pieces in the lower parts kit. To install the locking block, place it in the frame with the notch facing toward the rear of the gun. It will push down into the frame until the holes line up for the pin to go through. The locking block pin is the smaller of the two pins. It may have grooves cut in it, but others will be smooth. Insert the pin to hold the locking block in place.

The trigger pin is the larger of the two pins and may also have grooves cut in it. Start the trigger pin in the hole from the right side of the gun, but do not go all the way in. If there are grooves, insert the pin until it reaches the second groove. The slide release lever will need to be installed before the pin is pushed the rest of the way in.
Installing the Slide Stop/Release Lever
The last thing to install on the frame is the slide stop/release lever. This part has a small spring attached to it and the end with the spring is the part that goes into the frame. The wire “hook” shaped spring will go in with the hook facing upwards. Push the slide release under the locking block pin and to the far left side of the gun frame. The hook part of the spring will push against the locking block pin. The slide release lever will hang over the gun frame so that the lever can be pushed with a thumb once the gun is finished.

With the slide release lever in place, the trigger pin can be pushed in the rest of the way. Sometimes it will go in without any issues and other times it wants to catch on the trigger or slide release lever. Don’t force it but wiggle it around until you get the parts to line up and the pin will push through. The trigger pin should be flush on both sides and the locking block pin should be just below the surface of the gun on both sides.
Wrapping Up with the Lower Frame
The lower frame is now complete and ready for the slide. The fun thing about learning to build your own Glock-compatible lower is the ability to customize the gun to your own liking. You can change out parts for a different look or function anytime you want. Some people like to build their gun from a stripped frame (like we did here) and others like to buy a Glock and slowly make upgrades.
For now, I have placed the slide from my Bull Armory Gen 3 to see how the lower functions. I like the looks of it enough that I may just leave the slide on this frame and place the slide we are about to build on the frame of the Bull Armory. Again, that’s the fun part of building guns that are universal. You can switch them around and make the gun you want.
Be sure to check in tomorrow and Thursday for Parts 3 and 4 of our Building a Glock series. We will be installing the parts on a Glock-compatible slide and finishing the Glock build.


