The BCG (bolt carrier group) for an AR-15 is one of the least talked about parts of an AR rifle. But it’s also one of the most important parts and should be well maintained. When you look at an AR-15 you notice the color, style of handguard, barrel, muzzle device, and stock. A lot of people don’t pay much attention to the BCG because it’s just an internal part. That part however is the equivalent of the motor in a car. It’s important and should be serviced from time to time. In two parts, we will be covering the entire BCG.

For the most part, if you clean the BCG and keep it oiled, it will run for a long time without issues. Inspecting it during each cleaning is important for identifying issues that may be creeping up. This could include wear on certain parts or hairline cracks in the bolt. I once took the bolt out of a rifle at my agency and found part of it had chipped off and was gone. It was magically still firing, but I wouldn’t call it reliable at that point.
I have covered the importance of inspecting an AR-15 before, but in this AR-15 BCG series, we will focus on the BCG and disassemble the bolt components.
About the Bolt Carrier
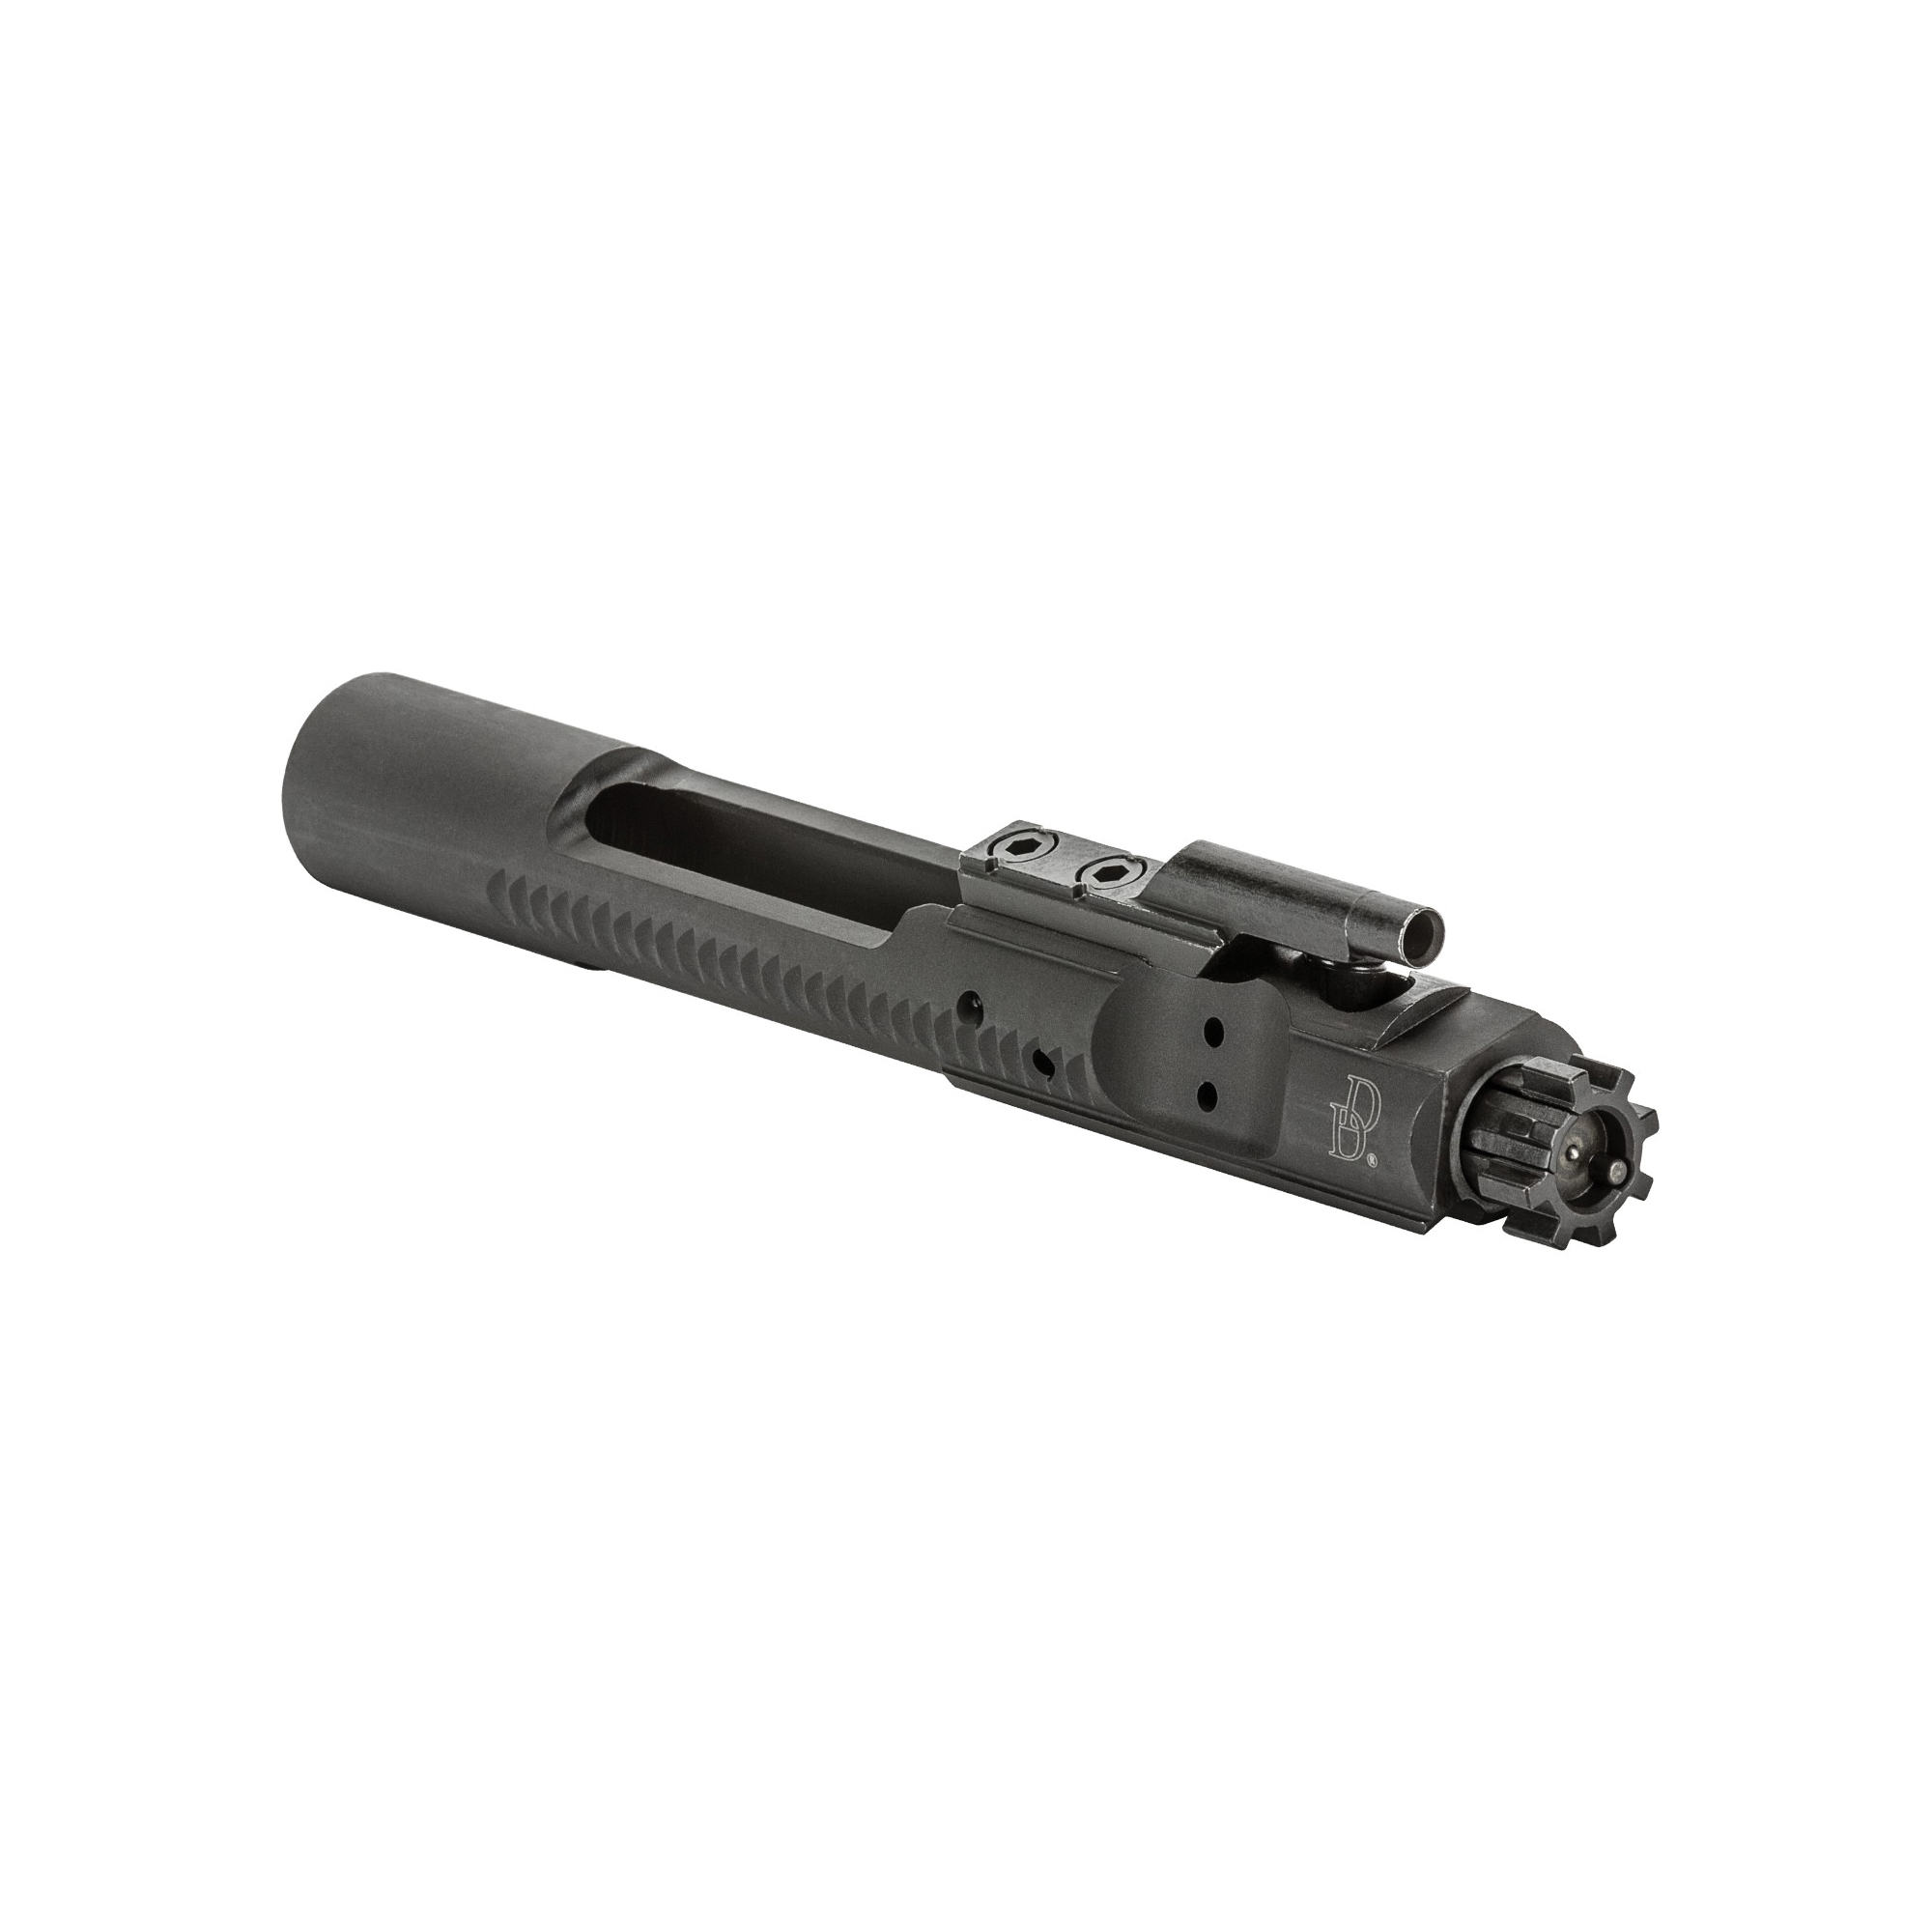
Referred to as the bolt carrier group, the bolt carrier holds the bolt, gas key, firing pin, and cam pin. We will break it down step by step and talk about each part. The bolt carrier holds all this in place and allows several things to happen in just a fraction of a second when the gun is fired. There are several types of finishes available for BCG and some are better than others. We will talk about this briefly before we get into disassembling the BCG.
The first BCGs were chrome plated to make them durable. These types are still used today, but hard to find and expensive. The current mil-spec BCGs are phosphate coated which makes them hard but leaves a rough finish. This means the bolt carrier will need more oil to run smoothly. Black Nitride is one of the more popular finishes because it is durable and the finish is slick, making it run smoothly in the gun. One of the most durable finishes you can get for an AR-15 without breaking the bank is Nickle Boron. This type of finish will last for years with heavy use and helps the BCG run smoothly inside the gun.
Other types of finishes include Diamond-Like Carbon (DLC), Titanium Nitride, and Robar NP3+. All of these finishes are extremely durable, but also expensive. The good thing about the design of the AR-15 is the BCG can be replaced in seconds. I know a lot of people who had something break on their bolt or carrier and instead of fixing it, replaced the entire BCG. But it can be fixed!
Disassembling the BCG
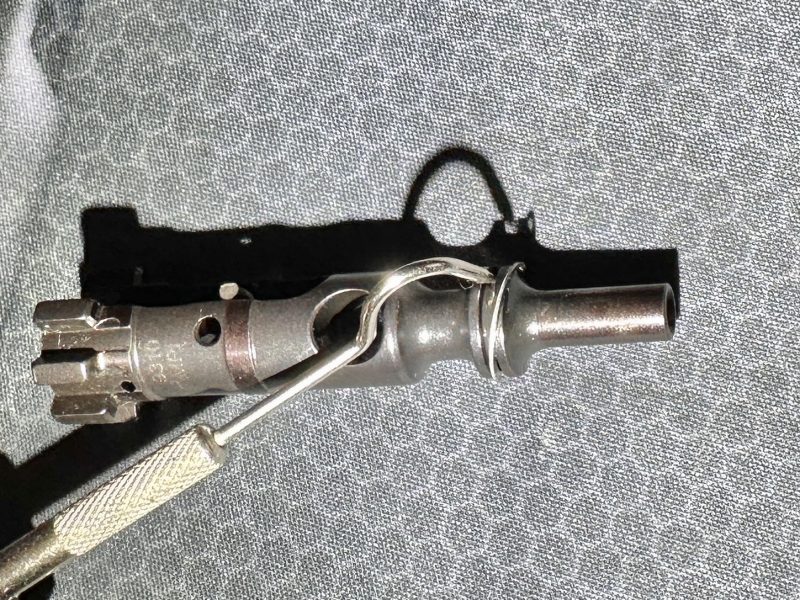
Taking the bolt and firing pin out of a BCG is easy and should be done every now and then for cleaning. I would recommend using a good gun cleaning mat for this part, a work rag, and a small pick from a gun cleaning kit. To remove the bolt from the carrier, use the pick to pull the retaining pin from the side of the carrier (see photo below). Once the retaining pin is out, the firing pin can be removed from the back of the bolt carrier.
With the firing pin and retaining pin out, the next step is to remove the cam pin. With the firing pin gone, the cam pin will turn halfway and then pull out. If it is not turned, the gas key will be in the way and not let it come out. After removing the cam pin, pull the bolt out of the carrier. This is how far the BCG comes apart during a regular field strip. When I have the BCG field striped, I take the opportunity to inspect it for worn or damaged parts. We will cover this process before moving on to disassembling the bolt in Part 2.
Inspecting the Bolt, Firing Pin, and Gas Key
With the BCG field stripped, I like to check the firing pin first. The firing pin is made of extremely hard metal and will last a long time. I like to clean it off and make sure there is no damage or wear to it. Then I inspect the bolt and locking lugs. The bolt is the most likely place to have fractures or cracks. These can be hard to see so I use a light to inspect the surface. The area around the cam pin hole is where I have found fractures before.

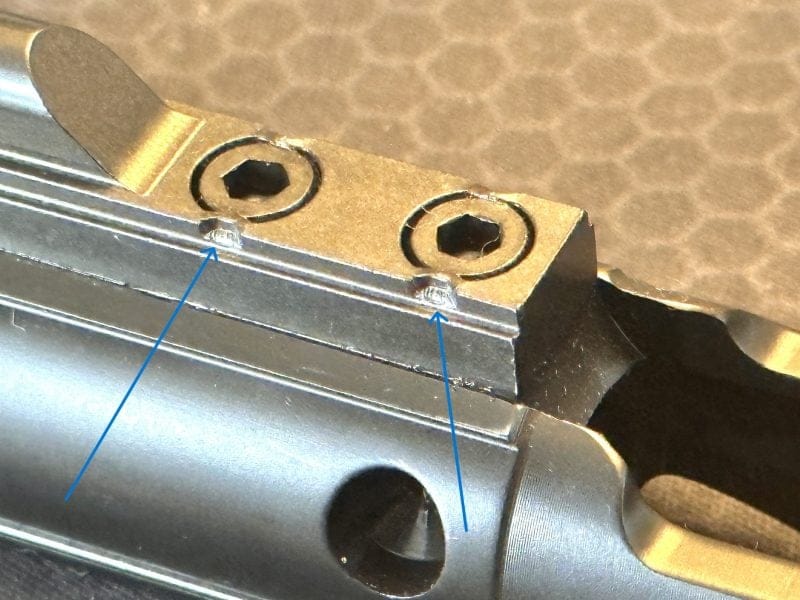
After inspecting the bolt for cracks, I check the locking lugs. In Part 2, we will take off the extractor, ejector, and gas rings. The rings can wear down and need replacing after a lot of use. Another area I like to check is the gas key. If you start to experience cycling issues, this can be caused by gas problems from the key or gas tube. The gas key should not be loose, and the screws should be staked. Staking a screw is a small indention in the metal beside the screw which keeps the screw from turning and coming loose. If the key needs to be removed, I would recommend installing a new one and staking it again.
Removing the Extractor
The extractor is like a little claw that pops over the edge of the bullet in the chamber and pulls it back out when the round is fired. If the extractor gets broken or worn down, it can stop pulling the spent shell casing out of the chamber. This will cause another bullet to try and feed behind it. When people say their rifle is “double feeding,” the real problem is often the failure to extract it.
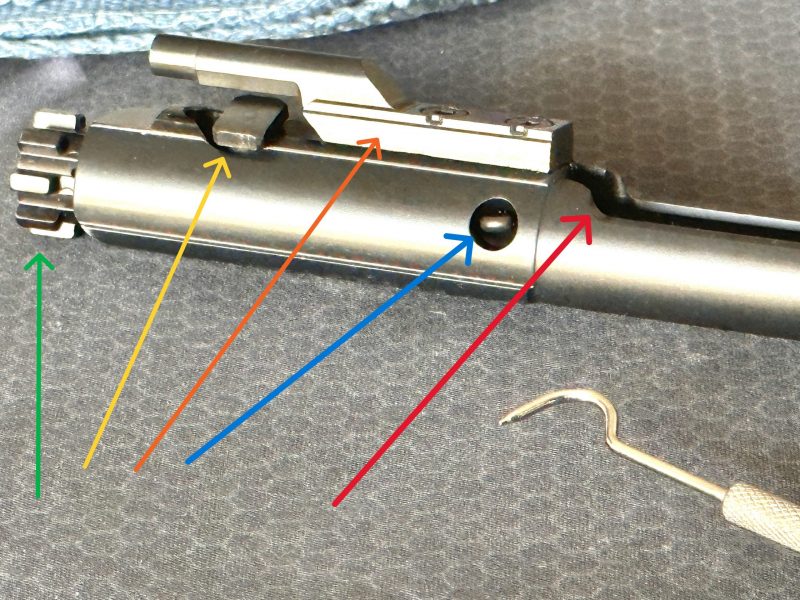
To remove the extractor, lay the bolt in the molded area of the bench block (see photo below). There are two small pins in the bolt. The one on the right (red arrow) is the one for the extractor. The Bench Block has a small cutout in the bottom of it that will allow the pin to fall out as you push the 3/32 punch through it. With the pin out, the extractor will come off. The extractor has a small spring and rubber washer that can be removed if they need to be replaced or cleaned.

There is a small plastic post that helps keep the spring from bending. It may come off in the spring or stay in the extractor. If this spring gets damaged or worn, it could cause the extractor to not have enough force to pull the shell casing out of the chamber. The groove of the extractor tooth is a place that can build up junk and may need to be scraped out.
Removing the Ejector
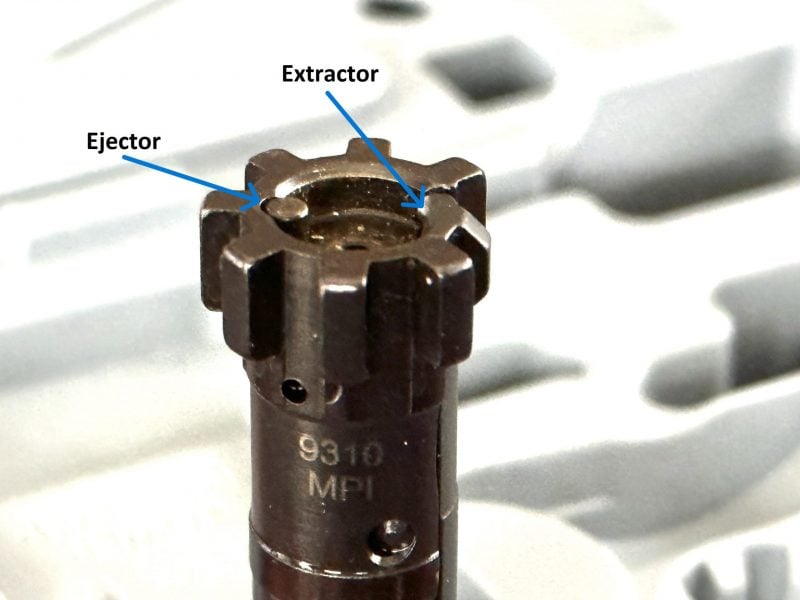
Now that the extractor is off, we can remove the ejector from the bolt. Just like we did with the extractor, the bolt should be placed in the molded area of the Bench Block with the ejector pin facing up. There is a red handle that turns on the bench block. The bolt should be orientated so that the ejector is pushed in as you turn the handle (see photo below). A 1/16 roll pin punch and a small hammer should be used to tap the pin out.

Once the roll pin is out, unscrew the red handle. The ejector spring will push the ejector part way out so make sure the pressure is all the off the bench block before picking the bolt up. The ejector will be sticking out of the top of the bolt and can be removed, along with the spring under it.

When the extractor starts to pull the bullet casing out of the chamber, the ejector pushes against the casing. There is nowhere for the casing to go until it clears the ejection port. Once it clears, the pressure from the ejector flings the casing out of the gun. If the spring is weak or the ejector gets worn, the casing will not eject properly. If a gun is older and appears to have been fired a lot, I like to replace the whole set. The ejector, spring, and roll pin can be purchased for about $10.
Removing the Gas Rings
The last thing we will remove from the bolt is the gas rings. The gas rings help create a seal as the bolt travels back and forth in the bolt carrier. If the rings get worn out, they can let gas through and may cause cycling issues. To remove the gas rings, I use a gunsmith pick (like the one I pulled the retaining pin out with in Part 1). Just like you take off a tire from a car, I get the pick started under the ring and push one side out. I start with the outside ring first. With one edge out of the grove, you can work your way around the bolt, pushing the ring off as you go (see photo below).
There should be three gas rings in total that need to be removed. Once they are removed, the bolt can be cleaned, and the rings can be wiped off or replaced. They go back on the same way they came off. Start one side and work your way around until it is back in the groove. There is a small gap in each ring. The rings should be turned so that the gaps are not lined up. This will help keep gas from getting past them on the bolt.
Finishing Up
Everything has now been taken off the bolt. It can be thoroughly scrubbed and cleaned if needed, and each part can be inspected. I would recommend keeping each part in groups so you don’t get the pins and springs confused. The process of putting them back on is the same as taking them off. I would start with the gas rings, then the ejector. The extractor can go on last, and then the bolt is ready to be placed back in the bolt carrier. Just like building an AR-15, having the knowledge to take the AR-15 BCG completely apart is satisfying and fun. It allows you to maintain your own rifle and keep it running great for years to come.
Shop This Article
-
KAK Industry AR-15 K-SPEC Enhanced 5.56 / .300 BLK Sand Cutter C158 Dual Ejector Bolt Carrier Group
 $209.99$188.99Save $21.00