So if you are interested in getting rid of the stupid, painful bump on the lower back of the Glock trigger guard here is a rundown of how I do it. Now I don’t claim to be an expert in this procedure but, I did watch the John Wick movies once in a Holiday Inn Express!
Daniel Bales demonstrates his Glock trigger guard reduction method.
Why reduce the trigger guard?
Why would you want to reduce the trigger guard? For me, when shooting several hundred rounds, my strong-hand middle finger takes a beating and becomes sore. During a multi-day course, it can cause some shooting errors due to the pain, causing me not to shoot as well. A second reason: by reducing the size of the underside of the trigger guard, you can achieve a higher strong handgrip as well as locking that middle finger into the frame and trigger guard. So for me, a trigger guard reduction is something I complete on almost all of my handguns!
Here’s How
Before you start this Glock trigger guard reduction project, first and foremost make sure that the weapon you are working on is empty then do it a second time.
To more easily work on the frame, I remove the slide from the frame. I take the magazine release off, as it usually gets in the way or will get marked up while removing the trigger guard surface. To remove the magazine release, I use a small flathead screwdriver and a flashlight or workbench light. Looking at the inside of the magazine well, I locate the groove in the magazine release and small metal rod holding the release in the frame. Using the flathead screwdriver I move the rod over to the magazine release groove opening, then slide it out of the groove. After this is done you should be able to move the magazine release out of the frame after sliding the rod over the smaller side of the magazine release.
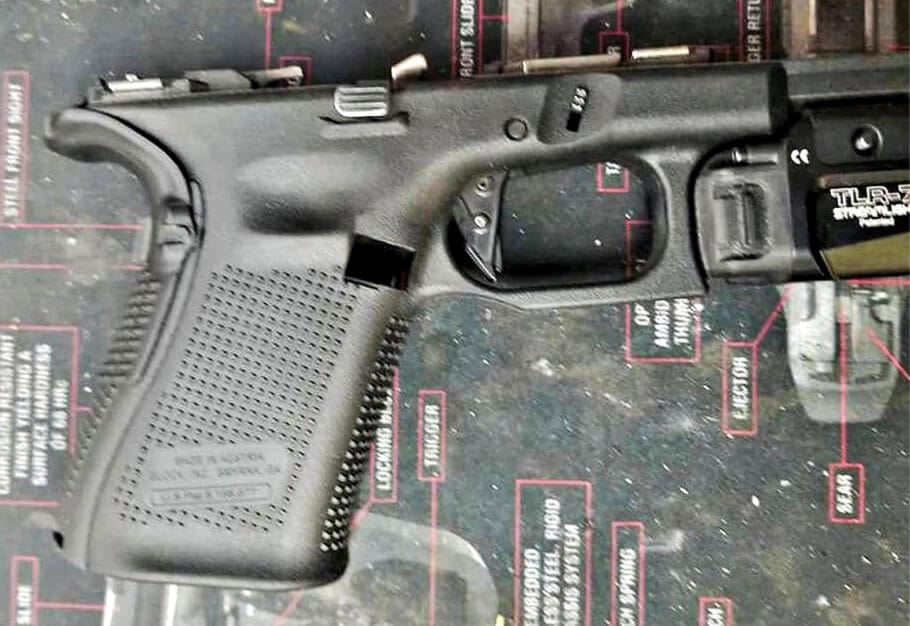
I now grip the weapon with my strong hand. Using a sharpie, I mark the location of where my middle finger rests on the trigger guard.

Tape Off the Trigger Guard Surface Area
Using some form of tape to protect the areas I don’t want surface removal, scraped or scratched (I used gorilla tape in these photos). Sometimes two layers of tape are needed depending on the strength or thickness of it. I place the tape on the grip as close to the trigger guard as possible and on the trigger guard where I placed the mark in front of my middle finger.


Using the Dremel
The use of a Dremel tool with a sanding wheel on it will help speed up the job, but can also increase the risk of damage. I normally use a coarser grit wheel to complete the first part of this project. When doing this job for the first time I recommend you take it very slow and remove minimal amounts of the frame surface at a time. I make small, light passes, then look at the results after each pass. Remember not to take too much surface off. Taking too much off could result in frame damage that can’t be corrected. I can’t stress this enough, there is no return after too much surface has been removed, and the trigger guard is a very important part of the frame, it only protects the trigger from being depressed! I will repeat the above process until I am satisfied with the results.


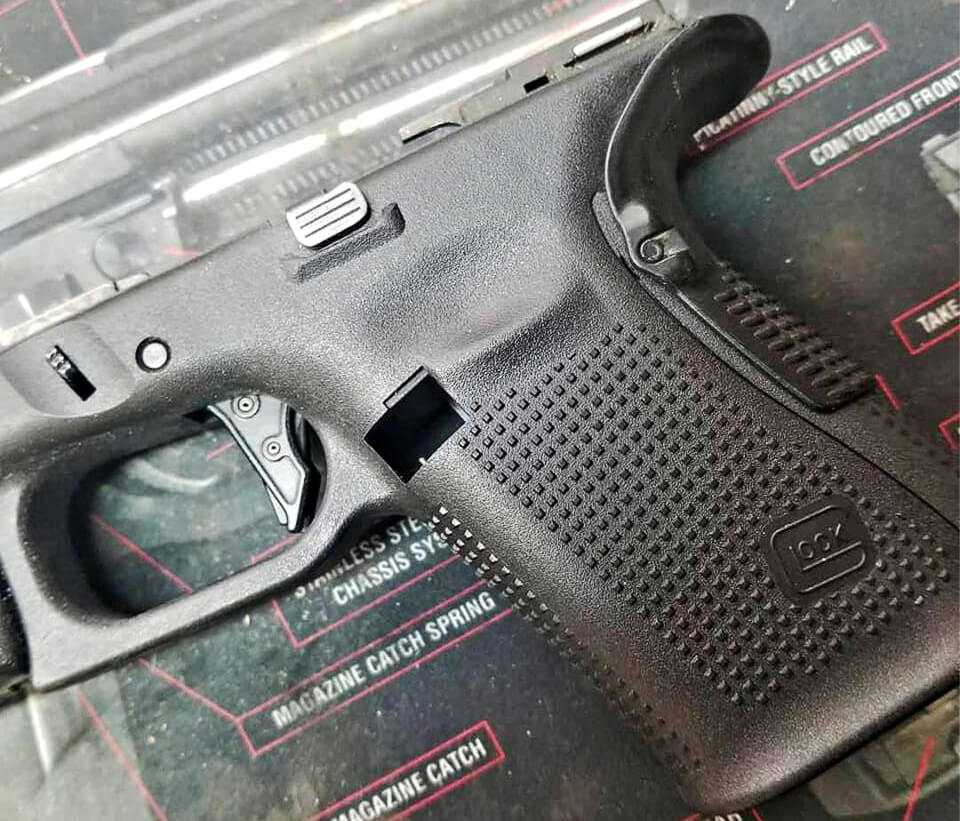
Hand-File
Now I move to the finer removal of the trigger surface. For this, I use hand tools. I start with a hand file and clean up the areas more precisely. On this removal, I found the edge wasn’t straight forward of my finger line. So using the hand file, I straightened out the edge for ascetic purposes, because looking good is half the battle. Again, I remove small amounts of the trigger guard surface at a time. I make one pass with the file and review my work. Repeat, repeat, repeat, and repeat until I get the desired results.

Finish Up with Sand Paper
Once I have the desired look, I use sandpaper to clean up all the tool marks. Start with a small strip of coarser paper and end with a small strip of fine sandpaper. After removing the tool marks, match the rest of the frame surface by using the plastic handle of a screwdriver. This just cleans up the appearance. To do this, rub the flat corner of the plastic handle along the surface. Doing this several times will change the surface from a dull color to what I feel more closely matches the original.
From start to finish this Glock trigger guard reduction project takes me between 45 minutes to an hour. Could you complete this project quicker? Yes. But do you want it to look good as well as reduce the likely hood of screwing up your equipment? I hope you do!
Don’t fuck it up, bro!
Big Bird out!