Have you ever struggled to rack a slide on a semi-automatic handgun? As an instructor, I see a lot of newer shooters, especially women, struggle with this necessary task. A common refrain I often hear is, “I’m just too weak!” Or, “I just can’t get it!” Or, “How come I can’t do this?” I wish this was an isolated problem, but it is more common than I’d like! What’s worse is that others who experience the same thing often rally around that person and recommend switching to “X” gun because it has an easier slide to operate.
Occasionally a well-meaning gun store salesperson will also blanket-recommend something easier to rack, without addressing the root cause. There’s nothing wrong with having a more pleasant racking experience, nor anything wrong with a firearm designed to meet that need—but what if that is the only feature that makes that gun appealing to you? What if you like the firearm you have (other than the pesky racking problem)? Wouldn’t you also rather be able to pick up any firearm and rack the slide to confidently check to ensure it is clear? A better answer is to learn how to do this necessary task across firearms, and then decide if ease of racking is essential enough to drive your next firearm purchase.
Before you jump to a different firearm and assume you aren’t physically capable, I’d like to discuss with you a technique that I’ve found particularly impactful. I’ll warn you in advance—this is a coordinated movement, not necessarily a movement needing a lot of strength. Therefore, it may require a little practice and patience. This is best to do when you are in a calm setting, like at home, or alone on the range—not when you are standing in front of a salesperson desperately trying to show that you know how to rack a slide! Don’t add unnecessary pressure on yourself.
Let’s break this down into a few steps, but first, a definition: the action of “racking the slide” simply means that you are manually moving the slide (the top part of the semi-automatic firearm that moves) from either a fully forward (closed) position to a fully backward (open) position, or, a backward (open) position to a forward (closed) position. You can do this action with or without ammunition in the firearm, although for this learning exercise you would practice without ammunition (dry). If you are not yet confident about racking the slide to ensure the firearm is clear (empty, no ammunition in a firearm), please find someone who can verify to you that it is clear before beginning!
Note: there are different ways to rack a slide—this technique is most helpful for those who currently struggle. If you aren’t struggling, do what works best for you.
First: Get a Good Grip

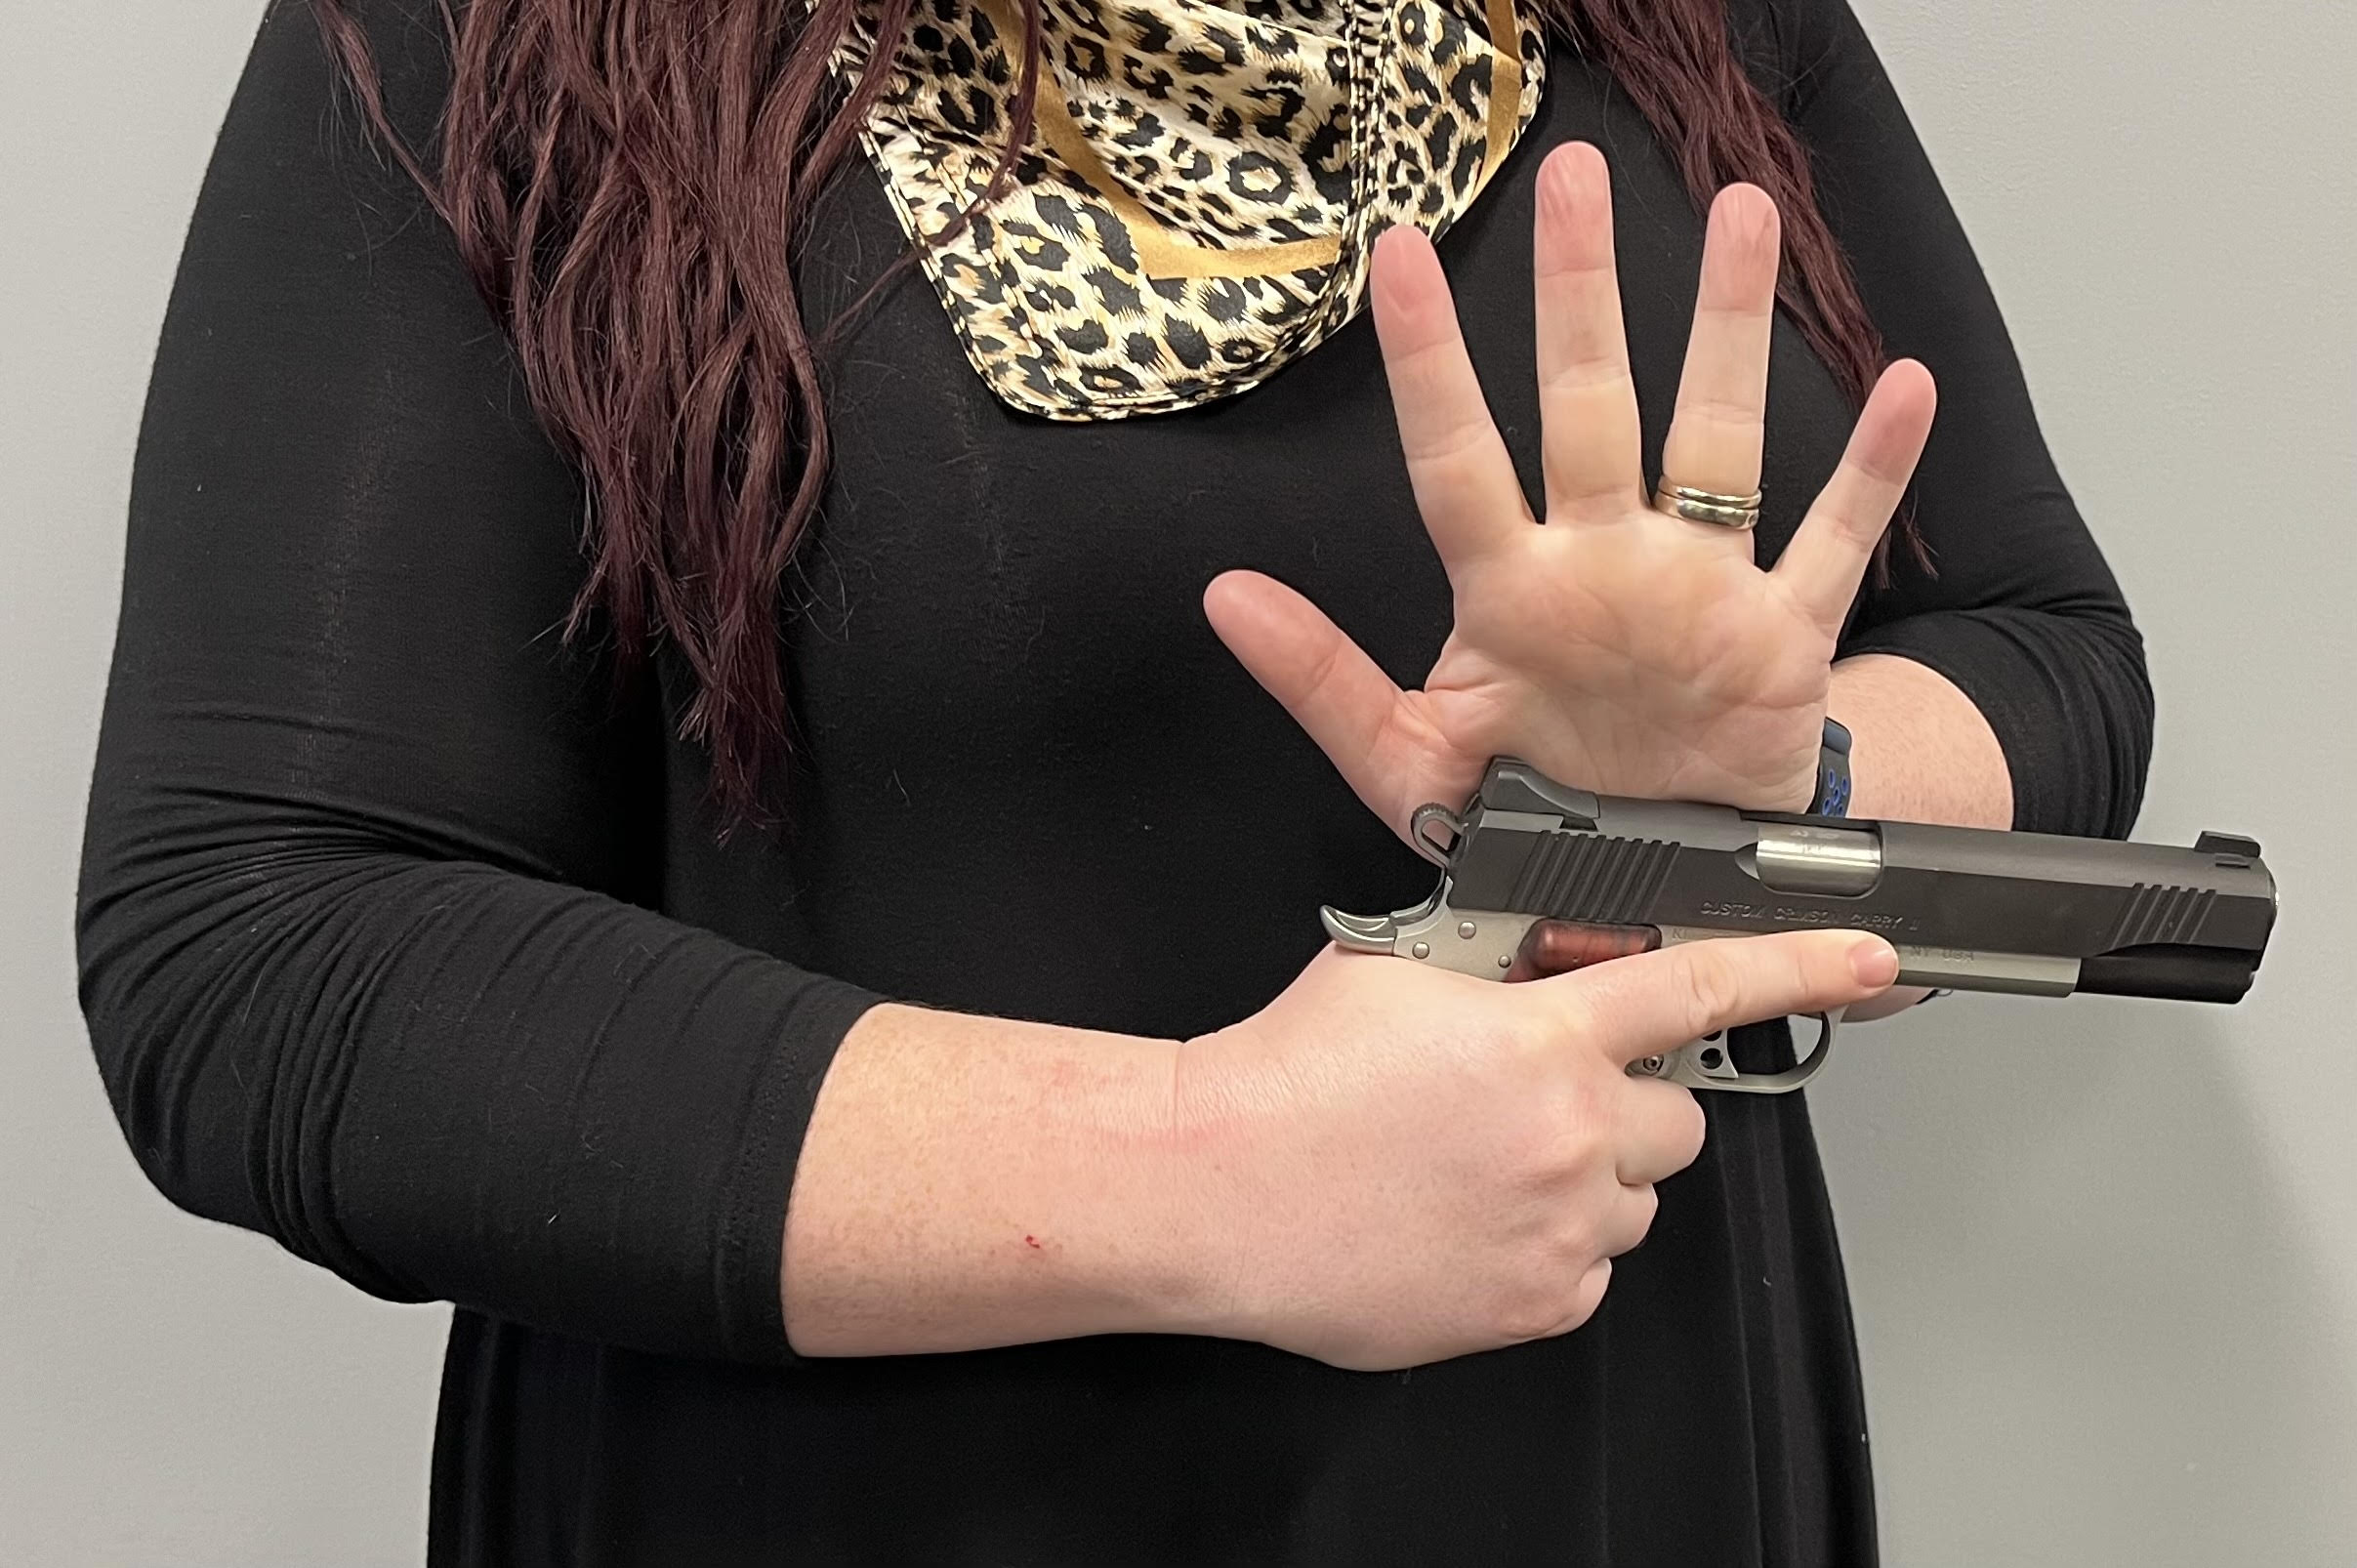
Regardless of where the slide is positioned, the first step is to get a good grip on the firearm with your dominant hand. Place the “V” of the skin between your thumb and forefinger up high on the back of the gun, called the tang. The thumb goes to the opposite side of your fingers, and your first finger will rest on the frame of the gun—not the trigger—and the remaining three fingers will go underneath the trigger guard.
Be sure that you practice great trigger discipline here (keeping your finger off of the trigger and out of the trigger guard). If you are placing physical effort into racking the slide and your finger is on the trigger, it’s hard for that finger to not squeeze accidentally! Build a good habit right now and keep your finger up on the frame (the part underneath the slide).
Second: Position Your Body

This is the key tip for creating the best possible “anchor point” for leveraging the most amount of your strength. Don’t let your strength go to waste! Start by facing downrange, or otherwise in a safe direction, and make sure your muzzle remains horizontal with the ground and pointing in that same safe direction.
Now, turn your torso towards your dominant side (if you are right-handed, turn your torso to the right), so that the gun is in line with your belly button but still facing in a safe direction. You may need to adjust your feet to make this the most comfortable for you.
Next, bring your gun in close to you. The reason we have you bring your gun in close is that you have greater control and leverage when you hold the pistol closer to your body; if your gun is far away from you, such as arm’s length distance, you are placing yourself at a disadvantage.
Third: Get a Good Overhand Grip

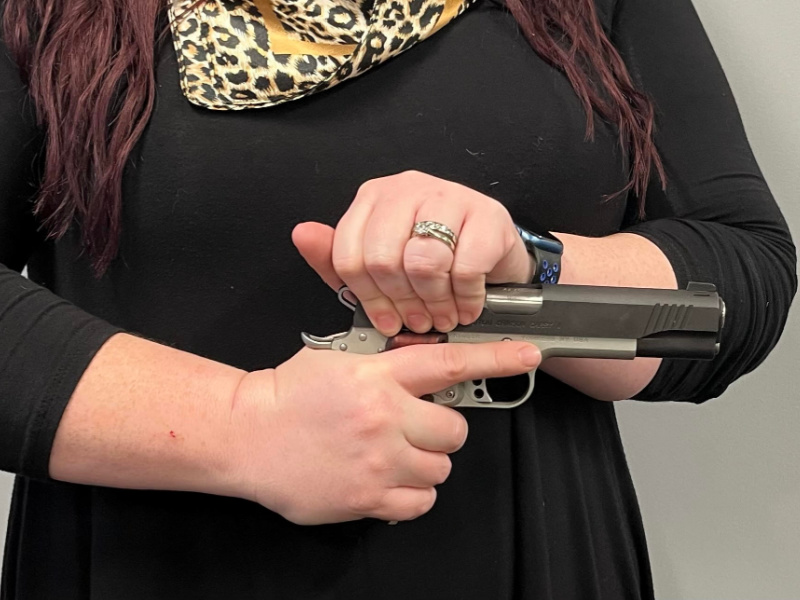
This is one of the most powerful pieces of information. Using your non-dominant hand, reach over the top of the slide, so that the heel of your palm is resting near your dominant thumb, and your fingers are reaching toward your dominant knuckles, but placed on the slide itself.
You are aiming to place your hand on the serrations that are present on most modern firearms, behind the ejection port (the hole in the slide that allows the spent bullet casing to eject). If you place your hand too far in front, you will lose some of your power in the next step, and you also run the risk of pinching your fingers in the ejection port—ouch!
Don’t grab the rear of the slide with your non-dominant thumb and forefinger, as this will make the next part harder. Make sure the heel of your palm is facing down toward your dominant thumb. If you twist your wrist too much and place the heel of your palm on the finger side of the gun, you will reduce the effectiveness of this technique!
Finally: Push and Pull

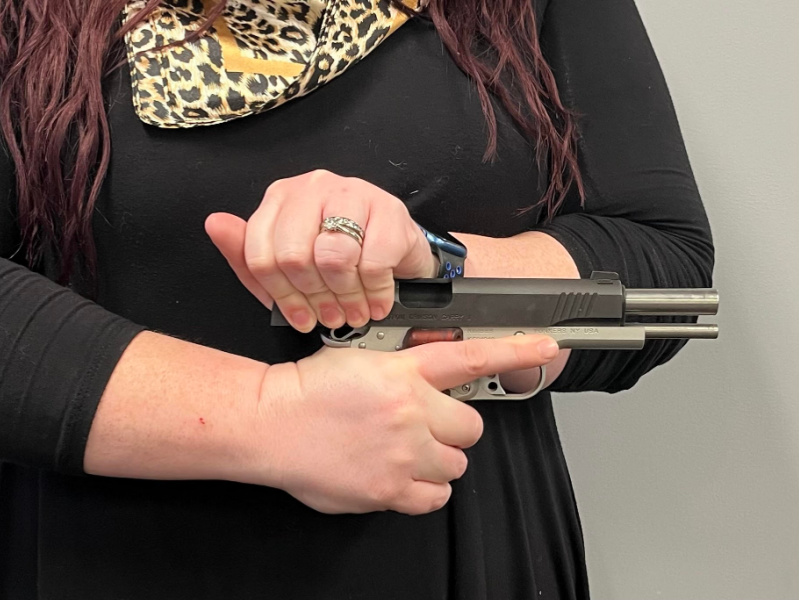
Once you have your dominant hand grip, your non-dominant overhand grip, and your body positioned correctly, you are ready to execute the movement. Take a deep breath and have confidence you can do this. Think about doing a smooth, fast, effective motion. The slower you go, the more strain you are putting on yourself. Take control of your firearm and, well—show it who’s boss!
Simultaneously, think about pushing forward with your dominant hand, and pulling back with your non-dominant hand. Your firearm should remain pointed in a safe direction with your finger off of the trigger the entire time you are executing this movement. Here’s where I remind you—this is a coordinated movement. It has less to do with strength and more to do with being purposeful in pushing and pulling at the same time.

Success?
If you followed these steps, I hope you found success. I have taught women in their eighties, young women with little to no grip strength, women with long acrylic nails, and women who suffer from arthritis. I have yet to find someone who can’t physically complete this movement with some practice!
It does require two non-injured hands, so if you are recovering from an injury, or have a significant physical disability, this technique may not work. But, if both hands are working and you have enough strength to lift a few grocery bags, you can rack your slide!
Keep practicing the coordination of the movement, and don’t give up. If you are truly struggling after trying this technique, have a qualified instructor evaluate your movements and see if there is something that can be improved based on your physical abilities. Depending on your firearm, this may be something that you need to practice a few times a week, and that’s okay. Don’t give up! I look forward to seeing you racking confidently!


