In Parts 2 and 3 of our Building an AR-15 series, we installed the trigger assembly, bolt catch assembly, and mag release. The rest of the lower parts kit will be installed today. Once these items are installed, the lower will be complete and we will move on to the upper receiver. The upper receiver consists mostly of the barrel, gas block, and handguard so we are getting closer to the finish line.
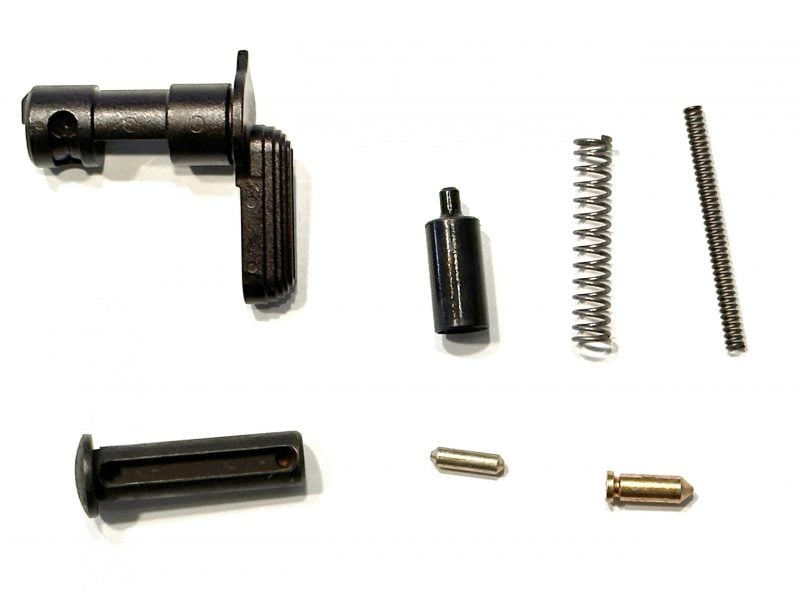
The lower receiver contains most of the springs, pins, and detents so the rest is much easier to assemble. I am using an Anderson Manufacturing parts kit, which contains mil-spec parts. Individual parts can also be purchased like an enhanced selector, different styles and colors of pistol grips, etc. To get started today, you will need the following items:
- Safety/Selector and spring
- Rear takedown pin with spring and detent
- Buffer detent pin and spring
- Buffer tube
- Buffer spring and buffer weight
Getting Started
We will start with the buffer tube kit. This kit will have an endplate, castle nut, buffer spring, and buffer weight with it. The first step is to make sure the castle nut is screwed onto the buffer tube as far as it will go until the threads stop. Then, slide the end plate on until it is up against the castle nut. It can now be set aside for the moment.
Before the tube can be installed there are a few other parts that need to go on the receiver. For this step, the lower receiver will need to be placed on the lower vice block, so it is held securely while you work. I like to have lots of light for this part too, so I don’t lose a spring. If you do lose one, a good magnet can help recover it from the floor.
With the receiver on the vice block, place the rear takedown pin in the hole from the right side of the receiver. It does not need to go all the way through the receiver but only started. The flat side of the takedown pin should be facing toward the back of the receiver. Next, the takedown detent pin is placed in the small hole in the back of the receiver and the takedown pin spring follows. The spring will not go in all the way so make sure not to bump it while you work. This will send it flying across the room.
Installing the Buffer Tube
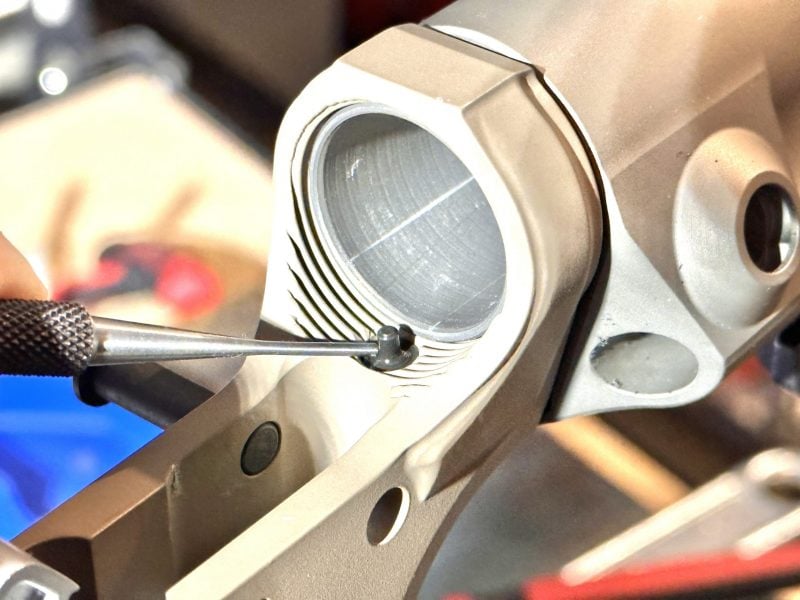
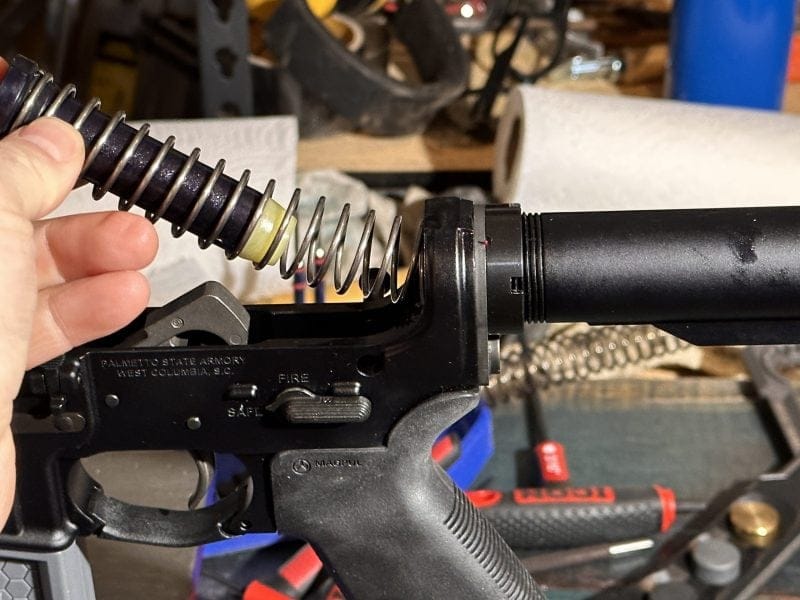
Now the buffer tube can be threaded onto the lower receiver. For now, it only needs to be started and not screwed in all the way. Next, the buffer detent spring and detent can be placed in the hole that is inside the threaded area where the buffer tube goes (see photo below). You can screw the buffer tube on until it is getting close to the detent. When it is up against it, use a punch to press down on the detent and screw the tube just far enough that it catches the detent and holds it down. You also want to make sure the back plate does not hit the takedown detent spring as you turn the buffer tube.
At this point, the backplate should be nearly touching the takedown detent spring. Being careful not to bend the spring, you can push in on the backplate until it is up against the receiver, compressing the spring in the process. While holding the backplate firm with one hand, begin tightening the castle nut until it is hand-tight. With the buffer tube intact, check the buffer detent to make sure it will move up and down. If the tube is too tight, it can press against the detent and stop it from moving. The castle nut can be tightened with an AR-15 armorer’s wrench to secure the buffer tube in place.

Installing the Selector Switch and Pistol Grip
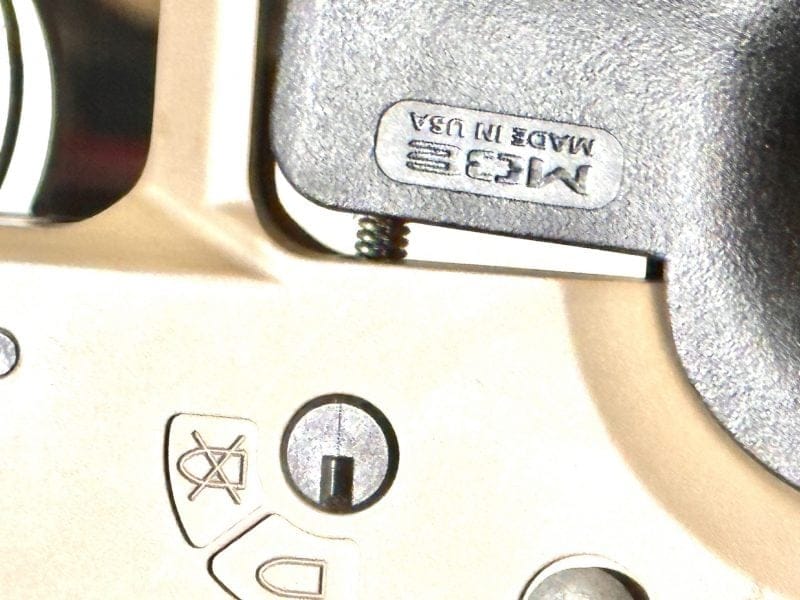
To install these pieces, I like to turn the receiver upside down on the vice block. This will make it easy to install the selector detent spring and pistol grip. With the receiver upside down, place the selector switch in the hole that is behind and slightly above the trigger. When the receiver is upside down, the selector will go in from the right side. Next, the selector detent will go in the small hole above the selector switch (see image below).

Now we need the pistol grip. There is a small hole in the top of the grip that will hold the detent spring for the safety switch. The kit I ordered was missing the detent spring, so it was not pictured. I had to find an extra when I installed the grip. The detent safety spring looks a little like the takedown detent springs but a bit thicker. When placed in the hole on the top of the grip, the spring will be sticking out a little.
This is the part that goes into the hole on the receiver. I do this by holding the spring in with my thumb as I slowly push the pistol grip over the notch on the receiver. Once the spring is lined up with the hole, you can push the grip down until it is flush (see image below). Using the bolt and lock washer that came with the grip, tighten the grip onto the receiver using a 3/16 T-handle Allen wrench.
Finishing Up
Once the pistol grip has been tightened down, the pistol brace or stock can be attached. Most braces and stocks will slide on by pulling out on the spring-loaded lever that is normally compressed when adjusting. At this point, I perform a function check of the trigger, hammer, selector switch, and takedown pins. I also like to place some oil on the takedown pins. The buffer spring and weight can be inserted into the tube as the last part of the lower assembly.
Now that the lower assembly is complete, it can be set aside as we move on to the upper receiver.
In the next and final article in this Building an AR-15 series (Part 5, which will run this coming Monday), I will be installing the dust cover, barrel, gas tube, handguard, and muzzle device. The last step of the build is my favorite part, which is heading to the range and firing the first round from it.